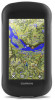
Garmin Montana 680t Owner s Manual - Page 8
Marking and Starting Navigation to a Man - how to use
 |
View all Garmin Montana 680t manuals
Add to My Manuals
Save this manual to your list of manuals |
Page 8 highlights
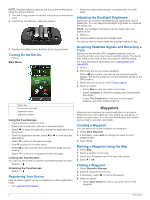
1 Select Track Manager. 2 Select a track. 3 Select . 4 Select Color, and select a color for the track line on the map. 5 Select Show On Map. On appears on the Show On Map option. 6 Select . 7 Select another track, and repeat steps 3 - 6 (optional). 8 Select , and close the application drawer. 9 From the main menu, select Map. The selected tracks appear on the map. Archived Tracks Your device allows you to save 200 tracks and 10,000 track points within a track. If you exceed these limits, there may not be enough memory for your current track recording. Archiving frees up memory for current track recording and stores archived tracks in a different location on your drive. The number of archived tracks you can store is limited only by the size of your drive. You can transfer archived tracks from your device to your computer for saving and viewing using Garmin BaseCamp™. You can archive saved tracks manually. In addition, you can create archived tracks from the current track log on an automated schedule or when the track log is full. Archiving Tracks Automatically You can archive tracks on an automated schedule to save memory space. 1 Select Setup > Tracks > Advanced Setup > Auto Archive. 2 Select When Full, Daily, or Weekly. Archiving Tracks Manually You can archive saved tracks manually. 1 Select Track Manager. 2 Select a saved track. 3 Select > . The track moves from the saved tracks list to the archived tracks list. Deleting a Track 1 Select Track Manager. 2 Select a track. 3 Select > Delete. Navigation Where To? Menu You can use the Where To? menu to find a destination to navigate to. Not all Where To? categories are available in all areas and maps. Navigating to a Destination 1 Select Where To?. 2 Select a category. 3 Select a destination. 4 Select Go. Your route appears as a magenta line on the map. 5 Navigate using the map (Navigating with the Map, page 4) or compass (Navigating with the Compass, page 5). Finding a Location by Name 1 Select Where To? > Waypoints > > Spell Search. 4 2 Enter the name or part of the name. 3 Select . Finding a Location Near Another Location 1 Select Where To? > > Search Near. 2 Select an option. 3 Select a location. Finding an Address You can use optional City Navigator® maps to search for addresses. 1 Select Where To? > Addresses. 2 Select the country or state, if necessary. 3 Enter the city or postal code. NOTE: Not all map data provides postal code searching. 4 Select the city. 5 Enter the house number. 6 Enter the street. Marking and Starting Navigation to a Man Overboard Location You can save a man overboard (MOB) location, and automatically start navigation back to it. 1 Select Man Overboard > Start. The map opens showing the route to the MOB location. The default appearance of the route is a magenta line. 2 Navigate using the map (Navigating with the Map, page 4) or compass (Navigating with the Compass, page 5). Stopping Navigation From the map or compass, select > Stop Navigation. Navigating with Sight 'N Go You can point the device at an object in the distance, lock in the direction, and navigate to the object. 1 Select Sight 'N Go. 2 Point the device at an object. 3 Select Lock Direction > Set Course. 4 Navigate using the compass. Navigating with the Map 1 Begin navigating to a destination (Navigating to a Destination, page 4). 2 Select Map. A blue triangle represents your location on the map. As you travel, the blue triangle moves and leaves a track log (trail). 3 Complete one or more actions: • Drag the map to view different areas. • Select and to zoom in and out of the map. • Select a location on the map (represented by a pin), and select the information bar at the top of the screen to view information about the selected location. Navigating a Driving Route Before you can navigate street routes, you must purchase and load City Navigator maps. 1 Select Profile Change > Automotive. 2 Select a destination. 3 Navigate using the map. Turns appear in the information bar along the top of the map. Audible tones signal turns in the route. Navigation
-
 1
1 -
2
-
 3
3 -
 4
4 -
 5
5 -
 6
6 -
 7
7 -
 8
8 -
 9
9 -
 10
10 -
 11
11 -
 12
12 -
 13
13 -
14
-
15
-
16
-
17
-
18
-
19
-
20
-
21
-
22
-
23
-
24
 |
 |
