GE 27958GE1 User Guide - Page 15
Set Area Code, Link Handset, Waiting Handset Registration, Link Base?, Default Setting, Default - phone
 |
UPC - 044319202373
View all GE 27958GE1 manuals
Add to My Manuals
Save this manual to your list of manuals |
Page 15 highlights
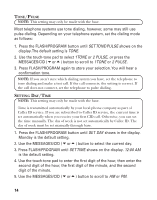
6. Press FLASH/PROGRAM again to store your selection. LOCAL AREA CODE NOTE: This setting may be made with the base or the cordless handset. 1. Press the FLASH/PROGRAM button until SET AREA CODE - - - or AREA CODE - - - shows in the display. - - - is the default setting. 2. Use the cordless handset or base number pad to enter your three digit area code. 3. Press FLASH/PROGRAM again to store your selection. NOTE: You can press FLASH/PROGRAM at any time to go to the next option. REGISTRATION (LINK CORDLESS HANDSET) Registration links the base to a cordless handset. Once a handset is registered it can use the base's phone connection. A cordless handset will not operate until it is registered to the base. During the registration process, keep the handset near the base. 1. Press the FLASH/PROGRAM button on the base until LINK HANDSET shows in the display. 2NO is the default setting. 2. Press the 1 number key or press the MESSAGES/CID ( or ) button on the base to scroll to 1YES. 3. Press FLASH/PROGRAM on the base to confirm handset is linked to the base. WAITING HANDSET REGISTRATION shows in the display. 4. Press the flash/program button on the handset until LINK BASE? shows in the display. NO is the default setting. 5. Press cid/vol ( or ) button on the handset to scroll to YES. 6. Press flash/program on the handset again to confirm.You will hear a long confirmation tone when the handset is successfully linked to the base. DEFAULT SETTING 1. Press the FLASH/PROGRAM button until DEFAULT SETTING or DEFAULT shows in the display. 2NO is the default setting. 15
-
 1
1 -
2
-
3
-
4
-
5
-
6
-
7
-
8
-
9
-
 10
10 -
 11
11 -
 12
12 -
 13
13 -
 14
14 -
 15
15 -
 16
16 -
 17
17 -
 18
18 -
 19
19 -
 20
20 -
21
-
22
-
23
-
24
-
25
-
26
-
27
-
28
-
29
-
30
-
31
-
32
-
33
-
34
-
35
-
36
-
37
-
38
-
39
-
40
-
41
-
42
-
43
-
44
-
45
-
46
-
47
-
48
-
49
-
50
-
51
-
52
-
53
-
54
-
55
-
56
-
57
-
58
-
59
-
60
-
61
-
62
-
63
-
64
-
65
-
66
-
67
-
68
-
69
-
70
-
71
-
72
-
73
-
74
-
75
-
76
-
77
-
78
-
79
-
80
-
81
-
82
-
83
-
84
-
85
-
86
-
87
-
88
-
89
-
90
-
91
-
92
-
93
-
94
-
95
-
96
 |
 |
