GE 28811FE2 User Guide - Page 28
Registration, De-Registration
 |
UPC - 044319805086
View all GE 28811FE2 manuals
Add to My Manuals
Save this manual to your list of manuals |
Page 28 highlights
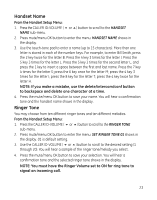
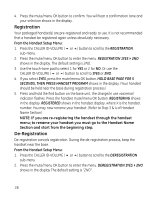
4. Press the mute/menu OK button to confirm. You will hear a confirmation tone and your selection shows in the display. Registration Your packaged handset(s) are pre-registered and ready to use. It is not recommended that a handset be registered again unless absolutely necessary. From the Handset Setup Menu: 1. Press the CALLER ID-VOLUME ( 6 or 5) button to scroll to the REGISTRATION sub-menu. 2. Press the mute/menu OK button to enter the menu. REGISTRATION 1YES42NO shows in the display. The default setting is 2NO. 3. Use the touch-tone pad to select 1 for YES or 2 for NO. Or use the CALLER ID-VOLUME ( 6 or 5) button to scroll to 1YES or 2NO. 4. If you select 1YES, press the mute/menu OK button. HOLD BASE PAGE FOR 5 SECONDS, THEN PRESS HANDSET PROGRAM shows in the display. (Your handset should be held near the base during registration process.) 5. Press and hold the find button on the base unit, the charge/in use voicemail indicator flashes. Press the handset mute/menu OK button. REGISTERING shows in the display. REGISTERED shows in the handset display, where X is the handset number. You may now rename your handset. (Refer to Step 3 & 4 of Handset Name Section) NOTE: IF you are re-registering the handset through the handset menu; to rename your handset you must go to the Handset Name Section and start from the beginning step. De-Registration De-registration cancels registration. During the de-registration process, keep the handset near the base. From the Handset Setup Menu: 1. Press the CALLER ID-VOLUME ( 6 or 5) button to scroll to the DEREGISTRATION sub-menu. 2. Press the mute/menu OK button to enter the menu. DEREGISTRATION 1YES42NO shows in the display The default setting is "2NO". 28
-
 1
1 -
2
-
3
-
4
-
5
-
6
-
7
-
8
-
9
-
10
-
11
-
12
-
13
-
14
-
15
-
16
-
17
-
18
-
19
-
20
-
21
-
22
-
 23
23 -
 24
24 -
 25
25 -
 26
26 -
 27
27 -
 28
28 -
 29
29 -
 30
30 -
 31
31 -
 32
32 -
 33
33 -
34
-
35
-
36
-
37
-
38
-
39
-
40
-
41
-
42
-
43
-
44
-
45
-
46
-
47
-
48
-
49
-
50
-
51
-
52
-
53
-
54
-
55
-
56
-
57
-
58
-
59
-
60
 |
 |