GE AJCS12DCB Owners Manual
GE AJCS12DCB Manual
 |
View all GE AJCS12DCB manuals
Add to My Manuals
Save this manual to your list of manuals |
GE AJCS12DCB manual content summary:
- GE AJCS12DCB | Owners Manual - Page 1
Air Filter 11 Front Grille 10 Grille and Case 10 Outdoor Coils l0 Installation Instructions Before You Begin .......... Installing a J-Model on models so equipped 16--91 Troubleshooting Tips ........ 22 Nomml Operating Sounds .... 22 © Consumer Support Consumer Support ... - GE AJCS12DCB | Owners Manual - Page 2
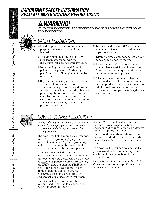
installed in accordance with the Installation Instructions before it is used. Ne_er unplug your air conditioner 1)y pulling on tim power cord. Always g_iI) plug firefly and pull straight Otlt from the receptacle. Replace immediately all electric service cords that have become frayed or otherwise - GE AJCS12DCB | Owners Manual - Page 3
ge having a grounding type plug and outlet and that file electrical radng of tile cord be 15 ampeies (minimum) and with any of the 230/208 volt models. USEOFADAPTERPLUGS--115-Vomltodelsonly Because of potential ground temfinal breaks, DO IVOTIISE the air conditioner until a proper gTound has been - GE AJCS12DCB | Owners Manual - Page 4
thesettinglast used. O OTuNrn/,I_TOaiPr oc nditi onet on and off. To cancel (CI,) tile On Timer press tile ONpad again. Display OFF--_A]Ien tile air conditioner is on, it can be set to automatically turn off in half an hour to 94 horns. Each touch will set _1 V MOnODtilEe remote control - GE AJCS12DCB | Owners Manual - Page 5
room at the set level of comtbrt. Set die thermostat at a lower number and die indoor air will ge.com become coolex; Set tile thermostat at a higher nmnber and the indoor air will become _mnex: NOTEf:f theair conditioneirs off andis thenturnedon whileset toCOOLit, willtakeapproximatel3yminutesfor - GE AJCS12DCB | Owners Manual - Page 6
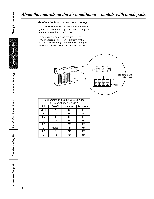
About the controlson the air conditionermmodels with touchpads. Auxiliary Controls- TemperatureLimiting To reach the auxiliary controls remove the fl'ont g_ille. Access them through the small rectangular opening above the - GE AJCS12DCB | Owners Manual - Page 7
- GE AJCS12DCB | Owners Manual - Page 8
delay is automat/cally provided on the Heat/Cool and Heat Pumpmodels. Heat Pump Models When the outdoor temperature is lower than 25°F., heat is provided by the electric heater in the air conditioner instead ot bv Cooling/Pleating Descriptions ForNormal Coolingor Heating--Select HIGH COOLor - GE AJCS12DCB | Owners Manual - Page 9
tot COOLand in tile cgCtfsetting fi)r HEAT Cool only models have a rocker switch on tile front of the Tile trait is shipped in the CONTsetting. ge.com Temperature Limiting Limiting prevents extreme the rear hole in card over locating pin inside air discharge ScI'eW _lt [i'OIlt. and reattaching - GE AJCS12DCB | Owners Manual - Page 10
side ()t the air conditioner should be checked regularly. If they are clogged with dirt or soot they may be professionally steam cleaned, a service available through your GE se_Mce outlet. Front Grille The ti'ont grille can be removed tot more thorough cleaning or to make the model and serial - GE AJCS12DCB | Owners Manual - Page 11
To remove the a# filter, on uther models: Pull it down. go.corn Dir:y filte_Needs cleaning Clogged filter Greatly reduces cooling, heating and airflow. Turn the a# conditioner off before cleaning. The most important thing you can do to maintain the air conditioner is to clean the filter at - GE AJCS12DCB | Owners Manual - Page 12
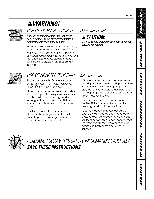
cord of this air conditioner. Aluminum house wiring may present special problems--consult a qualified electrician. IMPORTANT! GE strongly recommends is not covered under the terms of the GE warranty. J-MODEL QUALIFYING QUESTIONS J-model air conditioners may fit in existing wall cases. However, they - GE AJCS12DCB | Owners Manual - Page 13
instructions Read these instructions stay engaged, discontinue use of the air conditioner and contact a qualified service technician. TOOLS YOU MAY NEED RAK1082 Whirlpool Type 23W Wall Case RAK1102 RAK123A64 GE RAB30 ("F" models) FeddersWall Case "A" RAK126 Westinghouse Wall Case - GE AJCS12DCB | Owners Manual - Page 14
these instructions completely and carefully. [] REMOVE LOCKING PLATE ON FRONT LEFT SIDE Locking plate Remove screw [] REINSTALL LOCKING PLATE WITH TAB BEHIND WALL CASE FLANGE. TIGHTEN SCREW [] ATTACH POWER CORD TO BASE PAN WITH CLAMP pan [] REMOVE THREE SHIPPING PADS INSIDE AIR CONDITIONER NEXT - GE AJCS12DCB | Owners Manual - Page 15
is 72" to the right and 47" to the left. For the 230/208-volt models the cord length is 65" to the right and 39" to the left. [] SUPPORT REQUIREMENTS FOR AIR CONDITIONER The air conditioner wall case may be installed with 1/4" min. extension out from the inside wall or with 1/4" min. extension - GE AJCS12DCB | Owners Manual - Page 16
• These instructions are for a standard double-hung window. You will need to modify them for other types of windows. • The air conditioner can be installed without the accordion panels if needed to fit in a narrow window. See the window opening dimensions to the right. • All supporting parts must be - GE AJCS12DCB | Owners Manual - Page 17
Installation Instructions []STORM WINDOW REQUIREMENTS A storm window frame will not allow the air conditioner to tilt towards the outside and will keep it from draining properly. To adjust for this, attach a piece of wood to the stool. 1/2"higher _ than A - GE AJCS12DCB | Owners Manual - Page 18
Installation instructions WINDOW INSTALLATION--OPTIONAL (cont.) [] PREPAREWINDOW [] Mark the centerline of the stool, Measure from the centerline 13%" on both sides for the panel cuts. [] Measure 12%" from the centerline on both sides for the sill support brackets. Centerline Centerline _-_ - GE AJCS12DCB | Owners Manual - Page 19
Installation instructions [] MEASURE, CUT AND INSTALL FILLER C (painted screws) 4, _/-_' ' A '_'_ Left side 13%" i 133X" Width ofthe air "_'_ conditioner (panel marks) ":"" ___ B_ Right side [] Mark the A and B measurements on each tab into the sill support. l Hook the tab into the sill - GE AJCS12DCB | Owners Manual - Page 20
Installation Instructions WINDOW INSTALLATION--OPTIONAL (cont.) [] INSTALL CASE IN WINDOW [] Peel off the backing from the bottom window gasket. [] Place the gasket on the stool and over - GE AJCS12DCB | Owners Manual - Page 21
and insects from getting into the room. [] Attach the window locking bracket with 1 type E screw. I [] REPLACE AIR CONDITIONER IN CASE [] Carefully slide the air conditioner back into the case. [] When the wall outlet is to the left, extend the cord under the unit and hold it in place with the - GE AJCS12DCB | Owners Manual - Page 22
Before youcall for service... Troubleshooting -tips:Save time and money! Review the chart below first and you may not need to call for service. Airconditioner doesnotstart PossibleCauses The air conditioner is unplugged. The fuse is bloom/circuit breaker is tripped, Power failure. The current - GE AJCS12DCB | Owners Manual - Page 23
of the origina/purchase GE Will Replace: Anypart of the air conditioner which thils due to a defect in matei_als or workmanship, Dudng this limited one-year warranty, GE will also pro_i(le, free of charge, all labor and related service to replace the defecti',e part, Any part of the sealed - GE AJCS12DCB | Owners Manual - Page 24
at 800.626.2002 during nomml business hom_. Instructions contained in this manual cover procedures to be performed by any user. Other servicing generally should fie referred to qualified service personnel. Caution must he exercised, since improper servicing may cause unsafe operation. ContactUs go
-
 1
1 -
 2
2 -
 3
3 -
 4
4 -
 5
5 -
 6
6 -
 7
7 -
8
-
9
-
10
-
11
-
12
-
13
-
14
-
15
-
16
-
17
-
18
-
19
-
20
-
21
-
22
-
23
-
24
 |
 |
g&com
r/3
©
"m
"¢J
©
<
Safely Instructions
.........
2, 3
Operating
Instructions
Controls_Control
I{mobs
....
8, 9
Controls---Touch
Pads
.......
4-6
Care and
Cleaning
Air Filter
...................
11
Front
Grille
.................
10
Grille
and
Case
..............
10
Outdoor
Coils
...............
l0
Installation
Instructions
Before
You Begin
..........
19, 13
Installing
a J-Model
in
an Existing
Wall Case
.........
14
Through-the-_'all
Installation--Optional
........
15
Window
Installation--
Optional
on
models
so equipped
..............
16--91
Troubleshooting
Tips
........
22
Nomml
Operating
Sounds
....
22
Consumer
Support
Consumer
Support
...
Back
Coxer
_A'atTantv
...................
93
Write the model and
serial
numbershere:
Model #
Serial #
Find these
mmfl)ers
on a label on
the
fl'ont
ot
the
base
pan
behind
the Kont grille.
Cool
O_ly:
H_,at/Cooh
H_,at Pump:
4/CH
O&
ZO
ACB
4/CH
m,
12
DCl3
41c:q
06
LCB
4/cq
o<
zo
ACB
41cq
m,
_2
t)c/3
A/(:S
06
LCB
4lOS
o_,',
m
acB
A/(;S
09,
lO,
12
DCB
A/EH
12
DCB
41/_s
06
I_SB
4//_:s
os
asv
4//_:s
09, m,
z2
t)cg
41tcs
zo
t)sv
A,IHS'
08
ASB
41HX
O&
10
t)d/3
Espahol
For
a Spanish
version
of
this
manual,
visit
our
V_:ebsite
at www.GEAppliances.com.
Para
consuhar
una
version
en
espaflol
de
este
manual
de
instrucciones,
visim
nuestro
siuo
de
internet
www.GEAppliances.com.
Fran_aise
For
a
French
version
of
this
manual,
visit
our
_:ebsite
at _vw.GEAppliances.com.
Pour
une
version
flangaise
de
ce
manuel
d'utilisation,
veuillez
visitor
notre
site
web
fi
l'adresse
x_svw.GEAppliances.com.
TINSEA470JBRZ
49-7535
12-05Jfl