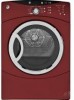
GE DCVH680GJMV Installation Instructions - Page 12
Warning - Label All Wires Prior
 |
UPC - 084691208921
View all GE DCVH680GJMV manuals
Add to My Manuals
Save this manual to your list of manuals |
Page 12 highlights
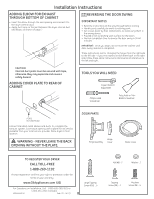
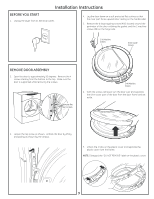
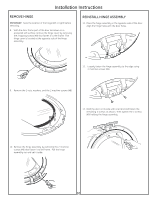
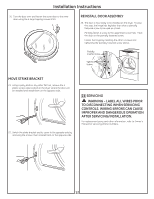
Installation Instructions 20. Turn the door over and fasten the outer door to the inner door using the 6 large tapping screws (#10). REINSTALL DOOR ASSEMBLY 23. The door is now ready to be installed on the dryer. To ease this step, the hinge has keyholes that allow a partially fastened screw to be used as a hook. Partially fasten a screw to the uppermost screw hole. Hook the door on the partially fastened screw. Fasten the hinge by installing the other 4 screws and tightening the partially fastened screw above. Partially Inserted Screw Tighten All Screws MOVE STRIKE BRACKET 21. Using a putty knife or any other flat tool, remove the 5 plastic screw caps located on the dryer where the door will be installed and install them on the opposite side. 22. Switch the strike bracket and its cover to the opposite side by removing the screws; then reinstall both on the opposite side. 14 SERVICING WARNING - LABEL ALL WIRES PRIOR TO DISCONNECTING WHEN SERVICING CONTROLS. WIRING ERRORS CAN CAUSE IMPROPER AND DANGEROUS OPERATION AFTER SERVICING/INSTALLATION. For replacement parts and other information, refer to Owner's Manual for servicing phone numbers. 12
-
 1
1 -
2
-
3
-
4
-
5
-
6
-
 7
7 -
 8
8 -
 9
9 -
 10
10 -
 11
11 -
 12
12 -
 13
13 -
 14
14
 |
 |
