GE DCVH680GJMV Installation Instructions - Page 8
Adding Cover Plate To Rear
 |
UPC - 084691208921
View all GE DCVH680GJMV manuals
Add to My Manuals
Save this manual to your list of manuals |
Page 8 highlights
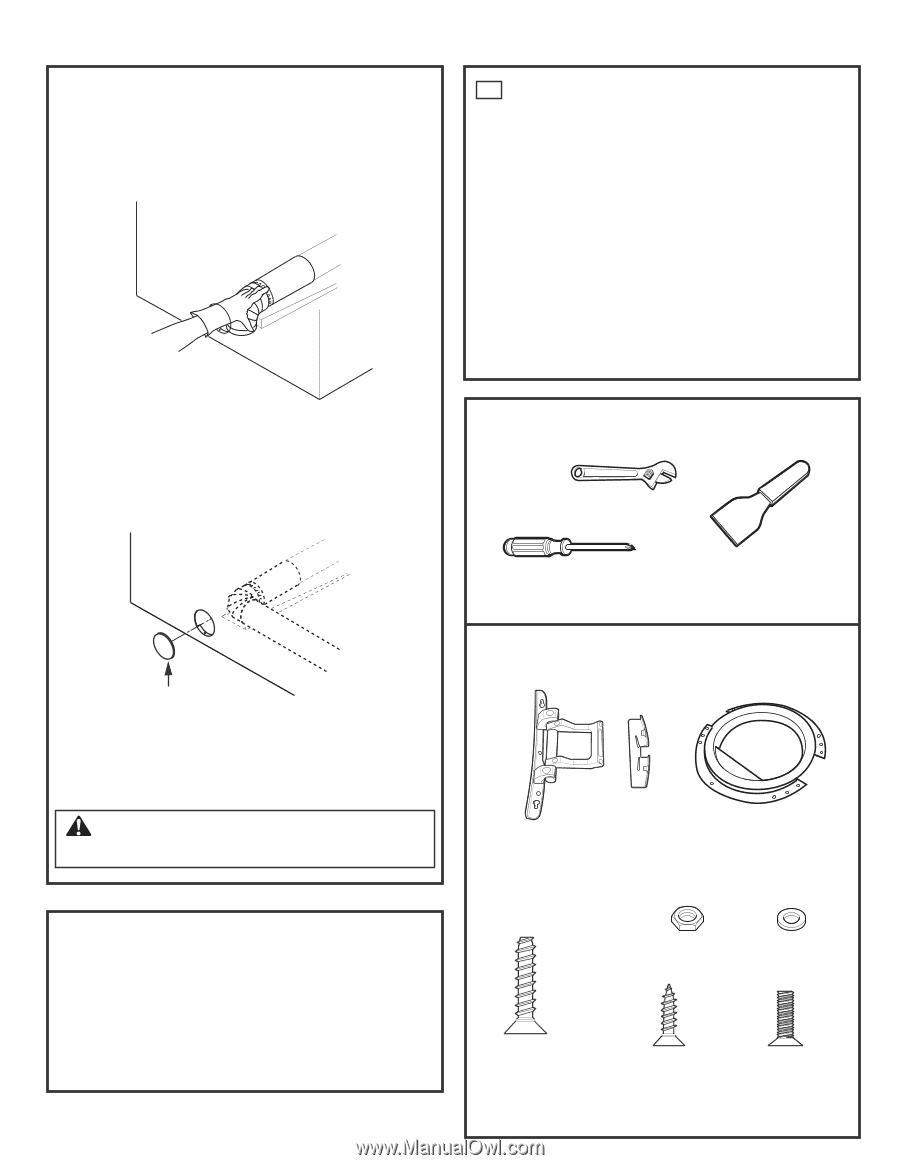
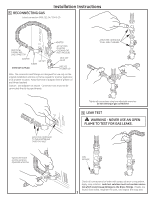
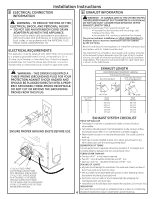
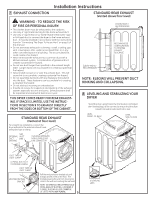
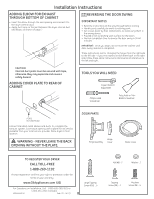
Installation Instructions ADDING ELBOW FOR EXHAUST THROUGH BOTTOM OF CABINET • Insert the elbow through the rear opening and connect it to the dryer internal duct. • Apply duct tape on the joint between the dryer internal duct and elbow, as shown on page 7. 13 REVERSING THE DOOR SWING IMPORTANT NOTES • Read the instructions all the way through before starting. • Handle parts carefully to avoid scratching paint. • Set screws down by their related parts to avoid using them in the wrong places. • Provide a non-scratching work surface for the doors. • Normal completion time to reverse the door swing is 30-60 minutes. IMPORTANT: Once you begin, do not move the cabinet until door-swing reversal is completed. These instructions are for changing the hinges from the right side to the left side - if you ever want to switch them back to the right side, follow these same instructions and reverse all references to the left and right . CAUTION: Internal duct joints must be secured with tape, otherwise they may separate and cause a safety hazard. ADDING COVER PLATE TO REAR OF CABINET TOOLS YOU WILL NEED Cresent Wrench (Adjustable) Phillips-Head Screwdriver Putty Knife or ThinBlade Screwdriver PLATE (KIT WE1M454) Connect standard metal elbows and ducts to complete the exhaust system. Cover back opening with a plate (Kit WE1M454) available from your local service provider. Place dryer in final location. WARNING - NEVER LEAVE THE BACK OPENING WITHOUT THE PLATE. DOOR PARTS Hinge Assembly Hinge Cover Plastic Cover TO REGISTER YOUR DRYER CALL TOLL-FREE 1-888-269-1192 Prompt registration confirms your right to protection under the terms of your warranty. www.GEAppliances.com (US) For Questions on Installation, Call: 1-800-626-2003 (US) or 1-800-561-3344 (Canada). 500A436P010 Pub # 31-16229 8 Large Tapping Screw (#10) ... 6 Nut (#8) - 2 Washer - 2 Tapping Screw (#8) ... 2 Machine Screw (#8) ... 6
-
 1
1 -
2
-
 3
3 -
 4
4 -
 5
5 -
 6
6 -
 7
7 -
 8
8 -
 9
9 -
 10
10 -
 11
11 -
 12
12 -
 13
13 -
14
 |
 |