GE GFSF2KEXCC Use and Care Manual - Page 25
Installation Instructions, REMOVING THE DOORS, Double Door Refrigerator Models only, IMPORTANT NOTES
 |
View all GE GFSF2KEXCC manuals
Add to My Manuals
Save this manual to your list of manuals |
Page 25 highlights
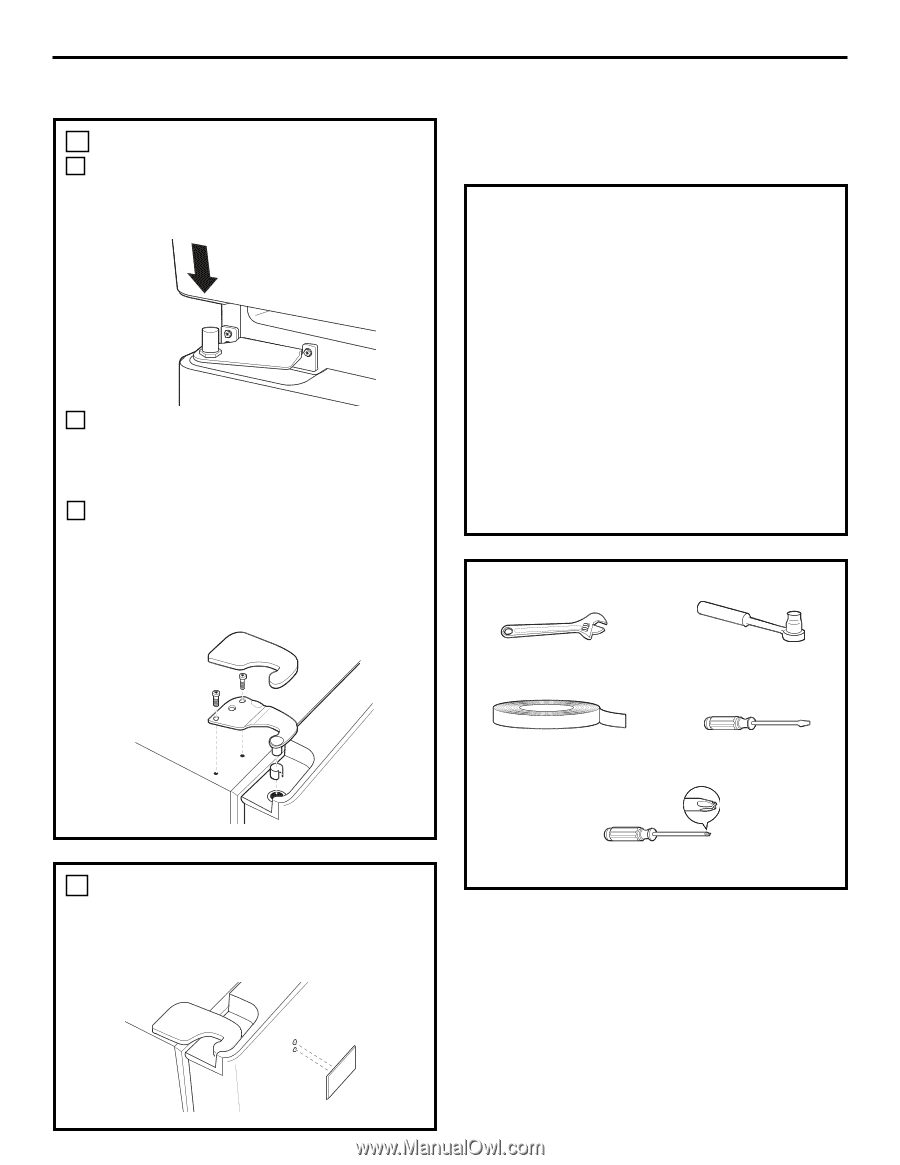
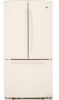
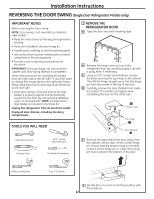
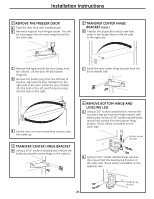
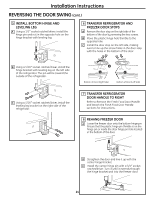
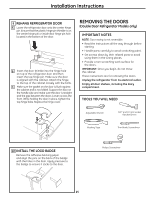
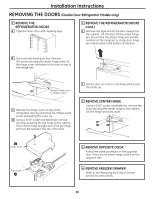
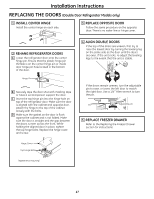
Installation Instructions 9 REHANG REFRIGERATOR DOOR A Lower the refrigerator door onto the center hinge pin. Ensure that the plastic hinge pin thimble is on the center hinge pin or inside door hinge pin hole located in the bottom of the door. B Insert the door thimble into the hinge hole on top of the refrigerator door and then insert the top hinge pin. Make sure the door is aligned with the cabinet. Attach the hinge to the top of the cabinet loosely with the bolts. C Make sure the gasket on the door is flush against the cabinet and is not folded. Support the door on the handle side and make sure the door is straight and the gap between the doors is even across the front. While holding the door in place, tighten the top hinge bolts. Replace the hinge cover. REMOVING THE DOORS (Double Door Refrigerator Models only) IMPORTANT NOTES NOTE: Door swing is not reversible. • Read the instructions all the way through before starting. • Handle parts carefully to avoid scratching paint. • Set screws down by their related parts to avoid using them in the wrong places. • Provide a non-scratching work surface for the doors. IMPORTANT: Once you begin, do not move the cabinet. These instructions are for removing the doors. Unplug the refrigerator from its electrical outlet. Empty all door shelves, including the dairy compartment . TOOLS YOU WILL NEED Adjustable Wrench 3/8″ and 10 mm Socket Ratchet/Driver Masking Tape Thin-blade Screwdriver 10 INSTALL THE LOGO BADGE Remove the adhesive backing paper and align the pins on the back of the badge with the holes in the door. Apply pressure to the badge to ensure it sticks to the door. Phillips Screwdriver 25
-
 1
1 -
2
-
3
-
4
-
5
-
6
-
7
-
8
-
9
-
10
-
11
-
12
-
13
-
14
-
15
-
16
-
17
-
18
-
19
-
 20
20 -
 21
21 -
 22
22 -
 23
23 -
 24
24 -
 25
25 -
 26
26 -
 27
27 -
 28
28 -
 29
29 -
 30
30 -
31
-
32
-
33
-
34
-
35
-
36
-
37
-
38
-
39
-
40
-
41
-
42
-
43
-
44
-
45
-
46
-
47
-
48
-
49
-
50
-
51
-
52
-
53
-
54
-
55
-
56
-
57
-
58
-
59
-
60
-
61
-
62
-
63
-
64
-
65
-
66
-
67
-
68
-
69
-
70
-
71
-
72
-
73
-
74
-
75
-
76
-
77
-
78
-
79
-
80
-
81
-
82
-
83
-
84
-
85
-
86
-
87
-
88
-
89
-
90
-
91
-
92
-
93
-
94
-
95
-
96
-
97
-
98
-
99
-
100
-
101
-
102
-
103
-
104
-
105
-
106
-
107
-
108
-
109
-
110
-
111
-
112
-
113
-
114
-
115
-
116
-
117
-
118
-
119
-
120
 |
 |