GE PGS950EEFES Use and Care Manual - Page 21
Cleaning The Cooktop Cont.
 |
View all GE PGS950EEFES manuals
Add to My Manuals
Save this manual to your list of manuals |
Page 21 highlights
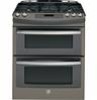
CARE AND CLEANING: Cleaning The Cooktop Cleaning The Cooktop (Cont.) Cleaning The Burners Burner Caps Wash burner caps in hot, soapy water and rinse with clean water. You may scour with a plastic scouring pad to remove burned-on food particles. The round caps may also be cleaned in your dishwasher. Burner Heads Wash the burner heads routinely, especially after bad spillovers, which could clog the openings. Lift burners off when cool. Use hot, soapy water. Rinse with clean water. For more stubborn stains, use a brush with plastic bristles. NOTE: Do not use steel wool or scouring powders to clean the burner parts as these may clog the parts. Never wash burner heads in your dishwasher as dishwasher detergents will discolor your burners. The ports in the burner heads must be kept clean at all times for an even, unhampered flame. Clogged or dirty burner ports or electrodes will not allow the burner to operate properly. Round hole in burner head must be kept clear CAUTION Do not operate the cooktop without all burner parts and grates in place. Any spill on or around an electrode must be carefully cleaned. Take care to not hit an electrode with anything hard or it could be damaged. Electrode or Tri-ring base (on some models) The electrode of the spark igniter is exposed when the burner head is removed. When one burner is turned to LITE, all the burners spark. Do not attempt to disassemble or clean around any burner while another burner is on. An electric shock may result, which could cause you to knock over hot cookware. For proper ignition, make sure the small hole in the notch that fits over the electrode is kept open. A sewing needle or wire twist-tie works well to unclog it After cleaning Before putting the burner caps, heads (on some models) and oval head/cap assembly back, shake out excess water and allow them to dry thoroughly. Replacing Burner Heads Replace burner heads in the correct locations according to size. Burner Caps Replace burner caps on burner heads. Make sure each cap fits securely and sits flat on its corresponding burner head. Burner cap is NOT properly seated. Burner cap is NOT properly seated. Burner cap is properly seated. 49-85213-1 21
-
 1
1 -
2
-
3
-
4
-
5
-
6
-
7
-
8
-
9
-
10
-
11
-
12
-
13
-
14
-
15
-
 16
16 -
 17
17 -
 18
18 -
 19
19 -
 20
20 -
 21
21 -
 22
22 -
 23
23 -
 24
24 -
 25
25 -
 26
26 -
27
-
28
 |
 |
