Hamilton Beach 67601 Use & Care - Page 6
cont.
 |
UPC - 040094676019
View all Hamilton Beach 67601 manuals
Add to My Manuals
Save this manual to your list of manuals |
Page 6 highlights
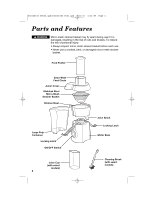
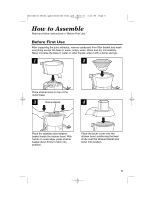
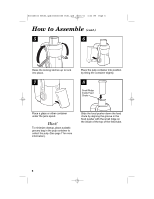
840148102 ENv03.qxd:840148100 Ev01.qxd 4/13/11 4:32 PM Page 6 How to Assemble (cont.) 5 6 Raise the locking latches up to lock into place. 7 Place the pulp container into position by tilting the container slightly. 8 Small Ridge Inside Feed Chute Place a glass or other container under the juice spout. Hint! To minimize cleanup, place a plastic grocery bag in the pulp container to collect the pulp. (See page 7 for more information.) Slide the food pusher down the feed chute by aligning the groove in the food pusher with the small ridge on the inside of the top of the feed tube. 6
-
 1
1 -
 2
2 -
 3
3 -
 4
4 -
 5
5 -
 6
6 -
 7
7 -
 8
8 -
 9
9 -
 10
10 -
 11
11 -
 12
12 -
13
-
14
-
15
-
16
-
17
-
18
-
19
-
20
-
21
-
22
-
23
-
24
-
25
-
26
-
27
-
28
-
29
-
30
-
31
-
32
-
33
-
34
-
35
-
36
-
37
-
38
-
39
-
40
-
41
-
42
-
43
-
44
 |
 |
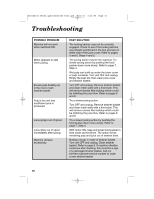
Place the pulp container into position
by tilting the container slightly.
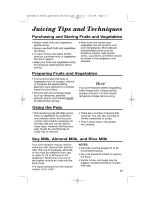
Place a glass or other container
under the juice spout.
6
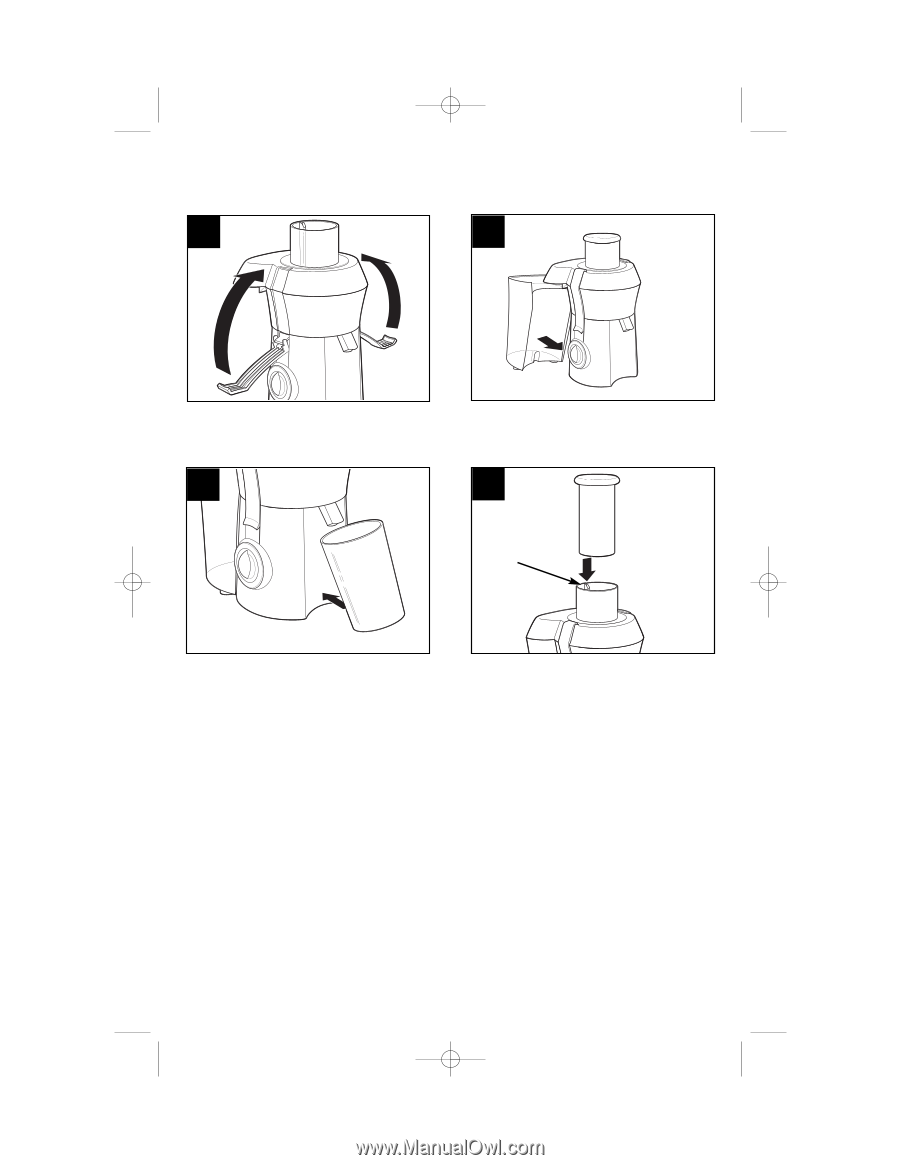
Slide the food pusher down the feed
chute by aligning the groove in the
food pusher with the small ridge on
the inside of the top of the feed tube.
8
6
7
Hint!
To minimize cleanup, place a plastic
grocery bag in the pulp container to
collect the pulp. (See page 7 for more
information.)
Small Ridge
Inside Feed
Chute
How to Assemble
(cont.)
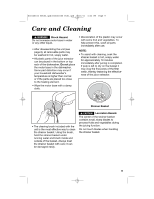
Raise the locking latches up to lock
into place.
5
840148102 ENv03.qxd:840148100 Ev01.qxd
4/13/11
4:32 PM
Page 6