Hannspree ST289MUB User Manual
Hannspree ST289MUB Manual
 |
View all Hannspree ST289MUB manuals
Add to My Manuals
Save this manual to your list of manuals |
Hannspree ST289MUB manual content summary:
- Hannspree ST289MUB | User Manual - Page 1
Safety Instructions 6 Preface 9 Warranty and Service 9 1. Getting Started 12 1.1 Package Contents 12 1.2 Introducing the TV 13 1.2.1 Features 13 1.3 Control Panel 14 1.4 Input and Output Jacks 15 1.5 Remote Control 16 1.6 Inserting the Remote Control Batteries 19 2. Setting up your TV 20 - Hannspree ST289MUB | User Manual - Page 2
CHIP Settings 32 3.6 Adjusting Setup Settings 33 4. Troubleshooting 34 5. Specifications 35 6. Appendix: Remote Control Guide 37 6.1 Introduction 37 6.1.2 Setting Program Codes 37 6.1.3 Searching Codes 38 6.1.4 Setting Volume Lock 38 6.1.5 Setting Channel Lock 39 6.1.6 Factory Setting Mode - Hannspree ST289MUB | User Manual - Page 3
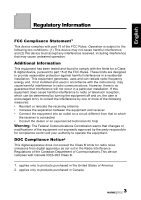
installed and used in accordance with the instructions, may cause harmful interference to radio determined by turning the equipment off and on, the user is encouraged to try to correct the interference by radio noise emissions from digital apparatus as set out in the Radio Interference Regulations of - Hannspree ST289MUB | User Manual - Page 4
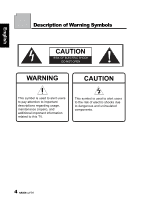
SHOCK DO NOT OPEN WARNING CAUTION This symbol is used to alert users to pay attention to important descriptions regarding usage, maintenance (repair), and additional important information related to this TV. This symbol is used to alert users to the risk of electric shocks due to dangerous and - Hannspree ST289MUB | User Manual - Page 5
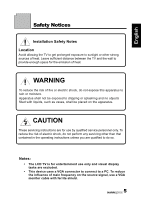
risk of electric shock, do not perform any servicing other than that contained in the operating instructions unless you are qualified to do so. Notes: • The LCD TV is for entertainment use only and visual display tasks are excluded. • This device uses a VGA connector to connect to a PC. To reduce - Hannspree ST289MUB | User Manual - Page 6
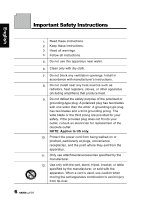
this apparatus near water. 6. Clean only with dry cloth. 7. Do not block any ventilation openings. Install in accordance with manufacturer's instructions. 8. Do not install near any heat sources such as radiators, heat registers, stoves, or other apparatus (including amplifiers) that produce heat - Hannspree ST289MUB | User Manual - Page 7
English 13. Unplug this apparatus during lightning storms or when unused for long periods of time. 14. Refer all servicing to qualified service personnel. Servicing is required when the apparatus has been damaged in any way, such as power-supply cord or plug is damaged, liquid has been spilled or - Hannspree ST289MUB | User Manual - Page 8
down, or is otherwise damaged, unplug the power cord immediately and contact an authorized service technician. 5. If any fluid is sprayed or dropped into the TV, contact an authorized service technician. 6. The screen of the TV is made of glass. Avoid hitting or scraping it. If the screen is broken - Hannspree ST289MUB | User Manual - Page 9
Preface Thank you for purchasing a Hannspree Liquid Crystal Display Television (LCD TV). Your new TV will allow you to enjoy superior audio and video while enriching your lifestyle with advanced technology. Please carefully read this manual in its entirety before setting up, using or operating your - Hannspree ST289MUB | User Manual - Page 10
services available in your area. http://www.hannspree.com/us 888.808.6789 Copyright © Copyright 2009 Hannspree, Inc. All rights reserved. This manual authorization of Hannspree. The TV described in this manual may include copyrighted software of Hannspree (or other third parties). Hannspree (or other - Hannspree ST289MUB | User Manual - Page 11
English Trademark Notice Hannspree products incorporate High-Definition Multimedia Interface (HDMI™) technology. HDMI, the HDMI logo and High-Definition Multimedia Interface are trademarks or registered trademarks of HDMI Licensing - Hannspree ST289MUB | User Manual - Page 12
the following components are included in the box. Please contact Hannspree Customer Service immediately if anything is missing or damaged. • TV • Power cord • Remote control and batteries • User's manual • Quick start guide • Warranty card • Attention notice card • Cleaning cloth • HDMI cable 12 - Hannspree ST289MUB | User Manual - Page 13
(location of these ports depends on model). You can also use the TV as a monitor for your PC by connecting it through the VGA port. Convenient control buttons located on the TV and a handy remote control let you change channels, adjust the volume, and change display settings through an easyto-use on - Hannspree ST289MUB | User Manual - Page 14
English 1.3 Control Panel Description Button Power Input source Menu INPUT MENU Channel select CH Channel select CH Volume adjust Volume adjust Remote IR sensor Power/ Standby indicator Speakers VOL VOL Function Power button. Press to turn the TV on or off. Press to open the input - Hannspree ST289MUB | User Manual - Page 15
VGA (PC) input Connect to a PC's VGA port. Audio input (PC) Component inputs (audio) PC LINE IN R AUDIO L Connect to a PC's audio port. Connect to an external device, such as a VCR, Set-Top-Box, or a DVD player. Component inputs Y Pb TV. Connect to an external device, such as a VCR, Set-Top - Hannspree ST289MUB | User Manual - Page 16
English 1.5 Remote Control Description Icon Power Input source INPUT Keypad Function Press to turn the TV on or off. Press the setting. Press up, down, left or right to scroll through the on-screen display menus. Press to confirm your selection. Press to view the ElectronicProgramming-Guide - Hannspree ST289MUB | User Manual - Page 17
/ SAP) in ATV or the audio services in DTV. Press to select a programmed DVD player. Press to select a programmed Audio Receiver/ Amp/ Home Theatre System. Press to select a programmed Cable TV set-top box or a satellite TV set-top box. Press to enter TV mode. Press to switch to favorite channels - Hannspree ST289MUB | User Manual - Page 18
by the equipment manufacturer. Discard used batteries according to manufacturer's instructions. • Refer to your local recycling or waste disposal rules and contact a local waste disposal vendor to dispose of used batteries. • The remote control cover may have a magnet in it, so do not place - Hannspree ST289MUB | User Manual - Page 19
English 1.6 Inserting the Remote Control Batteries 1 Open the battery compartment cover at the back of the remote control (A). A 2 Insert the batteries paying attention to the polarity markings inside the battery compartment (B). B 3 Close the battery compartment cover (C). C 19 - Hannspree ST289MUB | User Manual - Page 20
English 2 Setting up your TV 2.1 Basic Connections 2.1.1 Power Connection 1 Connect the power cord to the AC IN input jack on the rear of the TV. 2 Insert the plug at the other end of the power cord into a power outlet. 2.1.2 Connecting an Antenna or Cable TV Connect one end of the VHF/UHF (Antenna - Hannspree ST289MUB | User Manual - Page 21
English 2.2 Connecting External Devices Connect external devices such as VCRs, Set-Top-Box, DVD players, video game consoles, earphones, or a PC to the TV using the appropriate ports on the rear of the TV. 2.2.1 Connecting External Earphones Headphones EAR PHONE Speakers (Built-in Amplifiers) - Hannspree ST289MUB | User Manual - Page 22
English 2.2.2 Connecting to AV Devices A B HDMI 1 HDMI 2 or R AUDIO LY Pb Pr C or AUDIO R L VIDEO S-Video Audio Cable (Optional) HDMI Cable (Optional) Video Cable (Optional) Audio/ Video Cable (Optional) HDMI Game Console R L Y Pb Pr R L VIDEO S-VIDEO VCR or STB DVD 22 - Hannspree ST289MUB | User Manual - Page 23
a VCR/ STB/ DVD player using the component video inputs. R AUDIO LY Pb Pr VCR STB DVD Audio Cable Video Cable (Optional) (Optional) 2.2.4 Connecting a VCR/ STB/ DVD Player Using Composite Video Connect the TV to a VCR/ STB/ DVD player using the composite video input. VCR STB DVD AV AUDIO - Hannspree ST289MUB | User Manual - Page 24
the line out port of the PC to listen to audio from the PC. VGA PC LINE IN Audio Cable (Optional) PC VGA Cable (Optional) 2.2.6 Connecting a PC using DVI Connect the TV to your PC to use it as the monitor using the DVI port as shown. 1 Connect the HDMI 1 or HDMI 2 port of - Hannspree ST289MUB | User Manual - Page 25
not necessary. However, it is necessary to do so if a HDMI to DVI cable is connected. 2.2.8 Connecting USB Connect the USB flash drive to the TV using the USB port as shown. The JPEG and MP3 files are supported. USB USB Flash Drive (Optional) Note: The USB HDD is not - Hannspree ST289MUB | User Manual - Page 26
Press again. The power LED changes from green to red, indicating that the TV is off. 2.3.2 Switching Source Signals Press INPUT on the control panel or remote control to select the incoming source signal to set TV source for channel search. Press OK to confirm. 2.3.3 Performing an Automatic Channel - Hannspree ST289MUB | User Manual - Page 27
and press again or press the volume buttons to restore the original volume. 2.3.6 Editing Channel Table or Favorite Channel 1 Press MENU on the control panel or remote control, then select to enter the Channel menu. 2 Select Channel List. 3 If you want to add or remove channel from channel table - Hannspree ST289MUB | User Manual - Page 28
instructions for adjusting the settings. Picture Audio Channel V-CHIP Setup Move Picture Mode Brightness Contrast Sharpness Color Tint Digital NR X-Contrast Aspect Ratio Next Page OK Enter Return Return Menu Exit Function OSD Menu Up Down Increase Decrease Select Return 28 TV Control Panel - Hannspree ST289MUB | User Manual - Page 29
Color Temp and Recall settings. Brightness, Contrast, Sharpness, Color, and Tint are only available for adjustments if you select User in Picture Mode. Press / on the remote control or VOL+/ VOL- on the control panel to adjust these settings. • The Picture Mode can be set to Vivid, Standard, Movie - Hannspree ST289MUB | User Manual - Page 30
ATV only), Auto Volume (ATV only), and Recall settings. Equalizer is available for adjustment only if you select User in Audio Mode. •The Audio Mode can be set to Dynamic, Standard, Soft, or User. •Press / on the remote control or VOL+/ VOL- on the control panel to adjust the scales in Equalizer and - Hannspree ST289MUB | User Manual - Page 31
English 3.4 Adjusting Channel Settings 1 Press MENU to enter the OSD Main Menu screen. 2 Press / on the remote control or CHS / CHT on the control panel to select Channel menu. 3 Press / OK on the remote control or INPUT/ VOL+ on the control panel to enter the Channel menu. Picture Audio Channel - Hannspree ST289MUB | User Manual - Page 32
the item. 7 Press OK on the remote control or INPUT/ VOL+ on the control panel to mark an item. 8 Press RETURN to return to the V-CHIP menu. 9 Press MENU/ VOL- to exit the V-CHIP menu. 10 The V-CHIP menu can set Change Password, Lock, Unrated Block, MPAA , TV Rating, Can. English, and Can. French - Hannspree ST289MUB | User Manual - Page 33
mins, 45 mins, 60 mins, 90 mins, and 120 mins. • Press / on the remote control to move the scale in the Back Light settings. • To change settings in CC Mode, Analog CC, Digital CC, and CC Style, press / on the remote control to select the items and press / OK to activate the item. Note: The items - Hannspree ST289MUB | User Manual - Page 34
receive some TV • channels using cable TV. Want to reset TV settings. • Cannot operate menus. • Screen image turns over. • • Snow appears on the screen. • • Blurred or overlapped • images. • • • • Remote control doesn't work. • • Press on the control panel or remote control. press - Hannspree ST289MUB | User Manual - Page 35
5 Specifications LCD Panel Size Screen Format Panel Resolution TV System Video System Photo System Audio System Built-in Stereo Amplifier Output ACInput Power Consumption Standby Power Consumption (W) AC Power Supply (Vac) Dimension W x H x D Weight 28 inch TFT 16:10 1920 (H) x 1200 (V) ATV: - Hannspree ST289MUB | User Manual - Page 36
English PC Mode Support Timing Mode Resolution (active dot) Horizontal Frequency (KHz) VGA SVGA XGA SXGA WXGA+ WSXGA+ WUXGA 640x480@60Hz 800x600@60Hz 1024x768@60Hz 1280x1024@60Hz 1440x900@60Hz 1680x1050@60Hz 1920x1200@60Hz 31.469 37.879 48.363 63.981 55.935 65.290 74.083 Vertical Frequency ( - Hannspree ST289MUB | User Manual - Page 37
6 Appendix: Remote Control Guide 6.1 Introduction The electronic equipment type switch buttons are used for switching the current electronic equipment type on the remote control. The remote control includes 4 electronic equipment types: DVD, AUDIO, CABLE and TV. The remote control keypad matrix - Hannspree ST289MUB | User Manual - Page 38
is valid; otherwise the indicator light comes on again after going off for 2 seconds, prompting user to re-enter mode codes. 3. If setting is successful, the electronic equipment code-searching state is entered upon releasing the electronic equipment button. The POWER signal of all manufacturers - Hannspree ST289MUB | User Manual - Page 39
equipment button, press VOL- twice consecutively to cancel volume lock under current mode (for example, if volume lock was set under TV mode and you wish to transmit code values under current DVD mode, just perform this unlock operation, while those electronic equipment modes not operated still have - Hannspree ST289MUB | User Manual - Page 40
electronic equipment buttons to enter factory setting operation mode. 5. The default current electronic equipment is TV upon first power-on. Electronic equipment Code Note TV 1001 Provided by manufacturer CABLE -- Transmit TV code AUDIO -- Transmit TV code DVD -- Transmit TV code 40 - Hannspree ST289MUB | User Manual - Page 41
VOL- and Mute TV Transmit TV code CABLE Transmit CABLE code AUDIO Transmit AUDIO code DVD Transmit DVD code 7. Default channel lock setting: Electronic equipment CH+ and CH- TV Transmit TV code CABLE AUDIO DVD Transmit CABLE code Transmit AUDIO code Transmit DVD code Note Provided by - Hannspree ST289MUB | User Manual - Page 42
time, only when a single button is pressed, the corresponding code is just output. Two or more buttons simultaneously pressed do not output any code. 6.2.2 Buttons Information Except TV equipment, all the buttons on remote controls corresponding to other electronic equipments (AUDIO, CABLE, and DVD - Hannspree ST289MUB | User Manual - Page 43
2102 Daewoo 2010, 2017, 2025 Dell 2102 Denon 2008 Direc TV 2059 Durabrand 2007, 2006 Electrohome 2005 Electrophonic 2005 Emerex 2002 Emerson 2102 GE 2013, 2004, 2024 General 2010 Go Video 2026 Setup Code for VCR's GoldStar 2005, 2022, 2006, 2023 HaoJie 2024 Harman - Hannspree ST289MUB | User Manual - Page 44
2013 Protec 2015 Puslar 2007 Qisheng 2013 Quasar 2004, 2020 Radix 2005 Randex 2005 Setup Code for VCR's RCA 2013, 2004, 2024, 2008, 2077 Realistic 2004, 2005, 2012, 2011, 2017 Replay TV 2043 Runco 2007 Sampo 2005, 2012 Samsung 2024, 2010, 2026 Sanky 2012, 2007 Sansui 2014 - Hannspree ST289MUB | User Manual - Page 45
Daewoo 2073, 2097, 2076 Denon 2028 DVD2000 2031 Emerson 2042, 2054 Enterprise 2042 Funai 2054 Gateway 2096, 2088 GE 2032. 2058 Setup Code for DVD's Go Video 2060, 2073, 2092, 2063, 2089, 2076, 2100 Greenhill 2058 Harman/ Kardon 2041,2057 Hitachi 2040, 2052 Hiteker 2053 - Hannspree ST289MUB | User Manual - Page 46
Sansui 2055 Sanyo 2055 Sharp 2047, 2061 Sharper Image 2093 Sherwood 2062 Shinco 2058 Shinsonic 2034 Sonic Blue 2076, 2092 46 Setup Code for DVD's Sony 2034, 20864, 2083 SVA 2085 Sylvania 2054 Symphonic 2054 Teac 2058 Technics 2028 Theta Digital 2039 Toshiba 2029, 2055 - Hannspree ST289MUB | User Manual - Page 47
, 0027 Memorex 0028 Mitsubishi 0029 Motorola 0036 Next Level 0036 Setup Code for Satellite Panasonic 0013, 0026 Paysat 0028 Philips 0044, 0029, 0032, 0048 Ultimate TV 0056, 0051 Uniden 0028, 0027 US Digital 0055 USDTV 0055 Voom 0036 Zenith 0058 Setup Code for CD Aiwa - Hannspree ST289MUB | User Manual - Page 48
3030, 3004, 3019 MCS 3004 Miro 3001 Mission 3019 MTC 3027 NSM 3019 Onkyo 3013 Optimus 3001, 3005, 3007, 3027, 3022 48 Setup Code for CD Panasonic 3004 Parasound 3027 Philips 3030, 3019 Pioneer 3038, 3005 Polk Audio 3019 Proton 3019 QED 3019 Quad 3004 RCA 3038, 3005 - Hannspree ST289MUB | User Manual - Page 49
Qisheng 3057 RCA 3036, 3057, 3044, 3029, 3039 Silsonic 3021 Sony 3037, 3054, 3045, 3058 Soundesign 3032 Stereophonics 2025 Sunfire 3050 Setup Code for Audio Amp / Tuner's Teac 3049 Technics 3043, 3055 Thorens 3042 Victor 3010 Wards 3002 Yamaha 3021, 3048, 3041 49 English - Hannspree ST289MUB | User Manual - Page 50
. • The 28" TV stand base can be screwed on a table or a hard surface using the hole on the back of the stand base. *Installing the LCD TV requires special skill that should only be performed by qualified service personnel. Customers should not attempt to do the work themselves. Hannspree bears no - Hannspree ST289MUB | User Manual - Page 51
English 8 Using the Cable Organizer Organzie your cables by routing the cables through the cable clamp. 51
-
 1
1 -
 2
2 -
 3
3 -
 4
4 -
 5
5 -
 6
6 -
 7
7 -
8
-
9
-
10
-
11
-
12
-
13
-
14
-
15
-
16
-
17
-
18
-
19
-
20
-
21
-
22
-
23
-
24
-
25
-
26
-
27
-
28
-
29
-
30
-
31
-
32
-
33
-
34
-
35
-
36
-
37
-
38
-
39
-
40
-
41
-
42
-
43
-
44
-
45
-
46
-
47
-
48
-
49
-
50
-
51
 |
 |

Table of Contents
1
English
Regulatory Information
................................................................
3
Description of Warning Symbols
..................................................
4
Safety Notices
.............................................................................
5
Important Safety Instructions
.......................................................
6
Preface
.......................................................................................
9
Warranty and Service
..................................................................
9
1.
Getting Started
......................................................................
12
1.1 Package Contents
...........................................................
12
1.2 Introducing the TV
...........................................................
13
1.2.1 Features
................................................................
13
1.3 Control Panel
..................................................................
14
1.4 Input and Output Jacks
....................................................
15
1.5 Remote Control
...............................................................
16
1.6 Inserting the Remote Control Batteries
.............................
19
2.
Setting up your TV
.................................................................
20
2.1 Basic Connections
...........................................................
20
2.1.1 Power Connection
..................................................
20
2.1.2 Connecting an Antenna or Cable TV
........................
20
2.2 Connecting External Devices
...........................................
21
2.2.1 Connecting External Earphones
..............................
21
2.2.2 Connecting to AV Devices
.......................................
22
2.2.3 Connecting a VCR/ STB/ DVD Player
Using Component Video
.........................................
23
2.2.4 Connecting a VCR/ STB/ DVD Player
Using Composite Video
...........................................
23
2.2.5 Connecting a PC using VGA
...................................
24
2.2.6 Connecting a PC using DVI
.....................................
24
2.2.7 Connecting HDMI
...................................................
25
2.2.8 Connecting USB
.....................................................
25
2.3 Using the TV
...................................................................
26
2.3.1 Turning the TV On and Off
......................................
26
2.3.2 Switching Source Signals
........................................
26
2.3.3 Performing an Automatic Channel Search
................
26
2.3.4 Selecting Channels
.................................................
26
2.3.5 Adjusting the Volume
..............................................
26