Harman Kardon HK 3390 Owners Manual - Page 16
Installation - harman kardon receiver
 |
View all Harman Kardon HK 3390 manuals
Add to My Manuals
Save this manual to your list of manuals |
Page 16 highlights
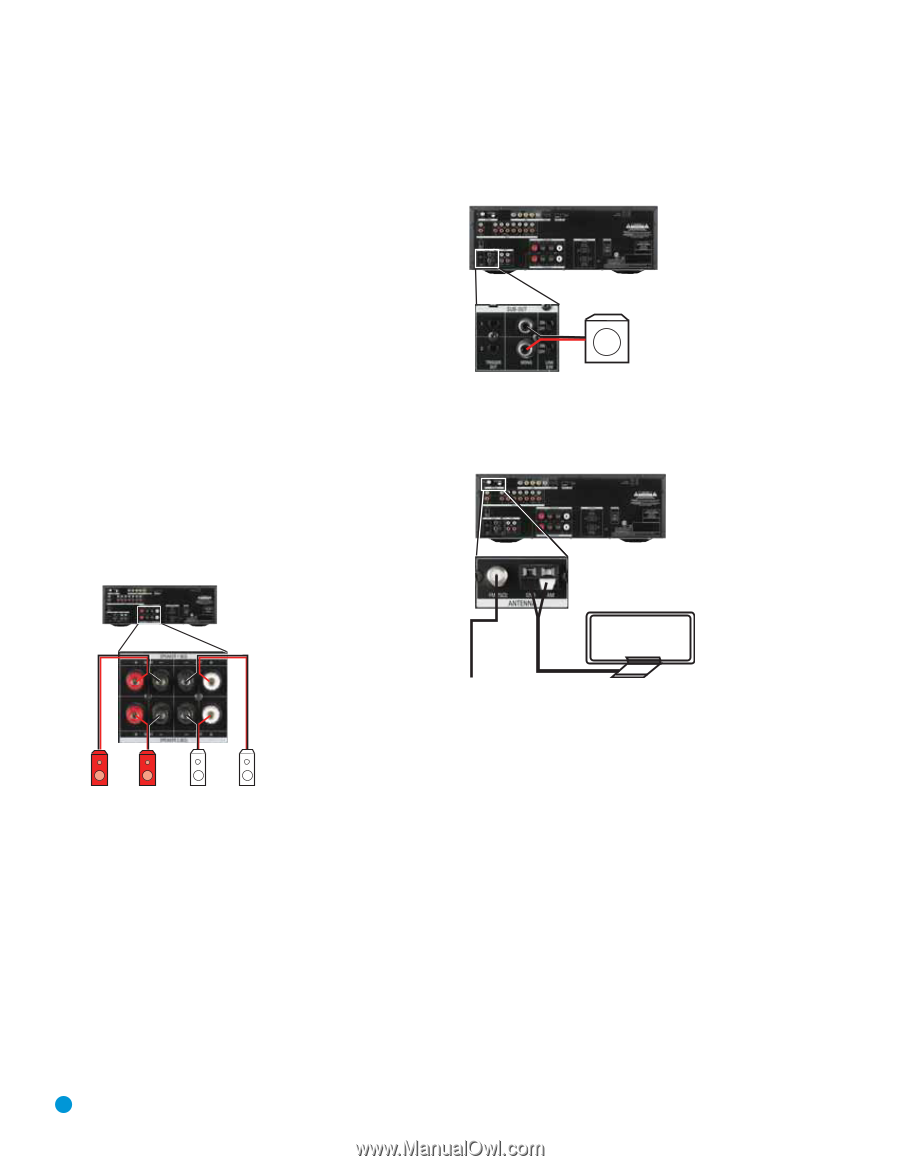
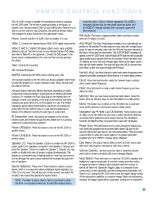
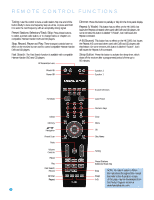
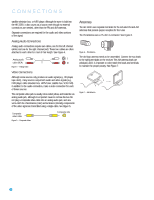
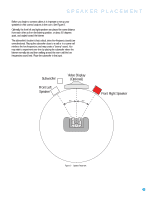
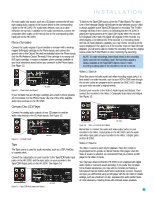
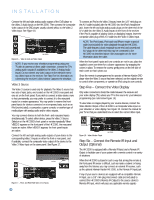
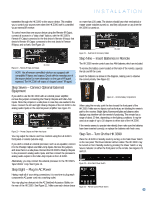
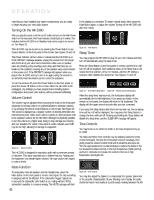
INSTALLATION You are now ready to connect your various components to your receiver. Before beginning, make sure that all components, including the HK 3390, are turned completely off and their power cords are unplugged. Don't plug in any of the power cords until you have finished making all of your connections. The receiver generates heat while it is on. Select a location that leaves several inches of space on all sides of the receiver. It is preferable to avoid completely enclosing the receiver inside a cabinet. It is also preferable to place components on separate shelves rather than directly on top of the receiver. Some surface finishes are delicate. Try to select a location with a sturdy surface finish. Step One - Connect the Speakers If you have not yet done so, place your speakers in the listening room as described in the Speaker Placement section. Connect the front left and right loudspeakers to the Speaker 1 speaker terminals on the HK 3390. Maintain the proper polarity by always connecting the positive and negative terminals on each speaker to the positive and negative terminals on the receiver. You may place a second pair of speakers in another room, or in the same room for additional sound power, connecting those speakers to the Speaker 2 Outputs, and maintaining polarity. Use the Speaker 1/2 Selector on the front panel or remote to activate either or both pairs of speakers simultaneously. See Figure 9. corresponding pair of main speakers is not being used, such as during muting, when headphones are being used, or when the speakers are turned off using the Speaker 1/2 switch. See Figure 10. Consult the manufacturer's guide for the subwoofer for additional information. HK 3390 SUB Figure 10 - Subwoofer Connection Step Three - Connect the Antennas Connect the FM and AM antennas to their terminals. See Figure 11. HK 3390 HK 3390 AM FM Right (Spkr 1) Right (Spkr 2) Left (Spkr 2) Figure 9 - Speaker Connections Left (Spkr 1) Step Two - Connect the Subwoofer Connect the Subwoofer Outputs on the HK 3390 to the line-level inputs on your subwoofer. The same full-range signal is output through both jacks. Thus, you have the option of connecting each jack to the line-level input on a separate subwoofer. If both pairs of main speaker outputs are in use in different locations, you may install a separate subwoofer with each speaker pair. If you have only one subwoofer with a single line-level input, connect it to the right Subwoofer Output on the HK 3390. For optional auto turn-on/turn-off control over the subwoofer, connect the Subwoofer Trigger Output for each subwoofer to the corresponding trigger input on its amplifier. This enables the subwoofer to turn on or off together with the HK 3390. To further conserve energy, when the trigger connection is made, turn the Subwoofer Link Switch on to turn the subwoofer off when the 16 Figure 11 - Antenna Connections Step Four - Connect the Source Components Use the worksheets in the Appendix to note which connections you will use for each of your source devices. For each source, select a source input (Video 1, Video 2, Video 3, etc.). In Table A1 in the appendix, we recommend connecting certain types of sources to certain source inputs to make it easier to use the remote control. The remote is preprogrammed to operate certain Harman Kardon components as shown in Table A1. However, you may connect any component with analog audio and/or composite video outputs to any source input on the HK 3390, with the exception of the Phono Inputs, and you may use the original remote control supplied with the component. It is not possible to reprogram the HK 3390 remote, or to change the device type associated with any source input. We recommend you follow the guidelines in Table A1 when connecting various source components to the HK 3390. However, due to the limitations in the design of the HK 3390 remote control, when using source components manufactured by other brands, use the device's original remote control to operate it.
-
 1
1 -
2
-
3
-
4
-
5
-
6
-
7
-
8
-
9
-
10
-
 11
11 -
 12
12 -
 13
13 -
 14
14 -
 15
15 -
 16
16 -
 17
17 -
 18
18 -
 19
19 -
 20
20 -
 21
21 -
22
-
23
-
24
-
25
-
26
-
27
-
28
 |
 |