Hayward HCP Pump HCP Series LITCPOMA10 - Page 20
Assembly/Disassembly
 |
View all Hayward HCP Pump manuals
Add to My Manuals
Save this manual to your list of manuals |
Page 20 highlights
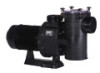
ASSEMBLY/DISASSEMBLY/PARTS LIST 10. Assembly/Disassembly ATTENTION Before performing any operation, all valves must be in the "off" position; having checked this: • Disconnect all power (this must be done by a licensed electrician). • Loosen and remove the supply cables on the junction box (fig. 4, page 23). • Release the plumbing connections. • Empty the pump, loosening the drain plugs with their two O-ring seals. ATTENTION In order to dismount and disassemble the pump, please see the detail drawing (fig. 4, page 23). In order to remove the motor from the pump casing, remove the six screws and the two screws, remove the motor with the impeller. In order to dismount the impeller loosen the screw and its O-Ring using an allen key nº 8; this way the impeller will be loose. By doing this operation the mechanical seal will be loose, too. The diffuser is already free. ATTENTION "All parts to be assembled must be clean and in perfect condition for use." In order to assemble the pump: • Assemble the mechanical seal, (fig. 4, page 23), assemble the rotary part of the seal above the back flange of the impeller by pressing until this falls into the space; the retainer will have been lubricated with water beforehand. • Assemble the impeller on the shaft, affixing this with the screw and the O-ring using an allen key nº 8. • At the junction of the pump with the motor, keep in mind that the diffuser flange, and all other connections, must fit into the correct space. To order any spare parts, indication must be given of the denomination, number shown on the exploded drawing (page 23) and nameplate ratings. 20
-
 1
1 -
2
-
3
-
4
-
5
-
6
-
7
-
8
-
9
-
10
-
11
-
12
-
13
-
14
-
 15
15 -
 16
16 -
 17
17 -
 18
18 -
 19
19 -
 20
20 -
 21
21 -
 22
22 -
 23
23 -
 24
24
 |
 |
