HP 300X HP JetDirect External Print Servers 300X, 500X 170X, EX Plus Hardware - Page 19
Verifying the Hardware Installation, Selecting a Configuration Language - reset jetdirect
 |
UPC - 882780300842
View all HP 300X manuals
Add to My Manuals
Save this manual to your list of manuals |
Page 19 highlights
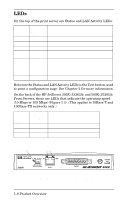
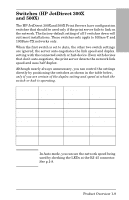
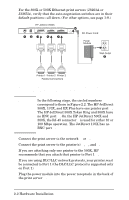
Hardware 2 Installation 8. Plug the power module into the wall outlet œ. Since there is no power switch, the print server is switched on after you plug it in. 9. Check the LEDs on the front of print server. The Status LED should be green-either steady or blinking. If the internal self-test failed, the Activity LED will be on and the Status LED will be off. For troubleshooting information, see the Troubleshooting chapter in the software guide shipped with your print server. 10. Wait about 10 seconds. For 10Base-T and 100Base-TX networks, check the 10 and 100 LEDs on the back to verify that the correct one is lit. See p.1-8. 11. Switch on the power on your printer(s) to begin printing. Verifying the Hardware Installation To verify the installation of the HP JetDirect external printer server, generate a configuration page. This page is generated from Port 1 of the printer server. To generate a configuration page, follow these steps: 1. Print a configuration page by pressing and releasing the Test button on the print server. 2. If the configuration page displays the message I/O CARD READY, you have successfully completed the hardware installation. (If not, see the Troubleshooting chapter in the HP JetDirect Print Server Administrator's Guide shipped on the HP JetDirect CD-ROM.) Refer to this configuration page when you are configuring the software. For sample configuration pages, see the Troubleshooting chapter in the HP JetDirect Print Server Administrator's Guide shipped on the HP JetDirect CD-ROM. Selecting a Configuration Page Language The configuration page for the HP JetDirect external print server is sent to the printer attached to Port 1. The printer language is auto-detected the first time the print server is powered up and after each cold reset. Hardware Installation 2-3
-
 1
1 -
2
-
3
-
4
-
5
-
6
-
7
-
8
-
9
-
10
-
11
-
12
-
13
-
 14
14 -
 15
15 -
 16
16 -
 17
17 -
 18
18 -
 19
19 -
 20
20 -
 21
21 -
 22
22 -
 23
23 -
 24
24 -
25
-
26
-
27
-
28
-
29
-
30
 |
 |