HP 353803-B22 HP StorageWorks 1000 Modular Smart Array installation guide (254 - Page 35
Slide the device into the rack until the front edge is flush with the front of the rack 1.
 |
UPC - 808736781619
View all HP 353803-B22 manuals
Add to My Manuals
Save this manual to your list of manuals |
Page 35 highlights
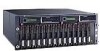
b. Slide the device into the rack until the front edge is flush with the front of the rack (1). c. Secure the device to the front of the rack using the provided thumbscrews on the front of the device (2). 2 1 15421 5. Secure the device in the rack: a. Loosen the thumbscrew on the shipping retaining bracket (1) and slide the bracket forward (2) until the tab engages the slot in the chassis. 2 1 15422 d. Tighten the thumbscrew on the bracket. e. Repeat these steps for the other rail. HP StorageWorks 1000 Modular Smart Array installation guide 35
-
 1
1 -
2
-
3
-
4
-
5
-
6
-
7
-
8
-
9
-
10
-
11
-
12
-
13
-
14
-
15
-
16
-
17
-
18
-
19
-
20
-
21
-
22
-
23
-
24
-
25
-
26
-
27
-
28
-
29
-
 30
30 -
 31
31 -
 32
32 -
 33
33 -
 34
34 -
 35
35 -
 36
36 -
 37
37 -
 38
38 -
 39
39 -
 40
40 -
41
-
42
-
43
-
44
-
45
-
46
-
47
-
48
-
49
-
50
-
51
-
52
-
53
-
54
-
55
-
56
-
57
-
58
-
59
-
60
-
61
-
62
-
63
-
64
-
65
-
66
-
67
-
68
-
69
-
70
-
71
-
72
-
73
-
74
-
75
-
76
-
77
-
78
-
79
-
80
-
81
-
82
-
83
-
84
-
85
-
86
-
87
-
88
-
89
-
90
-
91
-
92
-
93
-
94
-
95
-
96
-
97
-
98
-
99
-
100
-
101
-
102
-
103
-
104
-
105
-
106
-
107
-
108
-
109
-
110
-
111
-
112
-
113
-
114
-
115
-
116
-
117
-
118
-
119
-
120
-
121
-
122
-
123
 |
 |

HP StorageWorks 1000 Modular Smart Array installation guide
35
b.
Slide the device into the rack until the front edge is flush with the front of the rack (1).
c.
Secure the device to the front of the rack using the provided thumbscrews on the front of the
device (2).
5.
Secure the device in the rack:
a.
Loosen the thumbscrew on the shipping retaining bracket (1) and slide the bracket forward
(2) until the tab engages the slot in the chassis.
d.
Tighten the thumbscrew on the bracket.
e.
Repeat these steps for the other rail.
15421
1
2
2
1
15422