HP 353803-B22 HP StorageWorks 1000 Modular Smart Array installation guide (254 - Page 96
Powering on the MSA
 |
UPC - 808736781619
View all HP 353803-B22 manuals
Add to My Manuals
Save this manual to your list of manuals |
Page 96 highlights
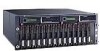
Powering on the MSA 1. Verify that the following devices are powered on and in a ready state: • Uninterruptible Power Supplies (UPS) • External Fibre Channel switches 2. Power on all attached storage enclosures. IMPORTANT: Proceed to the next step only after confirming that the external storage enclosures have completed their startup routines; otherwise, the MSA array may not properly discover the storage. 3. Wait for the storage enclosures to complete their startup routines. 4. Press and release the Power on/Standby button on the front of the chassis to start the MSA array. The LED on the Power on/Standby button changes from amber to solid green, indicating that the MSA has been powered on. 5. Wait for the MSA to complete its startup routine. When complete, the LCD will display "Startup Complete." This could take up to 3 minutes, depending on your configuration. NOTE: In dual-controller configurations, each time the MSA is restarted, firmware on the two controllers is compared. If the versions are mismatched, the system prompts to clone the firmware on the controller with the latest version (higher number) over to the controller with the earlier version (lower number) firmware. The following message is displayed on the LCD panel of the controller with the earlier firmware: 07 CLONE FIRMWARE? ''= YES Press the > button on the LCD panel to clone the firmware. In dual-controller configurations, the firmware on the controllers must be the same version. 6. Press the ^ and v LCD panel message buttons on the front of each MSA controller to review the startup messages and look for the following message: Startup Complete IMPORTANT: Proceed to the next step only after the Startup Complete message is displayed. If you power on (or restart) the server before the MSA array completes its start-up sequence, the server may not properly discover the storage. 7. Power on the servers in the SAN with access to the MSA, start the operating system, and log on as a user with administrative control. 96 Powering off and powering on the MSA
-
 1
1 -
2
-
3
-
4
-
5
-
6
-
7
-
8
-
9
-
10
-
11
-
12
-
13
-
14
-
15
-
16
-
17
-
18
-
19
-
20
-
21
-
22
-
23
-
24
-
25
-
26
-
27
-
28
-
29
-
30
-
31
-
32
-
33
-
34
-
35
-
36
-
37
-
38
-
39
-
40
-
41
-
42
-
43
-
44
-
45
-
46
-
47
-
48
-
49
-
50
-
51
-
52
-
53
-
54
-
55
-
56
-
57
-
58
-
59
-
60
-
61
-
62
-
63
-
64
-
65
-
66
-
67
-
68
-
69
-
70
-
71
-
72
-
73
-
74
-
75
-
76
-
77
-
78
-
79
-
80
-
81
-
82
-
83
-
84
-
85
-
86
-
87
-
88
-
89
-
90
-
 91
91 -
 92
92 -
 93
93 -
 94
94 -
 95
95 -
 96
96 -
 97
97 -
 98
98 -
 99
99 -
 100
100 -
 101
101 -
102
-
103
-
104
-
105
-
106
-
107
-
108
-
109
-
110
-
111
-
112
-
113
-
114
-
115
-
116
-
117
-
118
-
119
-
120
-
121
-
122
-
123
 |
 |
