HP 418800-B21 HP StorageWorks 70 Modular Smart Array Enclosure user guide (434 - Page 24
Installing hardware options, Installing servers, Choosing a con, guration
 |
UPC - 882780564640
View all HP 418800-B21 manuals
Add to My Manuals
Save this manual to your list of manuals |
Page 24 highlights
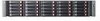
IMPORTANT: Be sure that the scissor-type locking latches engage the rack fully when the pins extend through the holes marked with the template. 15488 3. Slide the chassis into the rack. 4. Use the thumbscrews on the front of the chassis to secure it to the rack. 5. Use the shipping bracket to secure the enclosure for shipping: IMPORTANT: Use of the shipping bracket is required only when the rack is shipped with the MSA70 enclosure installed. a. Loosen the thumbscrew on the shipping bracket. b. Slide the shipping bracket forward until it engages the chassis. c. Tighten the thumbscrew. If you are installing the enclosure into a telco rack, order the appropriate option kit at the RackSolutions website: http://www.racksolutions.com/hp. Follow the enclosure-specific instructions on the website to install the rack brackets. Installing hardware options Install any hardware options before initializing the enclosure. For options installation information, see the option documentation. For enclosure-specific information, see Installing hardware drives. Installing servers Install the servers in the rack directly above the enclosure. See the server documentation. NOTE: When installing servers and enclosures, HP recommends installing all enclosures at the bottom of the rack. To optimize cabling access, avoid interleaving the enclosure and server products. Choosing a configuration Cable procedures vary, depending on the configuration. Choose one of the following configurations. 24 Setting up the enclosure
-
 1
1 -
2
-
3
-
4
-
5
-
6
-
7
-
8
-
9
-
10
-
11
-
12
-
13
-
14
-
15
-
16
-
17
-
18
-
 19
19 -
 20
20 -
 21
21 -
 22
22 -
 23
23 -
 24
24 -
 25
25 -
 26
26 -
 27
27 -
 28
28 -
 29
29 -
30
-
31
-
32
-
33
-
34
-
35
-
36
-
37
-
38
-
39
-
40
-
41
-
42
-
43
-
44
-
45
-
46
-
47
-
48
-
49
-
50
-
51
-
52
-
53
-
54
-
55
 |
 |
