HP 8/20q HP StorageWorks 8/20q and SN6000 Fibre Channel Switch Quick Start Ins - Page 3
Connect the switch, Install Simple SAN Connection Manager
 |
View all HP 8/20q manuals
Add to My Manuals
Save this manual to your list of manuals |
Page 3 highlights
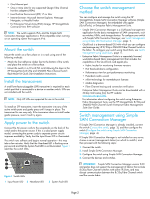
IMPORTANT: Simple SAN Connection Manager version 3.0 or later is required for the HP SN6000 Fibre Channel switch. Connect the switch 1. Connect the switch Ethernet port to the LAN that connects the server that is running (or will run) Simple SAN Connection Manager with the other servers in the storage area network. 2. Connect a Fibre Channel cable from the switch to an HBA in the management station, or connect a Fibre Channel cable from the switch to any switch in the SAN that includes an HBA connection from the management station. Each switch port autonegotiates the proper port type with the connected device or switch. NOTE: • If Simple SAN Connection Manager is not installed, see Install Simple SAN Connection Manager, page 3. • If Simple SAN Connection Manager is already installed, see Configure the switch using Simple SAN Connection Manager, page 4. Install Simple SAN Connection Manager Follow the instructions in the Read Me First document to obtain the SSCM software, and then install the management software on your management station, as described in this section. For information on configuring the other servers connected to your switch, see the HP StorageWorks Simple SAN Connection Manager User Guide. To install the Simple SAN Connection Manager software on your management station: 1. Follow the instructions in the Read Me First document to obtain the SSCM ISO image. 2. Open the ISO image file with CD creation software. 3. Create an SSCM installation CD. 4. Insert the installation CD into the CD-ROM drive of the server. The HP Installation Wizard starts automatically, and the initial installation window opens. (If the installer does not start automatically, run Setup.exe from the installation CD.) 5. Click Next. The End User License Agreement (EULA) appears. 6. Read the text of the HP EULA, and then click Agree to start the software installation or click Disagree to cancel the installation. The installation options window (Figure 2) opens. Figure 2 Installation wizard: options (Management Installation selected) 7. To install all components required for a management station with EVA storage, MSA storage, or both, select the Management Installation option. In addition, you can select one or both of the following optional components: • HP SAN Designer provides quick and easy ways to design SANs based on your specific performance, cost, and future storage needs. The tool generates a SAN topology diagram, a detailed list of required SAN components, as well as recommendations for planning your future growth requirements. • HP SAN Visibility is a SAN data analysis tool that securely analyzes your SAN configuration, providing an automated inventory process for switches, HBAs, and storage systems, including firmware version verification. 8. Click Install. The installation progress window appears briefly, and then the Available Storage Subsystem dialog box (Figure 3) prompts you to select the type of HP storage subsystem for this station. Figure 3 Available Storage Subsystem dialog box Page 3
-
 1
1 -
 2
2 -
 3
3 -
 4
4 -
 5
5
 |
 |
