HP 8/20q HP StorageWorks 8/20q and SN6000 Fibre Channel Switch Quick Start Ins - Page 5
Switch management using QuickTools - default ip
 |
View all HP 8/20q manuals
Add to My Manuals
Save this manual to your list of manuals |
Page 5 highlights
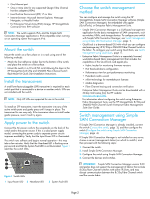
1. To launch the application, choose one of the following options: • Click Start, point to All Programs > Hewlett-Packard > HP StorageWorks Simple SAN Connection Manager, and then click HP StorageWorks Simple SAN Connection Manager. • Double-click the desktop shortcut • To access a help topic related to a specific window or dialog box, click the Help button on that window or press the F1 key. Connect the devices and switches Connect the Fibre Channel cables between the installed transceivers and the corresponding devices and switches. Each port autonegotiates the proper port type with the connected device or switch. 2. The New Switch Setup wizard (Figure 7) guides you through setting the switch IP address, administrator password, and default zoning. For details, see the "Getting started" section of the HP StorageWorks Simple SAN Connection Manager User Guide at www.hp.com/go/sn6000 or www.hp.com/go/8Gb-SSC. Switch management using QuickTools To use the QuickTools web applet to manage your switch: 1. Obtain the IP configuration from your network administrator. 2. Connect the switch Ethernet port to the workstation you use to access the switch in one of the following ways: • Connect directly to the workstation using an Ethernet crossover cable. • Connect indirectly to the workstation using an Ethernet straight cable through an Ethernet switch or hub. IMPORTANT: The default IP address of a new switch is 10.0.0.1. Ensure that your workstation is configured to communicate with the 10.0.0 subnet. Figure 7 New Switch Setup dialog box Figure 8 shows an example of the main window for Simple SAN Connection Manager. Figure 8 Simple SAN Connection Manager main window For assistance with this software, see the HP StorageWorks Simple SAN Connection Manager User Guide at www.hp.com/go/sn6000 or www.hp.com/go/8Gb-SSC. In addition, while using HP StorageWorks Simple SAN Connection Manager, you can access the help system by either of the following methods: • On the Help menu, click Contents. 3. To start the QuickTools web applet, open an Internet browser and enter the default IP address, 10.0.0.1. 4. Log in to the switch using the default user name (admin) and password (password). 5. To set the switch date and time: a. On the Switch menu, select Set Date/Time. b. In the Switch Date/Time dialog box, enter the year, month, day, time, and time zone. c. Click OK. The new date and time take effect immediately. 6. To set the switch properties: a. On the Switch menu, select Switch Properties. b. In the Switch Properties dialog box, enter a unique domain ID either in decimal (left field) or hexadecimal (right field). c. To prevent the domain ID from changing, select the Domain ID lock check box. d. Click OK. 7. To set the network properties: a. On the Switch menu, select Network Properties. b. Enter the IP address, subnet address, and gateway you obtained from your administrator in step 1. c. Click OK. The QuickTools session terminates. 8. If necessary, restore your workstation IP configuration to the original IP address. 9. To log in to the switch: a. Enter the new IP address in the browser address field. b. Enter the user name (admin) and password (password). 10. Connect the Fibre Channel cables between the installed transceivers and the corresponding devices and switches. Each port autonegotiates the proper port type with the connected device or switch. Page 5
-
 1
1 -
 2
2 -
 3
3 -
 4
4 -
 5
5
 |
 |
