HP 8/20q HP StorageWorks 8/20q and SN6000 Fibre Channel Switch Quick Start Ins - Page 4
Con the switch using Simple SAN, Connection Manager
 |
View all HP 8/20q manuals
Add to My Manuals
Save this manual to your list of manuals |
Page 4 highlights
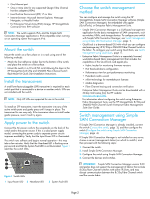
9. Select one or more storage subsystem types (EVA or MSA) that exist in your SAN by choosing Yes from the drop-down menu for the appropriate subsystem types. Then, click OK to close this dialog box and continue the installation. The progress window monitors the installation. A progress bar shows the percent of the installation completed and icons show the status of each component as it is installed; for example: • A icon indicates successful installation of the component. • A icon indicates a component that has not been installed or that was skipped because there is a later version of the component in the system. • A icon indicates that an error occurred during installation of this component. The final wizard window provides additional information about component installation errors. When the first component, the HP FC Driver, is installed, a diagnostic window (Figure 4) shows the HBA properties and targets found. Figure 4 Installation wizard: SAN diagnostic 10.Click OK to close the SAN diagnostic window and continue the installation, or click Cancel to stop the installation. If the Simple SAN Connection Manager software component is installed on a system with EVA storage, the Add EVA Management Account dialog box (Figure 5) prompts you to either select an existing user account or to create a user account to manage your EVA. 11. Before installation can proceed, you must add a user account to the HP Storage Admin user group. (This step is not necessary for MSA storage.) Choose one of the following options: • If you do not already have any user accounts set up, create a user account now by completing the User name, Password, and Confirm Password boxes. Then click Create User and Add to Group. • If you already have one or more user accounts set up (for example, you may have set up accounts when you installed your EVA), select one to add to the HP Storage Admin group. Then click Add To Group. When prompted, enter a password for the existing user account, and then click OK. The selected user is added to the HP Storage Admin group and the Add EVA Management Account dialog box closes. The message Your installation is complete appears. If any software components fail to install, the final installation window lists those components. 12.Click the View Error Log link to open an error log that provides additional information. You may be prompted to upgrade, add, or modify components for successful installation. 13.Remove the SSCM installation CD, and then click Reboot. 14.Restart your computer to complete the installation process. 15.When you restart your computer, the system may report finding new hardware. Respond to these messages by clicking Cancel. 16.The Enable VCEM Discovery dialog box (Figure 6) enables you to choose to view your blade enclosures in the topology if you have a configured VCEM server. Choose one of the following options: • Select the Enable VCEM Discovery check box, enter the VCEM server username, password, IP address, and then click Set. • Click Skip to leave VCEM discovery disabled and continue. Figure 5 Add EVA Management Account dialog box Figure 6 Enable VCEM Server Enclosure Discovery Configure the switch using Simple SAN Connection Manager When you first start or restart the Simple SAN Connection Manager software and it discovers a new unconfigured switch, the software prompts you to set the switch IP address, administrator password, and default zoning. Page 4
-
 1
1 -
 2
2 -
 3
3 -
 4
4 -
 5
5
 |
 |
