HP C5280 Setup Guide
HP C5280 - Photosmart All-in-One Color Inkjet Manual
 |
UPC - 883585060276
View all HP C5280 manuals
Add to My Manuals
Save this manual to your list of manuals |
HP C5280 manual content summary:
- HP C5280 | Setup Guide - Page 1
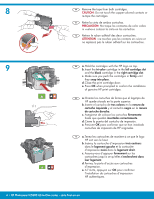
EN WARNING: To ensure that the software is installed correctly, do not connect the USB cable until step 14. ES ATENCIÓN: Para asegurarse de que el software se ha instalado correctamente, no positionner l'écran pour améliorer l'affichage. HP Photosmart C5200 All-in-One series - série Tout-en-un - HP C5280 | Setup Guide - Page 2
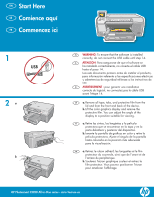
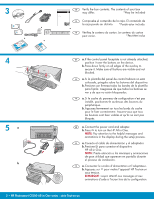
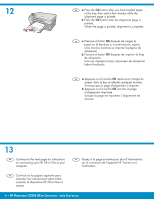
HP Photosmart C5200 All-in-One series Basics Guide a. Si le cache du panneau de configuration n'est pas installé, positionnez-le au-dessus des boutons du périphérique. b. adapter. b. Press to turn on the HP All-in-One. NOTE: Pay attention to the helpful messages and animations in the display during - HP C5280 | Setup Guide - Page 3
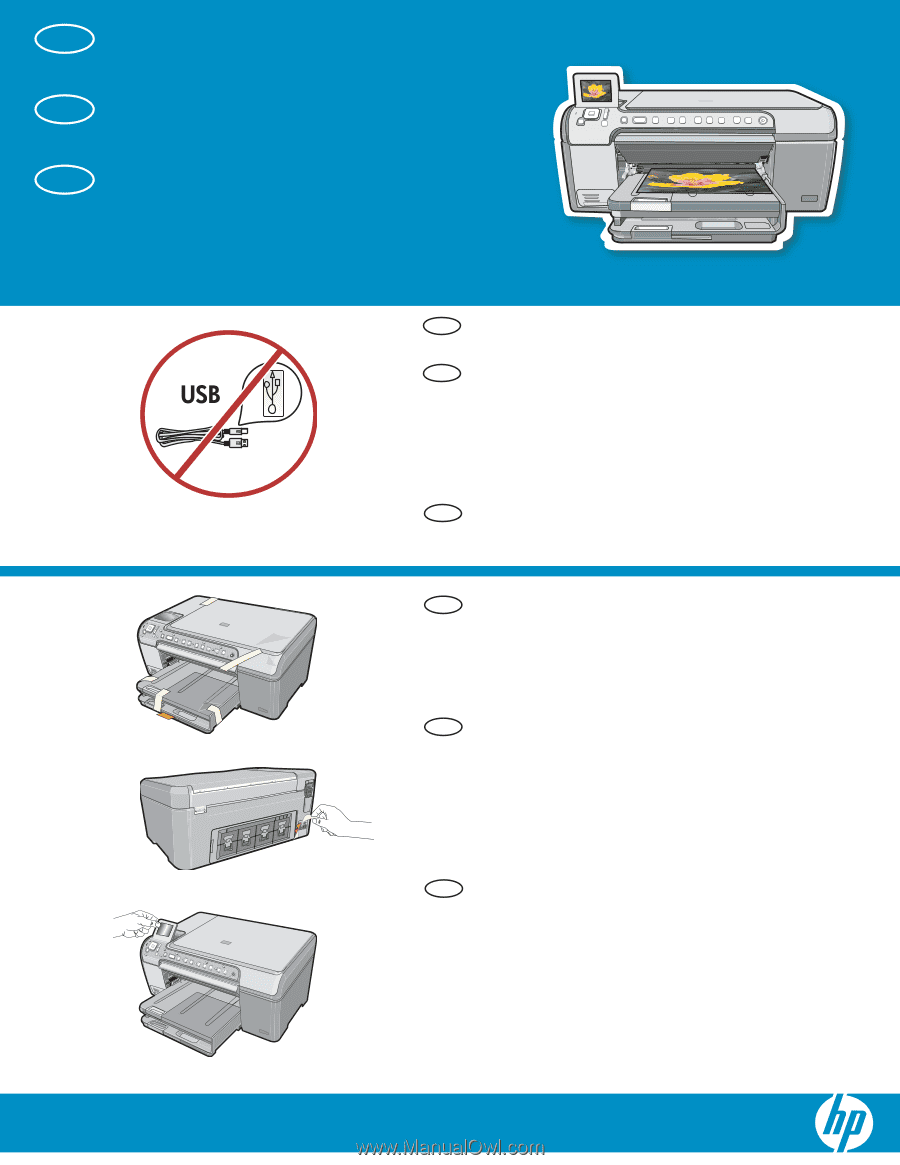
, press OK and confirm. • If a prompt appears asking to install print cartridges, go to the next step in this guide. ES Realice una de las acciones siguientes: • Si aparece un mensaje por d'impression, le périphérique doit être allumé. HP Photosmart C5200 All-in-One series - série Tout-en-un • 3 - HP C5280 | Setup Guide - Page 4
cartridges with the HP logo on top. b. Insert the tri-color cartridge in the left cartridge slot and the black cartridge in the right cartridge slot. c. Make sure you push the cartridges firmer l'installation de cartouches d'impression HP authentiques. 4 • HP Photosmart C5200 All-in-One series - sé - HP C5280 | Setup Guide - Page 5
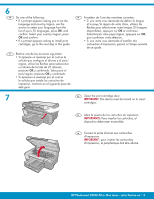
. b. Chargez le papier photo côté brillant vers le bas dans le bac photo. Placez les guides du papier contre le papier photo. c. Abaissez le capot du bac photo. d. Tirez l'extension du bac et soulevez le bac de récupération de papier. HP Photosmart C5200 All-in-One series - série Tout-en-un • 5 - HP C5280 | Setup Guide - Page 6
to the next page for instructions on connecting your HP All-in-One to your computer. FR Passez HP Tout-en-un à l'ordinateur. ES Continúe en la página siguiente para consultar las instrucciones sobre cómo conectar el dispositivo HP All-in-One al equipo. 6 • HP Photosmart C5200 All-in-One series - HP C5280 | Setup Guide - Page 7
a cualquier puerto USB del equipo. FR IMPORTANT : achetez un câble USB séparément si aucun n'est inclus. Mac : connectez le câble USB au port situé à l'arrière de l'appareil HP Tout-en-un, puis à n'importe quel port USB de l'ordinateur. HP Photosmart C5200 All-in-One series - série Tout-en-un • 7 - HP C5280 | Setup Guide - Page 8
sur l'icône du CD HP Photosmart du bureau. c. Double-cliquez sur l'icône HP All-in-One Installer. Suivez les instructions affichées à l'écran. 15 Windows: EN Follow the onscreen instructions to complete the EN software installation. Now explore your HP All-in-One. ES Siga las instrucciones que - HP C5280 | Setup Guide - Page 9
HP Photosmart software program is installed on your computer, you can try out one of the features on the HP All-in-One. ES Una vez instalado el programa de software HP Photosmart mémoire de l'appareil photo dans l'emplacement approprié. HP Photosmart C5200 All-in-One series -série Tout-en-un • 9 - HP C5280 | Setup Guide - Page 10
8/59 Press to browse, OK to zoom View Photos 8/59 ES c. Cuando aparece el menú Photosmart Express en la pantalla de gráficos en color, presione OK para seleccionar Ver. d. Presione las 4x6 Borderless Press OK to print, for pages 10 • HP Photosmart C5200 All-in-One series - série Tout-en-un - HP C5280 | Setup Guide - Page 11
14. FR Problème : (Windows) l'écran Microsoft Ajout de matériel s'affiche. Action : cliquez sur Annuler sur tous les écrans affichés. Débranchez le câble USB, puis introduisez le CD-ROM vert du logiciel HP Tout-en-un. Reportez-vous à l'étape 14. HP Photosmart C5200 All-in-One series - série Tout-en-un - HP C5280 | Setup Guide - Page 12
hp.com/support EN Problem: (Windows only) You did not see the screen prompting you to connect the USB cable. Action: Cancel all screens. Remove, and then re-insert the green HP All-in-One CD. Refer to Step 14. ES Problema: (Sólo en Windows -90001* HP PhQo8to3s3m0-a9r0t0C051200 All-in-One series •12
-
 1
1 -
 2
2 -
 3
3 -
 4
4 -
 5
5 -
 6
6 -
 7
7 -
8
-
9
-
10
-
11
-
12
 |
 |
HP Photosmart C5200 All-in-One series - série Tout-en-un
2
1
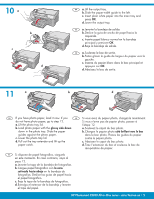
Retirez le ruban adhésif, les languettes et le
fi
lm
protecteur du couvercle, ainsi que de l’avant et de
l’arrière du périphérique.
Soulevez l’écran graphique couleur et retirez le
fi
lm protecteur. Vous pouvez positionner l’écran
pour améliorer l’af
fi
chage.
a.
b.
Commencez ici
Comience aquí
Retire las cintas, las lengüetas y la película
protectora que se encuentran en la tapa y en la
parte delantera y posterior del dispositivo.
Levante la pantalla de grá
fi
cos en color y retire la
película protectora. Ajuste el ángulo de la pantalla
hasta colocarla en la posición más adecuada
para la visualización.
a.
b.
Start Here
Remove all tape, tabs, and protective
fi
lm from the
lid and from the front and back of the device.
Lift the color graphics display and remove the
protective
fi
lm. You can adjust the angle of the
display to a position suitable for viewing.
a.
b.
a
b
FR
FR
EN
EN
ES
ES
AVERTISSEMENT :
pour garantir une installation
correcte du logiciel, ne connectez pas le câble USB
avant l’étape 14.
ha instalado correctamente, no conecte el cable USB
hasta el paso 14.
WARNING:
To ensure that the software is installed
correctly, do not connect the USB cable until step 14.
FR
EN
ES
ATENCIÓN:
Para asegurarse de que el software se
Lea este documento primero antes de instalar el producto,
para información referente a las especificaciones eléctricas
de seguridad refiérase a los instructivos de
uso.
y advertencias