HP E27k User Guide - Page 12
Rear components, Refer to the illustration that best matches your monitor.
 |
View all HP E27k manuals
Add to My Manuals
Save this manual to your list of manuals |
Page 12 highlights
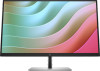
Table 1-4 Front components and their descriptions (curved model) Component Description (1) Ambient light sensor Adjusts the display brightness according to lighting conditions in the environment. (2) Power button Turns the monitor on or off. NOTE: When applicable HP products are connected to the USB Type-C port, pressing the power button on the display turns on/off your notebook, or puts it to sleep based on your power setting. (3) Power LED Indicates that the monitor is powered on. Rear components To identify the components on the rear of the monitors, use these illustrations and tables. NOTE: Refer to the illustration that best matches your monitor. Table 1-5 Rear components and their descriptions (FHD and QHD models) Component Description (1) Joypad Press to open the OSD settings. (2) Security cable slot Connects an optional security cable. (3) Power connector Connects a power cord. (4) HDMI port Connects the HDMI cable to a source device such as a computer. (5) DisplayPort Connects a DisplayPort cable to a source device such as a computer. (6) USB Type-C port (upstream) Connects a USB Type-C cable to a source device, such as a computer. This USB Type-C port can function as a DisplayPort audio/video input or as a USB 3.0 connection. The USB Type-C port offers a faster transfer rate, and the alternate mode with DP1.2 supports the maximum resolution of 1920 × 1080 @75 Hz (FHD model) or 2560 × 1440 @75 Hz (QHD model). It can also be used to deliver up to 65 W of power to a device. Power delivery outputs are 20V/3.25 A, 15V/4.33 A, 12V/5 A, 9V/3 A, 5V/3 A to achieve a 65 W output. Connecting a USB Type-C cable from a source device to this port on the monitor enables USB ports on the monitor. 6 Chapter 1 Getting started
-
 1
1 -
2
-
3
-
4
-
5
-
6
-
 7
7 -
 8
8 -
 9
9 -
 10
10 -
 11
11 -
 12
12 -
 13
13 -
 14
14 -
 15
15 -
 16
16 -
 17
17 -
18
-
19
-
20
-
21
-
22
-
23
-
24
-
25
-
26
-
27
-
28
-
29
-
30
-
31
-
32
-
33
-
34
-
35
-
36
-
37
-
38
-
39
-
40
-
41
-
42
-
43
-
44
-
45
-
46
-
47
-
48
-
49
-
50
-
51
-
52
-
53
-
54
-
55
-
56
-
57
-
58
-
59
-
60
-
61
-
62
-
63
-
64
-
65
-
66
-
67
-
68
-
69
-
70
-
71
-
72
 |
 |
