HP ENVY 700-000 Upgrading and Servicing Guide - Page 21
Upgrading or Replacing an Add-in Card, On the back of the computer, locate the screw
 |
View all HP ENVY 700-000 manuals
Add to My Manuals
Save this manual to your list of manuals |
Page 21 highlights
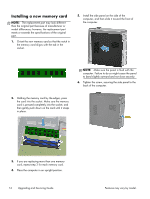
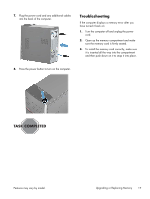
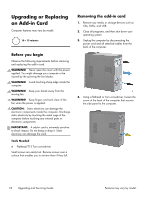
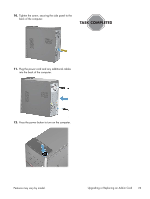
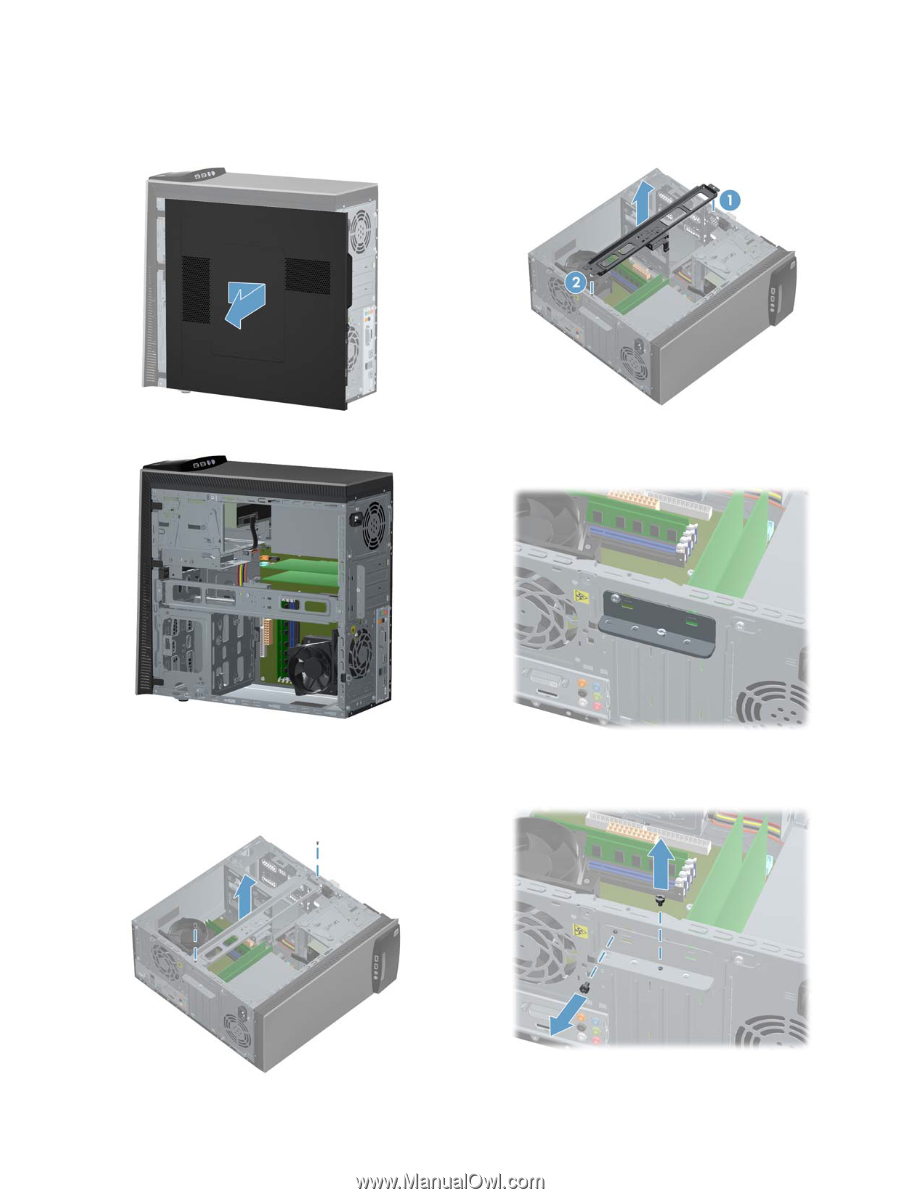
5. Slide the side panel toward the back of the computer, and then pull the side panel away from the computer. 8. Lift the retaining bar at the front of the computer (1), and then remove it from the back of the computer (2). The inside of the computer is exposed. 9. On the back of the computer, locate the screw holding the bracket in place. 6. Lay the computer on a flat surface. 7. Remove the two screws holding the retaining bar in place. 10. Remove the screw that secures the bracket to the computer. Features may vary by model. Upgrading or Replacing an Add-in Card 19
-
 1
1 -
2
-
3
-
4
-
5
-
6
-
7
-
8
-
9
-
10
-
11
-
12
-
13
-
14
-
15
-
 16
16 -
 17
17 -
 18
18 -
 19
19 -
 20
20 -
 21
21 -
 22
22 -
 23
23 -
 24
24 -
 25
25
 |
 |
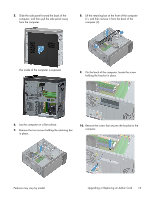
5.
Slide the side panel toward the back of the
computer, and then pull the side panel away
from the computer.
The inside of the computer is exposed.
6.
Lay the computer on a flat surface.
7.
Remove the two screws holding the retaining bar
in place.
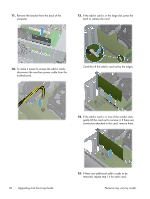
8.
Lift the retaining bar at the front of the computer
(1), and then remove it from the back of the
computer (2).
9.
On the back of the computer, locate the screw
holding the bracket in place.
10.
Remove the screw that secures the bracket to the
computer.
Features may vary by model.
Upgrading or Replacing an Add-in Card
19