HP Engage Go 13.5 User Guide
HP Engage Go 13.5 Manual
 |
View all HP Engage Go 13.5 manuals
Add to My Manuals
Save this manual to your list of manuals |
HP Engage Go 13.5 manual content summary:
- HP Engage Go 13.5 | User Guide - Page 1
User Guide SUMMARY This guide provides information about components, network connection, power management, security, backing up, and more. - HP Engage Go 13.5 | User Guide - Page 2
back to S Mode. Learn more at Windows.com/SmodeFAQ. To access the latest user guides, go to http://www.hp.com/support, and follow the instructions to find your product. Then select Manuals. Software terms By installing, copying, downloading, or otherwise using any software product preinstalled on - HP Engage Go 13.5 | User Guide - Page 3
About this guide This guide provides basic information for using and upgrading this product. WARNING! Indicates a hazardous situation that, if not avoided, could result in serious injury or death. CAUTION: - HP Engage Go 13.5 | User Guide - Page 4
Table of contents 1 Locating HP resources ...1 Product information ...1 Support ...1 Product documentation...2 Product diagnostics system column 12 3 Hardware setup...13 Tools needed...13 Warnings and cautions ...13 Locking and releasing the mobile head unit ...13 Attaching the mobile head unit to - HP Engage Go 13.5 | User Guide - Page 5
Finding the best assistive technology...34 Assessing your needs ...34 Accessibility for HP products...34 Standards and legislation...35 Standards...35 Mandate 376 - EN 301 ...36 Educational institutions ...36 Other disability resources ...36 HP links ...37 Contacting support ...37 Index ...38 v - HP Engage Go 13.5 | User Guide - Page 6
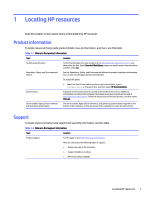
Location Technical specifications To find the QuickSpecs for your product, go to http://www.hp.com/go/quickspecs, and then select the link. Select Search all and Service Guide on the web at http://www.hp.com/support. Follow the instructions to find your product, and then select Manuals. - HP Engage Go 13.5 | User Guide - Page 7
the latest online documentation, go to http://www.hp.com/support and follow the instructions to find your product. Then select Manuals. The documentation includes this user guide and the Maintenance and Service Guide. Product notifications Subscriber's Choice is an HP program that allows you to - HP Engage Go 13.5 | User Guide - Page 8
and Service Guide at http://www.hp.com/support. Follow the instructions to find your product, and then select Manuals. Product updates To locate resources that provide product updates, use this table. Table 1-5 Where to find product updates Topic Location Driver and BIOS updates Go to - HP Engage Go 13.5 | User Guide - Page 9
system with grip The HP Engage Go 10 is designed for long-term deployment within general retail, hospitality, and other markets. It includes the following features: ● Integrated connecting form factor available in mobile and connecting systems, both with a grip. ● 34.3 cm (13 - HP Engage Go 13.5 | User Guide - Page 10
● Major integrated peripherals: - Barcode scanner with integrated audio/video feedback and trigger button (configurable as upward facing or downward facing) - Optional fingerprint reader - NFC authentication - Optional contactless payment card scanner (available in the US only) - Multicharge (only - HP Engage Go 13.5 | User Guide - Page 11
up button 8 Volume down button 9 SIM card slot (optional) 10 Charging LED 11 USB Type-C ports (2) 12 Fingerprint reader (optional) 13 Barcode scanner button (optional) 14 Contactless payment card scanner (optional)** 15 Microphones (2) 16 Downward-facing laser barcode scanner* (optional) 17 Docking - HP Engage Go 13.5 | User Guide - Page 12
use this illustration and table. NOTE: The integrated devices shown are optional. Table 2-2 Identifying the integrated features Features 1 34.3 cm (13.5 in), 1800 × 1200, high definition display 2 Docking release button 3 I/O connectivity base 4 Mobile case 5 Biometric fingerprint reader (optional - HP Engage Go 13.5 | User Guide - Page 13
Basic I/O connectivity base components To identify the basic I/O connectivity base features, use this illustration and table. Table 2-3 Identifying the basic I/O connectivity base features Features 1 RJ-11 (modem) jack 7 USB Type-C port 2 Power connector 8 RJ-45 (network) jack 3 USB Type-C® - HP Engage Go 13.5 | User Guide - Page 14
Multicharger components You can charge up to four mobile head units in the multicharger. To identify charger features, use this illustration and table. NOTE: You can use the multicharger only with grip models, whether mobile or convertible systems. Table 2-5 Identifying the multicharger features - HP Engage Go 13.5 | User Guide - Page 15
Locating the mobile system power button The computer power button is located on the top-right edge of the bezel. Locating the I/O connectivity base power button The power button is located on the underside of the I/O connectivity base. The head unit controls the I/O connectivity base. When the head - HP Engage Go 13.5 | User Guide - Page 16
number and a product ID number that are located on the exterior of the computer. Keep these numbers available when you contact customer service for assistance. I/O connectivity base serial number location Each I/O connectivity base has a unique serial number and a product ID number that is located - HP Engage Go 13.5 | User Guide - Page 17
system column You can secure the I/O connectivity base to a fixed object with an optional security cable and an optional security cable lock available from HP. NOTE: The security cable lock and security cable are sold separately as an aftermarket option kit only. 1. Remove the screw from the bottom - HP Engage Go 13.5 | User Guide - Page 18
all of the applicable instructions, cautions, and warnings in this guide. WARNING! To reduce of serious injury, read the Safety & Comfort Guide. It describes proper workstation setup and provides guidelines This guide is located on the web at http://www.hp.com/ergo HP SureLock wizard. Hardware setup - HP Engage Go 13.5 | User Guide - Page 19
. NOTE: Your system might require a PIN to unlock the mobile head unit from the dock. See Locking and releasing the mobile head unit on page 13. To remove the mobile head unit from the dock: 14 Chapter 3 Hardware setup - HP Engage Go 13.5 | User Guide - Page 20
■ Press the lock release button (1) on the front of the dock's column, and then lift the mobile head unit (2) off the dock. Attaching an I/O connectivity base to the mobile system You can attach an I/O connectivity base to the bottom of the stand. To attach an I/O connectivity base: 1. Turn off the - HP Engage Go 13.5 | User Guide - Page 21
4. Connect the USB Type-C power cord to the USB Type-C port on the underside of the stand column. 5. Place the I/O connectivity base onto the bottom of the stand (1), and then tighten the four screws on the underside of the I/O connectivity base (2) to secure the I/O connectivity base to the dock. - HP Engage Go 13.5 | User Guide - Page 22
6. To connect and secure the USB Type-C power cable, attach the cable clip to the cable (1), insert the cable tie into the hole (2) below the USB Type-C port on the I/O connectivity base, and then slide the cable clip onto the cable tie and connect the cable to the port (3). 7. Connect the AC - HP Engage Go 13.5 | User Guide - Page 23
ports or powered serial ports. Some devices use a powered serial port. If the serial port is configured as a powered port, devices that support a powered serial interface do not require an external power source. IMPORTANT: The system must be turned off before connecting or disconnecting serial port - HP Engage Go 13.5 | User Guide - Page 24
4. Adjust the voltage select switch behind each serial port to the setting that you want. 5. Place the bottom plate onto the I/O connectivity base (1), and then secure the plate to the I/O connectivity base with the five screws (2). 6. Reconnect the I/O connectivity base power cord and peripheral - HP Engage Go 13.5 | User Guide - Page 25
2. Slide the payment bump side of the mobile head unit into the case (1), rotate the unit down into the case (2), and then securely snap the lip of the case around the unit (3). 3. If your mobile head unit includes a fingerprint reader, remove the fingerprint reader insert from the case. Attaching - HP Engage Go 13.5 | User Guide - Page 26
Mounting the mobile system to a countertop You can use an optional countertop mounting bracket to mount the computer head unit and column to a countertop. NOTE: The mounting bracket requires an 80 mm (3 in) hole in the countertop. The thickness of the countertop must be 10 mm (0.4 in) to 50 mm (2 in - HP Engage Go 13.5 | User Guide - Page 27
3. Hold the top piece of the mounting bracket against the bottom of the column, route the cables through the hole in the mounting surface, and then place the column over the hole on the mounting surface. 4. The bottom piece of the mounting bracket can be oriented in two ways, depending on the - HP Engage Go 13.5 | User Guide - Page 28
Connecting a standalone optional fingerprint reader to the I/O connectivity base You can use the optional fingerprint reader as a standalone device, or you can attach it to the I/O connectivity base. To connect a standalone optional fingerprint reader to the I/O connectivity base: 1. Turn off the - HP Engage Go 13.5 | User Guide - Page 29
Attaching an optional fingerprint reader to the I/O connectivity base You can use the optional fingerprint reader as a standalone device, or you can attach it to the I/O connectivity base. To connect an optional fingerprint reader to the I/O connectivity base. NOTE: You can attach the fingerprint - HP Engage Go 13.5 | User Guide - Page 30
and then attach the bracket on the fingerprint reader assembly to the underside of the I/O connectivity base (4) using the screw that was removed from the base and the short screw included in the kit. 5. Connect the fingerprint reader cable to a USB Type-A port on the I/O connectivity base. 6. - HP Engage Go 13.5 | User Guide - Page 31
Use these sections to update the mobile system. Downloading HP Firmware Installer Use these steps to download the firmware installation app. 1. Go to http://www.hp.com/support. 2. Select Software and Drivers, and follow the on-screen instructions to find your docking station. 3. Follow the on-screen - HP Engage Go 13.5 | User Guide - Page 32
available, select which updates to install, and then select Install. TIP: You must be connected to the internet for new updates to download to HP Firmware Installer. 4. Select one of the following options: ● Shut down now: Installs the update immediately. NOTE: You might see the display flicker and - HP Engage Go 13.5 | User Guide - Page 33
routine care, and shipping preparation Follow these guidelines to ensure the best performance and useful life of your computer. Operating guidelines and routine care HP has developed guidelines to help you properly set up and care for the computer and monitor. ● Keep the computer away from excessive - HP Engage Go 13.5 | User Guide - Page 34
gently with the moistened cloth. IMPORTANT: Keep liquids away from the product. Avoid getting moisture in any openings. If liquid makes its way inside your HP product, it can cause damage to the product. Do not spray liquids directly on the product. Do not use aerosol sprays, solvents, abrasives, or - HP Engage Go 13.5 | User Guide - Page 35
gently with the moistened cloth. IMPORTANT: Keep liquids away from the product. Avoid getting moisture in any openings. If liquid makes its way inside your HP product, it can cause damage to the product. Do not spray liquids directly on the product. Do not use aerosol sprays, solvents, abrasives, or - HP Engage Go 13.5 | User Guide - Page 36
can be powered from a standalone DC power source, it should be powered only with an AC adapter or a DC power source supplied and approved by HP for use with this computer. The computer can operate on DC power within the following specifications. The voltage and current for your computer is located - HP Engage Go 13.5 | User Guide - Page 37
IMPORTANT: To prevent damage to the computer, damage to a drive, or loss of information, observe these precautions: ● If removal or installation instructions direct you to unplug the computer, first be sure that it is properly grounded. ● Keep components in their electrostatic-safe containers until - HP Engage Go 13.5 | User Guide - Page 38
establishes seven key objectives to guide HP actions. All HP managers and employees are expected to support these objectives and their implementation in Support internal and external research and development that improves assistive technology relevant to HP products and services. ● Support and - HP Engage Go 13.5 | User Guide - Page 39
supports HP's accessibility goal of designing, producing, and marketing products and services HP Aging & Accessibility: Go to http://www.hp.com, type Accessibility in the search box. Select Office of Aging and Accessibility. ● HP computers: For Windows products, go to http://www.hp.com/support - HP Engage Go 13.5 | User Guide - Page 40
disabilities. These regulations are historically applicable to telecommunications products and services, PCs and printers with certain communications and video playback features, their associated user documentation, and their customer support. Standards The US Access Board created Section 508 of the - HP Engage Go 13.5 | User Guide - Page 41
exhaustive list. These organizations are provided for informational purposes only. HP assumes no responsibility for information or contacts you encounter on the internet. Listing on this page does not imply endorsement by HP. Organizations These organizations are a few of the many that provide - HP Engage Go 13.5 | User Guide - Page 42
that relates to disabilities and age-related limitations. HP comfort and safety guide HP public sector sales Contacting support HP offers technical support and assistance with accessibility options for customers with disabilities. NOTE: Support is in English only. ● Customers who are deaf - HP Engage Go 13.5 | User Guide - Page 43
to the I/O connectivity base 23 customer support, accessibility 37 D diagnostics 2 docking stand 7 documentation 2 downloading HP Firmware Installer 26 E electrostatic discharge 32 F features 8 firmware update 26 H hardware setup 13 HP Assistive Policy 33 HP resources 1 I input power 31 installing
-
 1
1 -
 2
2 -
 3
3 -
 4
4 -
 5
5 -
 6
6 -
 7
7 -
8
-
9
-
10
-
11
-
12
-
13
-
14
-
15
-
16
-
17
-
18
-
19
-
20
-
21
-
22
-
23
-
24
-
25
-
26
-
27
-
28
-
29
-
30
-
31
-
32
-
33
-
34
-
35
-
36
-
37
-
38
-
39
-
40
-
41
-
42
-
43
 |
 |

User Guide
SUMMARY
This guide provides information about components, network connection, power management, security, backing up,
and more.