HP HP-380467-003 InterVideo Home Theater Quick Start Guide - Page 67
Removing Files in RecordNow, Removing Files from a Recorded Data Disc, Archiving Files on a DVD or
 |
UPC - 846084030171
View all HP HP-380467-003 manuals
Add to My Manuals
Save this manual to your list of manuals |
Page 67 highlights
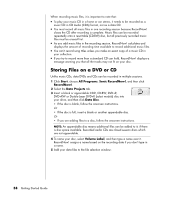
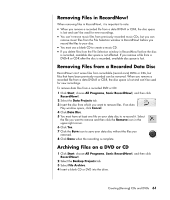
Removing Files in RecordNow! When removing files in RecordNow!, it is important to note: • When you remove a recorded file from a data DVD+R or CD-R, the disc space is lost and can't be used for new recordings. • You can't remove music files from previously recorded music CDs, but you can remove music files from the File Selection window in RecordNow! before you record the files to your disc. • You must use a blank CD to create a music CD. • If you delete files from the File Selection window in RecordNow! before the disc is recorded, available disc space is not affected. If you remove a file from a DVD+R or CD-R after the disc is recorded, available disc space is lost. Removing Files from a Recorded Data Disc RecordNow! can't erase files from recordable (record once) DVDs or CDs, but files that have been previously recorded can be removed. When you remove a recorded file from a data DVD+R or CD-R, the disc space is lost and can't be used for new recordings. To remove data files from a recorded DVD or CD: 1 Click Start, choose All Programs, Sonic RecordNow!, and then click RecordNow!. 2 Select the Data Projects tab. 3 Insert the disc from which you want to remove files. If an Auto Play window opens, click Cancel. 4 Click Data Disc. 5 You must have at least one file on your data disc to re-record it. Select the file you want to remove and then click the Remove icon in the upper-right corner. 6 Click Yes. 7 Click the Burn icon to save your data disc without the files you removed. 8 Click Done when the recording is complete. Archiving Files on a DVD or CD 1 Click Start, choose All Programs, Sonic RecordNow!, and then click RecordNow!. 2 Select the Backup Projects tab. 3 Select File Archive. 4 Insert a blank CD or DVD into the drive. Creating (Burning) CDs and DVDs 61
-
 1
1 -
2
-
3
-
4
-
5
-
6
-
7
-
8
-
9
-
10
-
11
-
12
-
13
-
14
-
15
-
16
-
17
-
18
-
19
-
20
-
21
-
22
-
23
-
24
-
25
-
26
-
27
-
28
-
29
-
30
-
31
-
32
-
33
-
34
-
35
-
36
-
37
-
38
-
39
-
40
-
41
-
42
-
43
-
44
-
45
-
46
-
47
-
48
-
49
-
50
-
51
-
52
-
53
-
54
-
55
-
56
-
57
-
58
-
59
-
60
-
61
-
 62
62 -
 63
63 -
 64
64 -
 65
65 -
 66
66 -
 67
67 -
 68
68 -
 69
69 -
 70
70 -
 71
71 -
 72
72 -
73
-
74
-
75
-
76
-
77
-
78
-
79
-
80
-
81
-
82
-
83
-
84
-
85
-
86
-
87
-
88
-
89
-
90
-
91
-
92
-
93
-
94
-
95
-
96
-
97
-
98
-
99
-
100
 |
 |
