HP LaserJet Enterprise MFP M635 User Guide - Page 138
Scan to network folder, Introduction, File Type and Resolution
 |
View all HP LaserJet Enterprise MFP M635 manuals
Add to My Manuals
Save this manual to your list of manuals |
Page 138 highlights
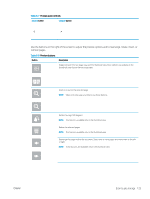
Scan to network folder Introduction The printer can scan a file and save it in a shared folder on the network. NOTE: Before you can scan to a network folder, your printer administrator or IT department must use the HP Embedded Web Server to enable the feature and configure the shared folders. Scan to network folder NOTE: You might be required to sign in to the printer to use this feature. 1. Place the document face-down on the scanner glass, or place it face-up in the document feeder and adjust the paper guides to fit the size of the document. 2. From the Home screen on the printer control panel, select Scan, and then select Scan to Network Folder. 3. Specify a folder destination. Folder options must first be configured by the printer administrator. ● To select a folder location that the administrator already set up, select Load under Quick Sets and Defaults, select the folder, and then select Load. ● To specify a new folder location, touch the Folder Paths field to open a touchscreen keyboard, type the path to the folder, and then select the Enter button. Enter user credentials if prompted and then select Save to save the path. NOTE: Use this format for the path: \\server\folder, where "server" is the name of the server that hosts the shared folder, and "folder" is the name of the shared folder. If the folder is nested inside other folders, complete all necessary segments of the path to reach the folder. For example: \ \server\folder\folder NOTE: The Folder Paths field might have a pre-defined path, and it might not be editable. In this situation, the administrator has configured this folder for common access. 4. Touch the File Name text field to open a touchscreen keyboard, type the name for the file, and then select the Enter button. 5. To configure settings, such as File Type and Resolution, Original Sides, and Content Orientation, select Options in the lower left corner, and then select the settings from the Options menus. Select Done for each setting if prompted. 6. Optional Preview: Touch the right pane of the screen to preview the document. You can use the Expand and Collapse buttons on the left side of the preview pane to expand and collapse the preview screen. Table 6-9 Preview pane controls Expand button Collapse button ENWW Scan to network folder 125
-
 1
1 -
2
-
3
-
4
-
5
-
6
-
7
-
8
-
9
-
10
-
11
-
12
-
13
-
14
-
15
-
16
-
17
-
18
-
19
-
20
-
21
-
22
-
23
-
24
-
25
-
26
-
27
-
28
-
29
-
30
-
31
-
32
-
33
-
34
-
35
-
36
-
37
-
38
-
39
-
40
-
41
-
42
-
43
-
44
-
45
-
46
-
47
-
48
-
49
-
50
-
51
-
52
-
53
-
54
-
55
-
56
-
57
-
58
-
59
-
60
-
61
-
62
-
63
-
64
-
65
-
66
-
67
-
68
-
69
-
70
-
71
-
72
-
73
-
74
-
75
-
76
-
77
-
78
-
79
-
80
-
81
-
82
-
83
-
84
-
85
-
86
-
87
-
88
-
89
-
90
-
91
-
92
-
93
-
94
-
95
-
96
-
97
-
98
-
99
-
100
-
101
-
102
-
103
-
104
-
105
-
106
-
107
-
108
-
109
-
110
-
111
-
112
-
113
-
114
-
115
-
116
-
117
-
118
-
119
-
120
-
121
-
122
-
123
-
124
-
125
-
126
-
127
-
128
-
129
-
130
-
131
-
132
-
 133
133 -
 134
134 -
 135
135 -
 136
136 -
 137
137 -
 138
138 -
 139
139 -
 140
140 -
 141
141 -
 142
142 -
 143
143 -
144
-
145
-
146
-
147
-
148
-
149
-
150
-
151
-
152
-
153
-
154
-
155
-
156
-
157
-
158
-
159
-
160
-
161
-
162
-
163
-
164
-
165
-
166
-
167
-
168
-
169
-
170
-
171
-
172
-
173
-
174
-
175
-
176
-
177
-
178
-
179
-
180
-
181
-
182
-
183
-
184
-
185
-
186
-
187
-
188
-
189
-
190
-
191
-
192
-
193
-
194
-
195
-
196
-
197
-
198
-
199
-
200
-
201
-
202
-
203
-
204
-
205
-
206
-
207
-
208
-
209
-
210
-
211
-
212
-
213
-
214
-
215
-
216
-
217
-
218
-
219
-
220
-
221
-
222
-
223
-
224
-
225
-
226
-
227
-
228
-
229
-
230
-
231
-
232
-
233
-
234
-
235
-
236
-
237
-
238
-
239
-
240
-
241
-
242
-
243
-
244
-
245
-
246
-
247
-
248
-
249
-
250
-
251
-
252
-
253
-
254
-
255
 |
 |
