HP LaserJet M2727 Service Manual
HP LaserJet M2727 - Multifunction Printer Manual
 |
View all HP LaserJet M2727 manuals
Add to My Manuals
Save this manual to your list of manuals |
HP LaserJet M2727 manual content summary:
- HP LaserJet M2727 | Service Manual - Page 1
HP LaserJet M2727 MFP Series Service Manual - HP LaserJet M2727 | Service Manual - Page 2
- HP LaserJet M2727 | Service Manual - Page 3
HP LaserJet M2727 MFP Series Service Manual - HP LaserJet M2727 | Service Manual - Page 4
not operate normally, see the online user guide. Refer all servicing questions to qualified personnel. Information regarding FCC Class B, Parts 15 and 68 requirements can be found in the user guide. Trademark credits Microsoft® and Windows® are U.S. registered trademarks of Microsoft Corporation - HP LaserJet M2727 | Service Manual - Page 5
systems 9 Supported printer drivers ...9 Software included with the product 9 Recommended installation for Windows 10 Express installation (USB or network 10 Macintosh software 10 Software for Windows ...12 HP ToolboxFX ...12 Embedded Web server (EWS 12 Software for Macintosh ...13 HP Director - HP LaserJet M2727 | Service Manual - Page 6
scan 26 HP policy on non-HP supplies 48 Reset the product for non-HP supplies 48 HP fraud hotline ...48 Clean the product ...49 Clean the exterior ...49 Clean the flatbed scanner glass 49 Clean the scanner-cover backing 51 Clean the tray 2 pickup roller 52 Clean the ADF pickup-roller assembly - HP LaserJet M2727 | Service Manual - Page 7
Print quality 64 Paper types 64 System setup 65 Service 65 Device Polling 65 Print settings ...65 Printing 65 PCL 5e 66 PostScript 66 Scanner and ADF functions and operation 72 Scanner functions ...72 Scanner operation ...73 ADF operation ...73 ADF paper path and ADF sensors 74 ADF - HP LaserJet M2727 | Service Manual - Page 8
Replace the ADF pickup-roller assembly 110 ADF scanner glass ...113 ADF assembly ...115 Scanner/ADF assembly ...117 Bezel and control panel ...119 Internal assemblies ...122 Convenience-stapler assembly (HP LaserJet M2727nfs only 122 Convenience-stapler power supply (HP LaserJet M2727nfs only 124 - HP LaserJet M2727 | Service Manual - Page 9
problems ...217 Fax problems ...218 General fax problem-solve 218 Problems receiving faxes 219 Problems sending faxes 222 Voice-call problems ...224 Media-handling problems 225 Performance problems ...226 Control-panel display problems ...227 Convenience-stapler problems (HP LaserJet M2727nfs - HP LaserJet M2727 | Service Manual - Page 10
...240 To view HP ToolboxFX 240 Troubleshooting tab 240 Service menu ...241 Restore the factory-set defaults 241 Clean the paper path 241 T.30 protocol trace 242 Archive print ...242 Firmware updates ...243 Firmware update by using a flash executable file 243 7 Parts Accessories and ordering - HP LaserJet M2727 | Service Manual - Page 11
2) ...268 Circuit diagram (2 of 2) ...268 Parts lists and diagrams ...270 Types of screws ...271 Scanner and ADF assemblies ...272 Scanner components ...274 ADF components ...276 Convenience stapler components (HP LaserJet M2727nfs only 278 Formatter, fax card, HP jewel, and nameplate 280 External - HP LaserJet M2727 | Service Manual - Page 12
program 329 Protecting the environment 329 Ozone production ...329 Power consumption ...329 Toner consumption ...329 Paper use ...329 Plastics ...329 HP LaserJet print supplies 329 Return and recycling instructions 330 United States and Puerto Rico 330 Multiple returns (two to eight cartridges - HP LaserJet M2727 | Service Manual - Page 13
List of tables Table 1-1 Product guides ...2 Table 1-2 Supported printer drivers ...9 Table 1-3 Supported paper and print media sizes 16 Table 1-4 Supported envelopes and postcards 17 Table 1-5 ADF ...17 Table 4-1 Sequence of operation ...70 Table 4-2 Power-on sequence ...71 Table 6-1 Alert and - HP LaserJet M2727 | Service Manual - Page 14
HP LaserJet M2727nfs only 279 Table 7-22 Formatter, Fax card, HP jewel, and nameplate 281 Table 7-23 External covers and panels ...283 Table 7-24 Cartridge door assembly assembly ...303 Table 7-34 Fuser assembly ...305 Table 7-35 Alphabetical parts list ...306 Table 7-36 Numerical parts list - HP LaserJet M2727 | Service Manual - Page 15
55 Figure 3-26 Clean the ADF pickup-roller assembly (4 of 5 56 Figure 3-27 Clean the ADF pickup-roller assembly (5 of 5 56 Figure 4-1 HP LaserJet M2727 MFP system block diagram 70 Figure 4-2 Optical system ...72 Figure 4-3 ADF paper path ...74 Figure 4-4 Cross-section of printer ...76 ENWW xiii - HP LaserJet M2727 | Service Manual - Page 16
Figure 5-2 Parts-removal tree ADF pickup-roller assembly (3 of 6 111 Figure 5-25 Replace the ADF pickup-roller assembly (4 of 6 111 Figure 5-26 Replace the ADF pickup-roller assembly (5 of 6 112 Figure 5-27 Replace the ADF pickup-roller assembly (6 of 6 112 Figure 5-28 Removing the ADF scanner - HP LaserJet M2727 | Service Manual - Page 17
the convenience-stapler power assembly (3 of 3 125 Remove the convenience-stapler AC inlet cable 126 Remove the convenience-stapler bracket and strap 127 Remove the speaker (1 of 2) ...128 Remove the speaker (2 of 2) ...129 Remove the power-switch PCA (HP LaserJet M2727nfs shown 130 Remove the - HP LaserJet M2727 | Service Manual - Page 18
Circuit diagram (2 of 2) ...269 Figure 7-12 Scanner and ADF assemblies ...272 Figure 7-13 Scanner assemblies ...274 Figure 7-14 ADF components ...276 Figure 7-15 Convenience stapler components (HP LaserJet M2727nfs only 278 Figure 7-16 Formatter, fax card, HP jewel, and nameplate 280 Figure 7-17 - HP LaserJet M2727 | Service Manual - Page 19
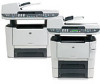
1 Product information ● Quick access to product information ● Product comparison ● Product features ● Product walkaround ● Serial number and model number location ● Software description ● Software for Windows ● Software for Macintosh ● Uninstall software ● Media specifications ENWW 1 - HP LaserJet M2727 | Service Manual - Page 20
● www.hp.com/support/LJM2727 Table 1-1 Product guides Guide Description HP LaserJet M2727 MFP Getting Provides step-by-step instructions for installing and setting up the product. Started Guide HP LaserJet M2727 MFP Series Provides detailed information for using the product and problem-solving - HP LaserJet M2727 | Service Manual - Page 21
. HP LaserJet M2727nf MFP HP LaserJet M2727nfs MFP ● Prints letter-size pages at speeds up to 27 pages per HP LaserJet M2727nf MFP, plus: minute (ppm) and A4-size pages at speeds up to 26 ppm. ● Additional 250-sheet input tray (tray 3) included. ● PCL 5 and PCL 6 printer drivers and HP - HP LaserJet M2727 | Service Manual - Page 22
bit full-color scanning from letter/A4- size scanner glass. ● The product provides 300 ppi, 24-bit full-color scanning from the automatic document feeder (ADF). ● Includes an ADF that allows faster, more efficient scan jobs with multiple-page documents. ● The HP LaserJet M2727nfs PCL 6 printer - HP LaserJet M2727 | Service Manual - Page 23
door latch 4 Top (face-down) output bin 5 Control panel 6 Automatic document feeder (ADF) input tray 7 Automatic document feeder (ADF) output bin 8 Convenience stapler (HP LaserJet M2727nfs only) 9 Power switch 10 Optional tray 3 (standard on the HP LaserJet M2727nfs MFP) ENWW Product walkaround 5 - HP LaserJet M2727 | Service Manual - Page 24
Back view 12 13 11 14 11 Power connector 12 Rear output door (face-up output bin for the straight-through output path) 13 DIMM door 14 Interface ports Interface ports The product has a 10/100 Base-T (RJ-45) network port, a Hi-Speed USB 2.0 port, and fax ports. 1 2 3 1 Hi-Speed USB 2.0 port - HP LaserJet M2727 | Service Manual - Page 25
options, determine the product status, and cancel the current job. 4 Copy controls. Use these controls to change commonly used default settings and to start copying. 5 Scan controls. Use these controls to scan to e-mail or to a folder. ENWW Product walkaround 7 - HP LaserJet M2727 | Service Manual - Page 26
Serial number and model number location The serial number and product model number label is on the rear output bin door at the back of the product. 8 Chapter 1 Product information ENWW - HP LaserJet M2727 | Service Manual - Page 27
operating systems The product supports the following operating systems: Full software installation Print and scan driver Printer driver only ● Windows XP (32-bit and 64-bit) ● Windows 98 ● Linux (Web only) ● Windows Vista (32-bit and 64-bit) ● Windows 2000 ● UNIX model scripts (Web only - HP LaserJet M2727 | Service Manual - Page 28
installation for Windows ● HP drivers ◦ PCL 6 printer driver ◦ Scan driver ● HP MFP software ◦ HP ToolboxFX ◦ HP LaserJet Scan program ◦ HP Send Fax program and driver ◦ HP Fax Setup Wizard ◦ Uninstall program ● HP Update program ● HP Customer Participation Program ● Shop for HP Supplies program - HP LaserJet M2727 | Service Manual - Page 29
◦ Scan to e-mail program ◦ HP Photosmart ENWW Software description 11 - HP LaserJet M2727 | Service Manual - Page 30
instructions, and see the Readme file for the latest software information. HP ToolboxFX Perform a typical installation in order to use HP ToolboxFX. HP ToolboxFX provides links to product status information and Help information, such as the user guide, and tools for product problem-solving. See HP - HP LaserJet M2727 | Service Manual - Page 31
ToolboxFX is not supported. HP Director HP Director is a software program for working with documents. When the document is loaded into the ADF and the computer is connected directly to the product, HP Director appears on the computer screen to initiate faxing, scanning, or changing settings on the - HP LaserJet M2727 | Service Manual - Page 32
PDEs (Mac OS X v10.3, v10.4, and later) PDEs are code plug-ins that provide access to product features, such as information about the number of copies, two-sided printing, and quality settings. An installation program for the PDEs and other software is provided on the product CD for Macintosh. 14 - HP LaserJet M2727 | Service Manual - Page 33
Start, point to Settings, and then click Control Panel. NOTE: In Windows XP, click Start, and then click Control panel. 2. Double-click Add or Remove Programs. 3. Scroll through the list of software programs and click HP LaserJet M2727. 4. Click Remove. Macintosh To remove the software, drag the PPD - HP LaserJet M2727 | Service Manual - Page 34
media sizes NOTE: See the user guide for information about using media correctly. This product supports a number of paper sizes, and it adapts to various media. NOTE: To obtain best print results, select the appropriate paper size and type in the print driver before printing. Use conventional 75 - HP LaserJet M2727 | Service Manual - Page 35
supported. Not supported. Not supported. Table 1-5 ADF Media Minimum-size Maximum-size Dimensions Weight 127 x 127 mm (5 x 5 inches) 60 to 90 gm2 (16 to 24 lb) 216 x 381 mm (8.5 x 15 inches) Capacity 50 sheets NOTE: When faxing, copying, or scanning using the product, use the flatbed scanner - HP LaserJet M2727 | Service Manual - Page 36
● Do not use any media that produces emissions, or that melts, offsets, or discolors when exposed to 200°C (392°F) for 0.1 second. To order HP LaserJet printing supplies, go to www.hp.com/go/ljsupplies in the U.S., or go to www.hp.com/go/ljsupplies worldwide. 18 Chapter 1 Product information ENWW - HP LaserJet M2727 | Service Manual - Page 37
2 Installation ● Operating environment ● Unpack the product ● Install input devices ● Install the control-panel faceplate ● Load paper and print media ● Install memory DIMMs ENWW 19 - HP LaserJet M2727 | Service Manual - Page 38
; operating) 10% to 80% relative humidity (no condensation) ● Humidity (printer; storage) 10% to 90% relative humidity (no condensation) ● Temperature (toner cartridge; storage) -20o to 40o C (-4 to 104o F) ● Humidity (toner cartridge; storage) 10% to 90% relative humidity (no condensation) Figure - HP LaserJet M2727 | Service Manual - Page 39
Minimum system requirements ● Windows OS (Win 98, Win 2000, 2003 Server, Millennium Edition (Me), XP, or Vista) or Mac OS X v10.3 and later ● 128 MB RAM for Windows operating systems ● 32 MB RAM for Macintosh operating systems ● 250 MB hard-disk space (full installation) ● CD-ROM drive ● USB port - HP LaserJet M2727 | Service Manual - Page 40
8 9 Description Automatic document feeder (ADF) input tray HP LaserJet M2727 MFP Power cord Fax cord Print cartridge Start guide and support flyer CD-ROMs (software and online user guide) 250-sheet media input tray (optional tray 3, standard on the HP LaserJet M2727nfs only) Control-panel faceplate - HP LaserJet M2727 | Service Manual - Page 41
Install input devices ADF input tray 1. Open the ADF cover. 2. Align the two tabs on the input tray with the grooves in the ADF. 3. Slide the tray into the grooves until the tray snaps into place. 4. Close the ADF cover. Figure 2-3 Install the ADF input tray ENWW Install input devices 23 - HP LaserJet M2727 | Service Manual - Page 42
tray (tray 3) in the location where the product will remain. The assembled combination is heavy, and cannot be easily moved. 1. Place the 250-sheet level surface. 2. Using the alignment pins at the corners of the tray as a guide place the product on top of the tray. 3. Make sure that the right-rear - HP LaserJet M2727 | Service Manual - Page 43
Install the control-panel faceplate NOTE: The control-panel faceplate might already be installed. 1. Lift the scanner cover. 2. Align the control-panel faceplate with the product. 3. Beginning in the center of the faceplate and working outward, press the faceplate until it snaps - HP LaserJet M2727 | Service Manual - Page 44
and print media Load documents to fax, copy, or scan NOTE: For the best-quality scans, use the flatbed scanner. To load originals onto the flatbed scanner 1. Make sure that the automatic document feeder (ADF) contains no media. 2. Lift the scanner cover. 3. Place the original document face-down on - HP LaserJet M2727 | Service Manual - Page 45
it does not move any farther. Figure 2-7 Load documents into the ADF (1 of 2) 2. Adjust the media guides until they are snug against the stack. Figure 2-8 Load documents into the ADF (2 of 2) 3. The document is ready to be faxed, copied, or scanned. Tray 1 Tray 1 is accessed from the front of the - HP LaserJet M2727 | Service Manual - Page 46
envelopes, ten transparencies, or ten cards. You can use tray 1 to print the first page on media different from the remainder of the document. Media guides ensure that the media is correctly fed into the product and that the print is not skewed (crooked on the media). When loading media, adjust - HP LaserJet M2727 | Service Manual - Page 47
trays When using one of the trays for a specific size of paper, you can set the default size for the tray in HP ToolboxFX or from the control panel. In HP ToolboxFX, select Paper handling, and then select the size for the tray you want to set. When you select that size - HP LaserJet M2727 | Service Manual - Page 48
The product comes with 64 MB of RAM and can be upgraded to 320 MB via the DIMM slot, which is accessible from the left side of the product. Install a memory DIMM CAUTION: Handling a DIMM without wearing a grounded, antistatic device might damage the DIMM. Touch any metal part of the product or - HP LaserJet M2727 | Service Manual - Page 49
4. With the gold contacts facing upward, insert the DIMM in the DIMM seat and press the DIMM body in until the metal retaining pins click. 5. Close the DIMM door. 6. Reconnect all cables and cords, and then use the power switch to turn on the product. 7. Print a configuration page, and then verify - HP LaserJet M2727 | Service Manual - Page 50
32 Chapter 2 Installation ENWW - HP LaserJet M2727 | Service Manual - Page 51
3 Maintenance ● Manage supplies ● Clean the product ● Manage the product ENWW 33 - HP LaserJet M2727 | Service Manual - Page 52
any parts that wear when servicing the product. Replace them as needed, based on failure or wear rather than usage. The following table lists approximate schedules for replacing consumables. Life expectancies of supplies and the product Item Capacity HP LaserJet M2727 MFP Series Print cartridge - HP LaserJet M2727 | Service Manual - Page 53
recycling free of charge. In 2004, HP Planet Partners for LaserJet Supplies was available in 85% of the world market where HP LaserJet supplies are sold. Postage-paid and pre-addressed labels are included within the instruction guide in most HP LaserJet print cartridge boxes. Labels and bulk boxes - HP LaserJet M2727 | Service Manual - Page 54
product is capable of using recycled papers, when the paper meets the guidelines outlined in the HP LaserJet Printer Family Print Media Guide, which you can view on the Web at www.hp.com/support/ ljpaperguide. This product is suitable for the use of recycled paper according to EN12281:2002. Material - HP LaserJet M2727 | Service Manual - Page 55
Replace print cartridge 1. Open the print-cartridge door. 2. Grasp the handle on the print cartridge and then pull the cartridge straight out to remove it. See the recycling information inside the print cartridge box. 3. Remove the new print cartridge from its packaging, remove the orange cover from - HP LaserJet M2727 | Service Manual - Page 56
5. Close the print-cartridge door. CAUTION: If toner gets on any clothing, wipe it off with a dry cloth and wash the clothing in cold water. Hot water sets toner into the fabric. 38 Chapter 3 Maintenance ENWW - HP LaserJet M2727 | Service Manual - Page 57
staples Each staple cassette holds 1,500 unformed staples. 1. Open the stapler door. NOTE: Opening the stapler door disables the stapler. Instructions and replacement staples part numbers are listed on the stapler door. 2. If you are replacing a staple cassette (for example, if the staple cassette - HP LaserJet M2727 | Service Manual - Page 58
on the work surface, with the front facing up. WARNING! When you move the product into this position, the scanner cover can open suddenly and be damaged. You must support the scanner cover to keep it from opening. Figure 3-1 Replace the tray 2 pickup roller (1 of 7) 40 Chapter 3 Maintenance ENWW - HP LaserJet M2727 | Service Manual - Page 59
-retaining collars up. TIP: Push down on the green tab to release and lower the duplex assembly to expose more of the roller. Figure 3-2 Replace the tray 2 pickup roller (2 of 7) 4. With the tab on the collar aligned with the slot in the plastic bracket, slide the collar to the right. Leave the - HP LaserJet M2727 | Service Manual - Page 60
left slot (callout 1), and then insert the right side shaft (the side with the notch) into the right slot (callout 2). Figure 3-5 Replace the tray 2 pickup roller (5 of 7) 7. Rotate the roller shaft until the notch engages with the drive shaft and clicks into place. 42 Chapter 3 Maintenance ENWW - HP LaserJet M2727 | Service Manual - Page 61
on the plastic bracket, slide the collar towards the pickup roller. Rotate the right and left retaining collars down into the locked position. Figure 3-7 Replace the tray 2 pickup roller (7 of 7) 10. Push up on the duplex assembly until it locks into place. Place the product upright on the work - HP LaserJet M2727 | Service Manual - Page 62
WARNING! When you move the product into this position, the scanner cover can open suddenly and be damaged. You must support the scanner cover to keep it from opening. 11. Perform the following tasks after completing this procedure. ● Replace the product on tray 3, if that tray was installed. ● - HP LaserJet M2727 | Service Manual - Page 63
Replace the tray 2 and optional tray 3 separation pad 1. Remove tray 2 or tray 3. Figure 3-8 Replace the tray 2 or tray 3 separation pad (1 of 6) 2. Locate the separation pad. Figure 3-9 Replace the tray 2 or tray 3 separation pad (2 of 6) ENWW Manage supplies 45 - HP LaserJet M2727 | Service Manual - Page 64
3. Remove two screws. Figure 3-10 Replace the tray 2 or tray 3 separation pad (3 of 6) 4. Remove the separation pad. CAUTION: Before you remove the separation pad, take note of how it is positioned in the tray. Figure 3-11 Replace the tray 2 or tray 3 separation pad (4 of 6) 46 Chapter 3 - HP LaserJet M2727 | Service Manual - Page 65
5. Install the replacement separation pad. Figure 3-12 Replace the tray 2 or tray 3 separation pad (5 of 6) 6. Replace the two screws, and then return the tray to the product. Figure 3-13 Replace the tray 2 or tray 3 separation pad (6 of 6) ENWW Manage supplies 47 - HP LaserJet M2727 | Service Manual - Page 66
help determine if the product is genuine and take steps to resolve the problem. The print cartridge might not be a genuine HP product if you notice the following issues: ● You are experiencing a large number of problems with the print cartridge. ● The print cartridge does not look like it usually - HP LaserJet M2727 | Service Manual - Page 67
, acetone, benzene, ammonia, ethyl alcohol, or carbon tetrachloride on any part of the product, as they can damage the product. Do not place liquids directly on the glass. They might seep under it and damage the product. Figure 3-14 Clean the scanner glass (1 of 2) ENWW Clean the product 49 - HP LaserJet M2727 | Service Manual - Page 68
3. Clean the ADF scanner glass by using a soft cloth or sponge that has been moistened with nonabrasive glass cleaner. Figure 3-15 Clean the scanner glass (2 of 2) 50 Chapter 3 Maintenance ENWW - HP LaserJet M2727 | Service Manual - Page 69
using a soft cloth or sponge that has been moistened with mild soap and warm water. Also, clean the ADF scanner glass (callout 1) next to the flatbed scanner glass. Figure 3-16 Clean the scanner-cover backing 1 3. Wash the backing gently to loosen debris; do not scrub the backing. 4. Dry the backing - HP LaserJet M2727 | Service Manual - Page 70
free cloth moistened with water. Figure 3-17 Clean the tray 2 pickup roller (1 of 6) 3. Use a dry lint-free cloth to wipe the roller and remove loosened dirt. Figure 3-18 Clean the tray 2 pickup roller (2 of 6) 4. Allow the roller to dry completely before you reinstall it. Figure 3-19 Clean the tray - HP LaserJet M2727 | Service Manual - Page 71
then insert the right side of the shaft (the side with the notch) into the right slot (callout 2). Figure 3-20 Clean the tray 2 pickup roller (4 of 6) 6. Rotate the roller shaft until the notch engages with the drive shaft and clicks into place. 7. Place the left retaining collar over the end of the - HP LaserJet M2727 | Service Manual - Page 72
roller (6 of 6) 9. Push up on the duplex assembly until it locks into place, and then place the product upright on the work surface with the top of the product facing up. WARNING! When you move the product into this position, the scanner cover can open suddenly and be damaged. You must support - HP LaserJet M2727 | Service Manual - Page 73
3-23 Clean the ADF pickup-roller assembly (1 of 5) 2. Open the ADF cover. Figure 3-24 Clean the ADF pickup-roller assembly (2 of 5) 3. Rotate the assembly upward. Wipe it clean and rotate the rollers until the assembly is clean. Figure 3-25 Clean the ADF pickup-roller assembly (3 of 5) ENWW Clean - HP LaserJet M2727 | Service Manual - Page 74
turn it on. Figure 3-27 Clean the ADF pickup-roller assembly (5 of 5) Clean the paper path During the printing process, paper, toner, and dust particles can accumulate inside the product. Over time, this buildup can cause print-quality problems such as toner specks or smearing. This product has - HP LaserJet M2727 | Service Manual - Page 75
is turned on and in the Ready state, and that media is loaded in tray 1 or tray 2. 2. Open HP ToolboxFX, click the product, and then click the System Settings tab. 3. Click the Service tab, and then click Start. A page feeds through the product slowly. Discard the page when the process is completed - HP LaserJet M2727 | Service Manual - Page 76
HP ToolboxFX. NOTE: The HP ToolboxFX is not supported for Windows 98 SE or Macintosh operating systems. To use the HP HP ToolboxFX icon. ● On the Windows Start menu, click Programs (or All Programs in Windows XP), click HP, click HP LaserJet M2727, and then click HP ToolboxFX. The HP problem toner - HP LaserJet M2727 | Service Manual - Page 77
it issues pop-up alerts when certain events occur. Events that trigger alerts include jams, low levels of toner in HP print cartridges, non-HP print cartridge in use, empty input trays, and specific error messages. Select the pop-up format, the tray icon format, or both for the alerts. The pop-up - HP LaserJet M2727 | Service Manual - Page 78
You must click Apply before changes take effect. Fax phone book Use the HP ToolboxFX Fax phone book to add and remove individuals or groups on a speed- . 4. When you have created a group, type a name in the Group name window, and then click OK. ● To edit an existing individual speed-dial entry: 1. - HP LaserJet M2727 | Service Manual - Page 79
● To edit an existing group speed-dial entry: 1. Click anywhere on the row containing the group name to select it, and then click New/Edit Group. 2. Make any required changes, and then click OK. You can make changes to the name of the group directly in the phone book directory list by clicking the - HP LaserJet M2727 | Service Manual - Page 80
HP ToolboxFX Documentation tab contains links to the following main pages: ● Troubleshooting ● How do I? View the How Do I? Help for help with specific tasks. ● Animated Demonstrations ● User Guide. View information about the product usage, warranty, specifications, and support. The user guide is - HP LaserJet M2727 | Service Manual - Page 81
product system settings, such as product language and jam recovery. ● Service. Gain access to various procedures that help you maintain the product settings to this product at a later time. Device information The HP ToolboxFX Device information page stores data about your product for future reference - HP LaserJet M2727 | Service Manual - Page 82
effect. Paper types Use the HP ToolboxFX paper-types options to configure print modes that correspond to the various media types. When you select Restore Modes, all of the modes are reset to the factory settings. NOTE: You must click Apply before changes take effect. 64 Chapter 3 Maintenance ENWW - HP LaserJet M2727 | Service Manual - Page 83
You must click Apply before changes take effect. Service During the printing process, paper, toner, and dust particles can accumulate inside the product. Over time, this buildup can cause print-quality problems, such as toner specks or smearing. HP ToolboxFX provides an easy method for cleaning the - HP LaserJet M2727 | Service Manual - Page 84
error option is turned on, the PostScript error page automatically prints when PostScript errors a hardware device (such as an HP LaserJet product) or in firmware, rather than as software that is supplies and order new ones. ● View and change part of the product configuration. ● View and print - HP LaserJet M2727 | Service Manual - Page 85
icon in the dock. 2. In HP Director, click Settings. 3. Select Configure device to open the Macintosh Configure Device home page in a browser. To view Macintosh Configure Device when the product is connected to a network 1. Open one of the following supported Web browsers: ● Safari 1.2 or later - HP LaserJet M2727 | Service Manual - Page 86
● Netscape Navigator 4.75 or later ● Opera 6.05 or later 2. Type the IP address of the product into the Web browser to open the Macintosh Configure Device home page. 68 Chapter 3 Maintenance ENWW - HP LaserJet M2727 | Service Manual - Page 87
4 Theory of operation ● Basic operation ● Scanner and ADF functions and operation ● Internal components (base unit) ● Engine control system ● Laser/scanner system ● Pickup/feed/delivery system ● Image-formation system ● Fax functions and operation ENWW 69 - HP LaserJet M2727 | Service Manual - Page 88
● Laser/scanner system ● Pickup/feed/delivery system ● Image-formation system Figure 4-1 HP LaserJet M2727 MFP system block a print cartridge; clears drive potential from the drum surface and cleans the transfer roller See Table 4-2 Power-on sequence on page 71 for a complete description of the - HP LaserJet M2727 | Service Manual - Page 89
voltage is turned off Forms the image on the photosensitive drum and transfers the toner image to the media LSTR (last rotation) From the end of the C. 7 Laser/scanner motor initial drive 8 High-voltage control Detect presence of a print cartridge Clean the transfer roller after the primary - HP LaserJet M2727 | Service Manual - Page 90
the ADF is being used, the document then advances in the ADF to the next raster line. If the flatbed is being used, the scanner module , or directing it to the computer as scanner output. The image data collected is 600 pixels per inch (ppi). Each pixel has 8 bits for each of the three colors (256 - HP LaserJet M2727 | Service Manual - Page 91
a copy or scan command, the ADF motor engages the gear train to lower the pickup-roller assembly and raise the stack-stop. The first roller, called the pre-pick roller, moves the top few sheets forward into the ADF. The next roller is the pickup roller. This roller contacts the ADF separation pad - HP LaserJet M2727 | Service Manual - Page 92
paper path and ADF sensors The following diagram shows the ADF paper path. Figure 4-3 ADF paper path Pick roller Stack stop ADF door open flag Separation pad Cleanout Form sensor Prescan rollers ADF glass Paper present sensor Pre-pick roller Picks top sheet INPUT TRAY PAGE EJECTS FULLY Postscan - HP LaserJet M2727 | Service Manual - Page 93
home position on the right side of the scanner assembly. The message Doc feeder jam. Clear, Reload. appears on the control-panel display. ● Other. If the paper stops in the ADF and the scan module remains under the ADF scanner glass, an internal firmware error has probably occurred. This is usually - HP LaserJet M2727 | Service Manual - Page 94
. Figure 4-4 Cross-section of printer 12 35 4 67 9 8 19 18 14 12 17 16 15 13 11 10 1 Top output bin delivery roller 2 Fuser film 3 Laser/scanner 4 Primary charging roller 5 Developer roller 6 Print cartridge 7 Feed roller 8 Multipurpose pickup roller 9 Multipurpose separation pad 10 - HP LaserJet M2727 | Service Manual - Page 95
15 Transfer roller 16 Photosensitive drum 17 Duplexer feed roller 18 Pressure roller 19 Rear output bin delivery roller ENWW Internal components (base unit) 77 - HP LaserJet M2727 | Service Manual - Page 96
The engine control system coordinates all of the product functions, according to commands sent from the formatter. It drives the laser/scanner system, the image-formation system, and the pickup/feed/ delivery system. The engine control system contains the following components: ● Formatter ● High - HP LaserJet M2727 | Service Manual - Page 97
Transfer roller Pressure roller Print cartridge Fuser control circuit Low-voltage power supply circuit Fan motor drive circuit IC502 Reset IC High-voltage power supply circuit Memory tag circuit IC201 CPU Memory tag Formatter Main motor Solenoids Sensors Duplex driver PCA Option Laser/scanner - HP LaserJet M2727 | Service Manual - Page 98
Laser/scanner system The laser/scanner system receives video signals from the DC controller and the formatter, and converts the signals into latent images on the photosensitive drum. Figure 4-7 Laser/scanner system 80 Chapter 4 Theory of operation ENWW - HP LaserJet M2727 | Service Manual - Page 99
and sensors. The DC controller uses two motors and two solenoids to drive the rollers. Three media-detection sensors detect media as it passes through the printer. If media does not reach or pass each sensor within a specified time period, the DC controller determines that a jam has occurred and - HP LaserJet M2727 | Service Manual - Page 100
NOTE: This sensor has two sensor flags; one flag detects the media when it is delivered from the fuser, and the other flag detects the media when it is reversed for duplexing. Figure 4-8 Pickup/feed/delivery system 82 Chapter 4 Theory of operation ENWW - HP LaserJet M2727 | Service Manual - Page 101
83 and described in the following sections. Figure 4-9 Image-formation system Step 1: Primary charging DC and AC biases are applied to the primary charging roller, which transfers a uniform negative potential to the photosensitive drum. Figure 4-10 Primary charging ENWW Image-formation system 83 - HP LaserJet M2727 | Service Manual - Page 102
laser beam scans the photosensitive drum to neutralize negative charges on parts of the drum. An electrostatic latent image is formed on the drum where negative charges were neutralized. Step 3: Developing The developing cylinder comes in contact with the photosensitive drum to deposit toner onto - HP LaserJet M2727 | Service Manual - Page 103
by weakening any electrostatic adhesion. Figure 4-13 Separation Step 6: Fusing The DC negative bias applied to the fusing film strengthens the holding force of the toner on the print media and prevents the toner from scattering. ENWW Image-formation system 85 - HP LaserJet M2727 | Service Manual - Page 104
Figure 4-14 Fusing Step 7: Drum cleaning The cleaning blade scrapes the residual toner off of the photosensitive drum and deposits it into the waste-toner case. Figure 4-15 Drum cleaning 86 Chapter 4 Theory of operation ENWW - HP LaserJet M2727 | Service Manual - Page 105
: ● No direct connection exists between the fax line and any devices that are connected to the USB or Ethernet ports. ● The internal firmware cannot be modified through the fax connection. ● All fax communications go through the fax subsystem, which does not use Internet data-exchange protocols - HP LaserJet M2727 | Service Manual - Page 106
with all of the distinctive-ring services that telephone companies provide in all countries/regions. HP does not guarantee that the distinctive- VoIP provider must state the service supports fax over IP services. Because the installation process varies, the VoIP service provider will have to assist - HP LaserJet M2727 | Service Manual - Page 107
problems faxing, contact your VoIP provider. The fax subsystem The formatter, fax card, firmware support V.34 fax transmission, lower speeds (such as V.17 fax), and older fax machines. Fax card in the fax subsystem Two versions of the fax card are used in the HP LaserJet M2727 MFP A series thermal - HP LaserJet M2727 | Service Manual - Page 108
calls that it recognizes as fax calls. If the product does not directly pick up the call, it monitors incoming calls for the fax tone or for a downstream call) until it has been authorized to do so (by a manual fax start or the detection of the appropriate tones). Hook switch control In the - HP LaserJet M2727 | Service Manual - Page 109
well as the firmware to determine if firmware your local telephone service provider. Fax page three ways: scanned to be sent toner or the product experiences other errors while printing faxes. The product also has scan-ahead functionality that makes use of flash memory. Scan-ahead automatically scans - HP LaserJet M2727 | Service Manual - Page 110
the original document immediately after it is scanned, eliminating the need to wait until the fax is transmission is complete. Because fax pages are stored in flash memory rather than RAM, more RAM - HP LaserJet M2727 | Service Manual - Page 111
5 Removal and replacement ● Introduction ● External panels, covers, and doors ● Replace the ADF pickup-roller assembly ● ADF scanner glass ● ADF assembly ● Scanner/ADF assembly ● Bezel and control panel ● Internal assemblies ENWW 93 - HP LaserJet M2727 | Service Manual - Page 112
replacement procedures. HP does not support repairing individual subassemblies or problem-solving at the problem solving. However, the power supply should be disconnected during parts removal. Never operate or service the product with the protective cover removed from the laser/scanner assembly - HP LaserJet M2727 | Service Manual - Page 113
● Small flatblade screwdriver ● #8 torx driver ● #10 torx driver ● Needle-nose pliers ● ESD mat and pozidrive screwdriver comparison Before performing service ● Remove all media from the the sheet-metal chassis before touching an ESD-sensitive part. ● Remove the print cartridge. See Remove the - HP LaserJet M2727 | Service Manual - Page 114
Verify that the expected start-up sounds occur. 5. Perform a control-panel test from the secondary service menu. Verify that the control-panel buttons beep when they are pressed. NOTE: If the control-panel 237. 6. Place the configuration page in the ADF. 96 Chapter 5 Removal and replacement ENWW - HP LaserJet M2727 | Service Manual - Page 115
verify the results. 8. Place the configuration page on the scanner glass. 9. Print a copy job, and then verify the results. 10. Clean the outside of the product with a damp cloth. Test 3 (fax-quality test) 1. Place the configuration page in the ADF. 2. Type a valid fax number and send the fax job - HP LaserJet M2727 | Service Manual - Page 116
bracket and strap Rear cover Registration assembly Scanner assembly Speaker Convenience stapler power supply Note: Convenience stapler components are only for the HP LaserJet M2727nfs. Formatter Note: some formatters Duplex assembly Laser/scanner assembly will include an Asian character - HP LaserJet M2727 | Service Manual - Page 117
on your clothing, wipe it off with a dry cloth and wash the clothing in cold water. Hot water sets toner into the fabric. 1. Open the print-cartridge door. Figure 5-3 Remove the print cartridge (1 of 2) 2. Grasp the handle on the print cartridge and then pull the - HP LaserJet M2727 | Service Manual - Page 118
External panels, covers, and doors Right cover 1. Remove the staple cassette (HP LaserJet M2727nfs only). Figure 5-5 Remove the right cover (1 of 4) 2. Use a small flatblade screwdriver to release three tabs at the rear of the product. Figure 5-6 Remove the right - HP LaserJet M2727 | Service Manual - Page 119
3. Release one tab at the bottom of the cover. Figure 5-7 Remove the right cover (3 of 4) 4. Rotate the back of the cover away from the product, and then slide it forward to remove it. Figure 5-8 Remove the right cover (4 of 4) ENWW External panels, covers, and doors 101 - HP LaserJet M2727 | Service Manual - Page 120
Left cover 1. Use a small flatblade screwdriver to release two tabs at the rear of the product. Figure 5-9 Remove the left cover (1 of 3) 2. Release one tab at the bottom of the cover. Figure 5-10 Remove the left cover (2 of 3) 102 Chapter 5 Removal and replacement ENWW - HP LaserJet M2727 | Service Manual - Page 121
3. Rotate the back of the cover away from the product, and then slide it forward to remove it. Figure 5-11 Remove the left cover (3 of 3) ENWW External panels, covers, and doors 103 - HP LaserJet M2727 | Service Manual - Page 122
Print-cartridge door 1. Remove the following components. ● Right cover. See Right cover on page 100. ● Left cover. See Left cover on page 102. 2. Open the print-cartridge door, and use a flatblade screwdriver to gently pry the cartridge-door arm (callout 1) off of the print-cartridge door. CAUTION: - HP LaserJet M2727 | Service Manual - Page 123
4. Lift the cartridge-door assembly up and straight away from the product. Figure 5-14 Remove the print-cartridge door (3 of 3) ENWW External panels, covers, and doors 105 - HP LaserJet M2727 | Service Manual - Page 124
screws (callout 1). Figure 5-15 Remove the rear cover (1 of 3) 1 3. Use a small flatblade screwdriver to release the duplex-drive assembly hinge (callout 2) on the power-plug side of the assembly. TIP: Be careful to not bend the hinge. Straighten the hinge if necessary. Figure 5-16 Remove the rear - HP LaserJet M2727 | Service Manual - Page 125
to not bend the hinge. Straighten the hinge if necessary. Figure 5-17 Remove the rear cover (3 of 3) 3 NOTE: After removing the rear cover, the duplex assembly is disconnected at the rear of the product. ENWW External panels, covers, and doors 107 - HP LaserJet M2727 | Service Manual - Page 126
. See Right cover on page 100. ● Left cover. See Left cover on page 102. ● Rear cover. See Rear cover on page 106. ● Scanner/ADF assembly. See Scanner/ADF assembly on page 117. 2. Open the print-cartridge door and loosen, but do not remove, one screw (callout 1). Figure 5-18 Remove the top cover - HP LaserJet M2727 | Service Manual - Page 127
4. Remove two screws (callout 3) from the back of the product. Figure 5-20 Remove the top cover (3 of 4) 3 5. Remove four screws (callout 4), and then lift up on the top cover (callout 5) to remove it. Figure 5-21 Remove the top cover (4 of 4) 4 5 ENWW External panels, covers, and doors 109 - HP LaserJet M2727 | Service Manual - Page 128
Replace the ADF pickup-roller assembly 1. Open the ADF cover. Figure 5-22 Replace the ADF pickup-roller assembly (1 of 6) 2. Release the ADF pickup-roller tension spring. Figure 5-23 Replace the ADF pickup-roller assembly (2 of 6) 1 2 110 Chapter 5 Removal and replacement ENWW - HP LaserJet M2727 | Service Manual - Page 129
up the ADF pickup-roller assembly (callout 2). Figure 5-24 Replace the ADF pickup-roller assembly (3 of 6) 2 1 4. Rotate the end of the assembly away from the ADF (callout 3) and then slide it out of the ADF to remove the assembly (callout 4). Figure 5-25 Replace the ADF pickup-roller assembly (4 of - HP LaserJet M2727 | Service Manual - Page 130
5. Install the replacement assembly. Figure 5-26 Replace the ADF pickup-roller assembly (5 of 6) 6 5 6. Reattach the ADF pickup-roller tension spring, and then close the ADF cover. Figure 5-27 Replace the ADF pickup-roller assembly (6 of 6) 1 112 Chapter 5 Removal and replacement ENWW - HP LaserJet M2727 | Service Manual - Page 131
pad and cause print-quality or paper-pickup problems. 1. Use a #10 torx screwdriver to remove one torx screw. Figure 5-28 Removing the ADF scanner glass (1 of 3) 2. Carefully remove the plastic ADF scanner-glass frame. Figure 5-29 Removing the ADF scanner glass (2 of 3) ENWW ADF scanner glass 113 - HP LaserJet M2727 | Service Manual - Page 132
remove the glass. CAUTION: Avoid touching the flatbed glass or the ADF separation pad. Skin oils and fingerprints can contaminate the glass or pad and cause print-quality or paper-pickup problems. Figure 5-30 Removing the ADF scanner glass (3 of 3) 1 2 114 Chapter 5 Removal and replacement ENWW - HP LaserJet M2727 | Service Manual - Page 133
ADF assembly 1. Open the scanner cover (it contains the ADF assembly). Figure 5-31 Remove the ADF assembly (1 of 3) 2. Squeeze the locking tabs on the ADF wire-harness plug (callout 1), and then disconnect the plug from the flatbed. Figure 5-32 Remove the ADF assembly (2 of 3) 1 ENWW ADF assembly - HP LaserJet M2727 | Service Manual - Page 134
3. Lift the scanner cover (containing the ADF assembly) straight up and off of the flatbed. Figure 5-33 Remove the ADF assembly (3 of 3) 116 Chapter 5 Removal and replacement ENWW - HP LaserJet M2727 | Service Manual - Page 135
fully seated in their connectors. Failure to fully seat an FFC into a connector can cause a short circuit in a PCA. Figure 5-34 Remove the scanner/ADF assembly (1 of 4) 1 2 3 3. Remove one screw (callout 4) to remove the ferrite from the chassis (callout 5), and then feed the cables out through the - HP LaserJet M2727 | Service Manual - Page 136
! The scanner cover (which contains the ADF assembly) is not captive when the scanner assembly is removed. The scanner cover can suddenly open and be damaged when you are handling the scanner assembly. You must keep the scanner assembly level to make sure that the scanner cover (ADF assembly) does - HP LaserJet M2727 | Service Manual - Page 137
Bezel and control panel 1. Gently pry up on the corner of the control-panel bezel, and then carefully lift it up and off of the control panel to remove it. NOTE: If you are only replacing the bezel, you can disregard the remaining steps in this procedure. Use the following steps if you are also - HP LaserJet M2727 | Service Manual - Page 138
3. Use a small flatblade screwdriver to release the three locking tabs (callout 2) along the top of the control panel. Figure 5-40 Remove the bezel and control panel (3 of 4) 2 120 Chapter 5 Removal and replacement ENWW - HP LaserJet M2727 | Service Manual - Page 139
4) 3 TIP: When you reinstall the control panel, make sure that the tabs at the bottom of the panel (callout 4) fit underneath the retainers in the scanner body. 4 ENWW Bezel and control panel 121 - HP LaserJet M2727 | Service Manual - Page 140
Internal assemblies Convenience-stapler assembly (HP LaserJet M2727nfs only) 1. Remove the right cover. See Right cover on page 100. 2. Disconnect one connector (callout 1). Figure 5-42 Remove the convenience-stapler assembly (1 of 2) 1 122 Chapter 5 Removal and replacement ENWW - HP LaserJet M2727 | Service Manual - Page 141
two screws (callout 2), and then separate the stapler assembly from the chassis to remove it. Figure 5-43 Remove the convenience-stapler assembly (2 of 2) 2 TIP: When you reinstall the convenience-stapler assembly, make sure that the hook on the top of the assembly bracket fits into the slot on the - HP LaserJet M2727 | Service Manual - Page 142
power supply (HP LaserJet M2727nfs only) 1. Remove the right cover. See Right cover on page 100. 2. Disconnect one connector (callout 1) at the convenience-stapler assembly, and then remove one screw (callout 2). Figure 5-44 Remove the convenience-stapler power assembly (1 of 3) 1 2 3. Remove - HP LaserJet M2727 | Service Manual - Page 143
4. Disconnect one connector and then remove the convenience-stapler power supply. Figure 5-46 Remove the convenience-stapler power assembly (3 of 3) ENWW Internal assemblies 125 - HP LaserJet M2727 | Service Manual - Page 144
Convenience-stapler AC inlet cable (HP LaserJet M2727nfs only) 1. Remove the right cover. See Right cover on page 100. 2. Disconnect two connectors (callout 1) to remove the convenience-stapler AC inlet cable. Figure 5-47 - HP LaserJet M2727 | Service Manual - Page 145
Right cover on page 100. ● Convenience-stapler power supply (HP LaserJet M2727nfs only). See Convenience-stapler power supply (HP LaserJet M2727nfs only) on page 124. NOTE: When you remove the convenience Figure 5-48 Remove the convenience-stapler bracket and strap 2 1 ENWW Internal assemblies 127 - HP LaserJet M2727 | Service Manual - Page 146
reminder when removing PCAs. Always perform service work at an ESD-protected workstation or before touching an ESD-sensitive part. Protect the ESD-sensitive parts by placing them in ESD connector can cause a short circuit in a PCA. Figure 5-49 Remove the speaker (1 of 2) 1 3 2 3. Remove - HP LaserJet M2727 | Service Manual - Page 147
4. Disconnect one connector (callout 6), and then separate the speaker (callout 7) from the product. Figure 5-50 Remove the speaker (2 of 2) 7 6 5 4 ENWW Internal assemblies 129 - HP LaserJet M2727 | Service Manual - Page 148
by touching the sheet-metal chassis before touching an ESD-sensitive part. Protect the ESD-sensitive parts by placing them in ESD pouches when they are out of the product. Figure 5-51 Remove the power-switch PCA (HP LaserJet M2727nfs shown) 1 3 2 4 130 Chapter 5 Removal and replacement ENWW - HP LaserJet M2727 | Service Manual - Page 149
4. If you need to remove the power-switch PCA mounting bracket, remove two screws (callout 5), then separate the power-switch PCA mounting bracket from the product. Figure 5-52 Remove the power-switch PCA mounting bracket 5 ENWW Internal assemblies 131 - HP LaserJet M2727 | Service Manual - Page 150
). Look for the ESD reminder when removing PCAs. Always perform service work at an ESD-protected workstation or mat. If an ESD yourself by touching the sheet-metal chassis before touching an ESD-sensitive part. Protect the ESD-sensitive parts by placing them in ESD pouches when they are out of the - HP LaserJet M2727 | Service Manual - Page 151
you reinstall it. Failure to install the protective sheet might cause a short circuit and damage the formatter. Figure 5-55 Install formatter protective sheet ENWW Internal assemblies 133 - HP LaserJet M2727 | Service Manual - Page 152
4. For products that use an Asian character control panel only: use a pair of needle nose pliers to release the Asian-character control-panel-display PCA spacer from the formatter. Figure 5-56 Remove the formatter (3 of 4) 5. For products that use an Asian character control panel only: remove the - HP LaserJet M2727 | Service Manual - Page 153
100. ● Left cover. See Left cover on page 102. ● Rear cover. See Rear cover on page 106. NOTE: After removing the rear cover, the duplex assembly is disconnected at the rear of the product. 2. Push down on the green lever at the front of the product to unlock and lower the - HP LaserJet M2727 | Service Manual - Page 154
out through the rear of the product. Figure 5-59 Remove the duplex assembly (2 of 2) TIP: When you reinstall the duplex assembly, push the size-selection switch in or pull the sizeselection switch out to correctly set the media size that is used in your country/region. - HP LaserJet M2727 | Service Manual - Page 155
service work at an ESD-protected workstation or mat. If an ESD workstation or mat is not available, ground yourself by touching the sheet-metal chassis before touching an ESD-sensitive part. Protect the ESD-sensitive parts on page 106. ● Scanner/ADF assembly. See Scanner/ADF assembly on page 117. - HP LaserJet M2727 | Service Manual - Page 156
5. Remove four screws (callout 4). Figure 5-60 Remove the laser/scanner assembly 4 2 1 3 6. Lift the laser/scanner out of the product. NOTE: Examine the shutter switch placement as you lift the laser/scanner out of the product. 138 Chapter 5 Removal and replacement ENWW - HP LaserJet M2727 | Service Manual - Page 157
● Right cover. See Right cover on page 100. ● Left cover. See Left cover on page 102. ● Rear cover. See Rear cover on page 106. ● Scanner/ADF assembly. See Scanner/ADF assembly on page 117. ● Top cover. See Top cover on page 108. 2. Remove the fan from the product chassis (see step 3 of Fan on page - HP LaserJet M2727 | Service Manual - Page 158
6. Remove one screw (callout 4). TIP: When you reinstall the memory-tag-reader assembly, make sure that the front of the assembly is under the laser/scanner shutter (callout 5). Figure 5-62 Remove the memory-tag-reader assembly (2 of 2) 5 4 3 7. Lift up slightly the back of the memory-tag-reader - HP LaserJet M2727 | Service Manual - Page 159
● Rear cover. See Rear cover on page 106. ● Scanner/ADF assembly. See Scanner/ADF assembly on page 117. ● Top cover. See Top cover on page 108. ● Convenience-stapler power supply. See Convenience-stapler power supply (HP LaserJet M2727nfs only) on page 124. ● Convenience-stapler power supply bracket - HP LaserJet M2727 | Service Manual - Page 160
3. Remove two screws (callout 2), and then lift the fan off of the product. Figure 5-65 Remove the fan (2 of 2) 2 142 Chapter 5 Removal and replacement ENWW - HP LaserJet M2727 | Service Manual - Page 161
cover. See Rear cover on page 106. ● Scanner/ADF assembly. See Scanner/ADF assembly on page 117. ● Top cover. See Top cover on page 108. ● Convenience-stapler power supply (HP LaserJet M2727nfs only). See Convenience-stapler power supply (HP LaserJet M2727nfs only) on page 124. ● Convenience-stapler - HP LaserJet M2727 | Service Manual - Page 162
duplex-drive gears on page 144 to correctly reinstall them. Figure 5-66 Remove the duplex-drive gears 1 TIP: It might be easier to replace the assembly if you place the two large gear sets into the appropriate holes on the chassis first, and then line up the holes in the gear - HP LaserJet M2727 | Service Manual - Page 163
cover. See Rear cover on page 106. ● Scanner/ADF assembly. See Scanner/ADF assembly on page 117. ● Top cover. See Top cover on page 108. ● Convenience-stapler power supply (HP LaserJet M2727nfs only). See Convenience-stapler power supply (HP LaserJet M2727nfs only) on page 124. ● Convenience-stapler - HP LaserJet M2727 | Service Manual - Page 164
3. Remove one screw (callout 2), and then lift the solenoid off of the product chassis. NOTE: The solenoid lever (callout 3) is not retained. Do not lose this lever. Figure 5-69 Remove the duplex solenoid (2 of 2) 2 3 146 Chapter 5 Removal and replacement ENWW - HP LaserJet M2727 | Service Manual - Page 165
cover. See Rear cover on page 106. ● Scanner/ADF assembly. See Scanner/ADF assembly on page 117. ● Top cover. See Top cover on page 108. ● Convenience-stapler power supply (HP LaserJet M2727nfs only). See Convenience-stapler power supply (HP LaserJet M2727nfs only) on page 124. ● Convenience-stapler - HP LaserJet M2727 | Service Manual - Page 166
the connectors along the edge of the ECU (callout 2). Remove the wire harness from the guides (callout 3). Figure 5-71 Remove the fuser (2 of 9) 3 2 4. Remove one screw (callout 4) from the wire harness guide and separate it from the product. Reinstallation tip You might find it easier to reassemble - HP LaserJet M2727 | Service Manual - Page 167
guide that contains the optional tray 3 connector. NOTE: It is not necessary to remove the tray 3 connector or the wire harness guide. But you need to release the guide so that the tray 3 connector wire harness is loose enough to be removed from a guide - HP LaserJet M2727 | Service Manual - Page 168
7. Remove three screws (callout 9) from the right side of the product. Figure 5-75 Remove the fuser (6 of 9) 9 8. Remove three screws (callout 10) from the left side of the product. Figure 5-76 Remove the fuser (7 of 9) 10 150 Chapter 5 Removal and replacement ENWW - HP LaserJet M2727 | Service Manual - Page 169
fuser (8 of 9) 10. Pull the fuser out of the product at an angle so that the delivery-roller shaft clears the hole (callout 11) in the chassis. Carefully remove the wire harnesses from the guide in the lower-left corner of the fuser. Figure 5-78 Remove the fuser (9 of 9) 11 ENWW Internal - HP LaserJet M2727 | Service Manual - Page 170
components. ● Right cover. See Right cover on page 100. ● Left cover. See Left cover on page 102. ● Rear cover. See Rear cover on page 106. ● Scanner/ADF assembly. See Scanner/ADF assembly on page 117. ● Top cover. See Top cover on page 108. 2. Remove two screws (callout 1), lift the interlock - HP LaserJet M2727 | Service Manual - Page 171
the sheet-metal chassis before touching an ESD-sensitive part. Protect the ESD-sensitive parts by placing them in ESD pouches when they are page 102. ● Rear cover. See Rear cover on page 106. ● Scanner/ADF assembly. See Scanner/ADF assembly on page 117. ● Top cover. See Top cover on page 108. - HP LaserJet M2727 | Service Manual - Page 172
2. Remove the wire harnesses from the retainer under the feed plate (callout 1), and then remove the feed plate by lifting it and pulling it straight back. Figure 5-80 Remove the ECU (1 of 7) 1 3. Disconnect three connectors (callout 2). Figure 5-81 Remove the ECU (2 of 7) 2 154 Chapter 5 Removal - HP LaserJet M2727 | Service Manual - Page 173
, and then push the interlock cables and the formatter cable (callout 5) through the hole in the chassis. Figure 5-83 Remove the ECU (4 of 7) 4 5 ENWW Internal assemblies 155 - HP LaserJet M2727 | Service Manual - Page 174
6. Spread the product frame on one side of the product to release the internal tabs that secure the ECU to the chassis. Figure 5-84 Remove the ECU (5 of 8) 7. Spread the product frame on the other side of the product to release the internal tabs, and then lower the ECU slightly and pull it straight - HP LaserJet M2727 | Service Manual - Page 175
8. Remove four screws (callout 7), and then lift the ECU off of the ECU pan. Figure 5-86 Remove the ECU (7 of 7) 7 ENWW Internal assemblies 157 - HP LaserJet M2727 | Service Manual - Page 176
. ● Right cover. See Right cover on page 100. ● Left cover. See Left cover on page 102. ● Rear cover. See Rear cover on page 106. ● Scanner/ADF assembly. See Scanner/ADF assembly on page 117. ● Top cover. See Top cover on page 108. ● Formatter. See Formatter on page 132. ● Fan. See Fan on page 141 - HP LaserJet M2727 | Service Manual - Page 177
3. Hold the motor while releasing the tabs (callout 2) on the wire-harness guide, and then lift the motor and the guide out of the product together. Figure 5-88 Remove the main motor (2 of 2) 2 ENWW Internal assemblies 159 - HP LaserJet M2727 | Service Manual - Page 178
2 and optional tray 3 separation pad on page 45. For information about replacing the ADF pickup roller, see Replace the ADF pickup-roller assembly on page 110. Transfer roller NOTE: Make sure that the transfer roller needs to be replaced before you remove it. Excess handling can cause additional - HP LaserJet M2727 | Service Manual - Page 179
Registration-roller assembly 1. Remove five screws (callout 1). Figure 5-90 Remove the registration-roller assembly 1 2. Lift the entire assembly out of the product. ENWW Internal assemblies 161 - HP LaserJet M2727 | Service Manual - Page 180
bracket and strap (HP LaserJet M2727nfs only) on page 127. ● Power switch PCA. See Power-switch PCA on page 130. ● Fan. See Fan on page 141. 2. Disconnect one connector (callout 1; J206) at the ECU and pull the wires through the chassis. Figure 5-91 Remove the main gear assembly (1 of 5) 1 162 - HP LaserJet M2727 | Service Manual - Page 181
lever from the print-cartridge door arm. Figure 5-92 Remove the main gear assembly (2 of 5) 4. Release the tab on the gear (callout 2) and slide the gear off of the shaft. 5. Remove the wire harnesses from the guide (callout 3). 6. Remove four screws (callout 4). Figure 5-93 Remove the main gear - HP LaserJet M2727 | Service Manual - Page 182
away from the product. NOTE: The large gear at the top of the assembly is not captive. Make sure that the gear does not separate from the assembly when the assembly is removed. Figure 5-94 Remove the main gear assembly (4 of 5) 8. Remove one screw (callout 5), and then lift the solenoid off of the - HP LaserJet M2727 | Service Manual - Page 183
-panel menus ● Print problems ● Scan problems ● Copy problems ● Fax problems ● Control-panel display problems ● Convenience-stapler problems (HP LaserJet M2727nfs only) ● DSL problems ● ADF problems ● Functional checks ● Service-mode functions ● Problem-solve tools ● Firmware updates ENWW 165 - HP LaserJet M2727 | Service Manual - Page 184
light, verify that the wire-harness connectors from the scanner to the formatter are connected correctly. If the error persists, replace the following components one at a time until the problem is resolved: scanner assembly, formatter. See Scanner/ADF assembly on page 117 and Formatter on page 132 - HP LaserJet M2727 | Service Manual - Page 185
in the ADF ADF path. meets ADF specifications. 2. Clean the ADF pick roller. See Clean the product on page 49. 3. If the problem persists, replace the ADF pick roller. See Replace the ADF pickup-roller assembly on page 110. 4. If the problem persists, replace the ADF. See ADF assembly on page - HP LaserJet M2727 | Service Manual - Page 186
still persists, replace the formatter. Port driver problem in Microsoft Windows. Uninstall and then reinstall the product software. Verify that you are using the correct installation procedure and the correct port setting. Does the product scan to the computer? Turn the product off, and then - HP LaserJet M2727 | Service Manual - Page 187
the product to initialize. If the error persists, contact HP. See www.hp.com/support/LJM2727 or the support flyer that came in the product box. Canceled copy. Clear document The Cancel button was pressed to cancel the current job while pages were feeding from the ADF. The cancel process does not - HP LaserJet M2727 | Service Manual - Page 188
. Reload Media in the ADF tray was not picked up. Remove the media from the ADF tray, and then reload it. Clean the ADF pickup roller. See Clean the ADF pickup-roller assembly on page 55. If the error persists, contact HP. See www.hp.com/support/LJM2727 or the support flyer that came in the - HP LaserJet M2727 | Service Manual - Page 189
tray 1, verify that the paper-length guide is in the correct position for the media size that you are using. Reload the media in the input tray and press Setup to continue the job. If the error persists, contact HP. See www.hp.com/support/LJM2727 or the support flyer that came in the product box - HP LaserJet M2727 | Service Manual - Page 190
making a call. Plug the product phone cord into a jack for another phone line. Try a different phone cord. If the error persists, contact HP. See www.hp.com/support/LJM2727 or the support flyer that came in the product box. Fax delayed - Send memory full Fax memory is full. Cancel the fax by - HP LaserJet M2727 | Service Manual - Page 191
cord into a jack for another phone line, and then try sending the fax again. Try a different phone cord. If the error persists, contact HP. See www.hp.com/support/LJM2727 or the support flyer that came in the product box. Fax is busy Redial pending The fax line to which you were sending a fax - HP LaserJet M2727 | Service Manual - Page 192
the fax resolution to Standard instead of the default of Fine. If the error persists, contact HP. See www.hp.com/support/LJM2727 or the support flyer that came in the product box. Group dial not allowed in group The telephone cord that came with the product. 174 Chapter 6 Solve problems ENWW - HP LaserJet M2727 | Service Manual - Page 193
. Plug the product phone cord into a jack for another phone line. If the error persists, contact HP. See www.hp.com/support/LJM2727 or the support flyer that came in the product box. No document sent The product did not scan any pages, or it did Try sending the fax again. not receive any pages - HP LaserJet M2727 | Service Manual - Page 194
Table 6-2 Alert and warning messages (continued) Control panel message Description Recommended action If the error persists, contact HP. See www.hp.com/support/LJM2727 or the support flyer that came in the product box. 176 Chapter 6 Solve problems ENWW - HP LaserJet M2727 | Service Manual - Page 195
service. Critical error message-tables Table 6-3 Critical error messages Control panel message Description 49 Error, Turn off then on The product has experienced an internal embedded software error. 50.x Fuser Error The product has experienced an internal hardware error. 52 Scanner Error - HP LaserJet M2727 | Service Manual - Page 196
product on. If the error persists, contact HP. See www.hp.com/support/LJM2727 or the support flyer that came in the product box. Scanner error #, Turn off then on The product has experienced an error in the Turn off the power by using the power switch, scanner sub-assembly area. wait at least - HP LaserJet M2727 | Service Manual - Page 197
include: ● The input trays are loaded improperly or overfilled, or the media guides are not set properly. ● Media is added to or removed from an input an output area. ● The print media that is being used does not meet HP specifications. See Media specifications on page 16. ● The media is damaged or - HP LaserJet M2727 | Service Manual - Page 198
not obvious, first look inside the product. Loose toner might remain in the product after a jam. This problem typically resolves itself after a few sheets have been printed. Clear jams from the ADF Occasionally, media becomes jammed during a fax, copy, or scan job. You are notified of a media jam by - HP LaserJet M2727 | Service Manual - Page 199
3. Lifting the green lever, and then rotate the pick mechanism until it stays open. 4. Gently try to remove the page without tearing it. If you feel resistance, go to the next step. 5. Open the ADF lid and gently loosen the media using both hands. 6. When the media is free, gently pull it out - HP LaserJet M2727 | Service Manual - Page 200
on the two tabs until the part snaps into place. Install the cleanout part correctly, because future jamming might occur if the cleanout part is not replaced correctly. 10. Close the ADF lid. Clear jams from the input be necessary. 1. Open the rear output door. 182 Chapter 6 Solve problems ENWW - HP LaserJet M2727 | Service Manual - Page 201
it free from the product. 5. If no media is visible, open the print-cartridge door, remove the print cartridge, and then rotate the upper media guide. Carefully pull the media up and out of the product. Replace the print cartridge. 6. Close tray 2 and optional tray 3. 7. Close the rear output door - HP LaserJet M2727 | Service Manual - Page 202
downward. 3. Remove tray 2. 4. Push down on the green lever on the automatic two-sided path door on the front of the product. 184 Chapter 6 Solve problems ENWW - HP LaserJet M2727 | Service Manual - Page 203
5. With both hands, grasp the side of the media that is most visible (this includes the middle), and carefully pull it free from the product. NOTE: If you cannot grasp the media with your hands, perform the procedure in Clear jams from the print-cartridge area on page 188. 6. Close the automatic two - HP LaserJet M2727 | Service Manual - Page 204
, grasp the side of the media that is most visible (this includes the middle), and carefully pull it free from the product. 186 Chapter 6 Solve problems ENWW - HP LaserJet M2727 | Service Manual - Page 205
downward. 3. With both hands, grasp the side of the media that is most visible (this includes the middle), and carefully pull it free from the printer. NOTE: If you cannot grasp the media with your hands, perform the procedure in Clear jams from the print-cartridge area on page 188. 4. Close - HP LaserJet M2727 | Service Manual - Page 206
carefully pull it free from the product. 4. Replace the print cartridge and close the print-cartridge door. 5. Close the rear output door. 188 Chapter 6 Solve problems ENWW - HP LaserJet M2727 | Service Manual - Page 207
risk of staple jams, make sure that you staple 20 or fewer pages of media (80 g/m2 or 20 lb) at a time. 1. Turn off the HP LaserJet M2727nfs MFP, and then open the stapler door. NOTE: Opening the stapler door disables the stapler. 2. Remove the staple cassette from the product. 3. Clear any loose - HP LaserJet M2727 | Service Manual - Page 208
you are using. ● Verify that the media guides are properly adjusted. ● Check that the input while the product is printing. ● Use only HP-recommended media types and sizes. See Media specifications on The print media type and the amount of toner used affect the output bin capacity. ● problems ENWW - HP LaserJet M2727 | Service Manual - Page 209
as language, print quality, or volume levels. ● Use the Network config menu to configure network settings such as TCP/IP configuration. ● Use the Service menu to restore default settings, clean the product, and activate special modes that affect print output. NOTE: To print a detailed list of the - HP LaserJet M2727 | Service Manual - Page 210
the default number of copies. Sets the default percentage to reduce or enlarge a copied document. Sets the default input paper tray. Sets the default input scan format and the default output format. Two-sided printing is supported from the ADF only. 192 Chapter 6 Solve problems ENWW - HP LaserJet M2727 | Service Manual - Page 211
Demo page Fax Reports Fax Confirmation Never Every fax Send fax only Receive fax Include 1st page On Off Fax Error Report Every error Send Error Receive Error Never Last Call Report Fax Activity log Print log now Auto Log Print PhoneBook report Block Fax list Billing report Menu - HP LaserJet M2727 | Service Manual - Page 212
page PCL font list PS font list PCL6 font list Service page Description scanned by the product. Prints a list of all installed PCL 5 fonts. Prints a list of all installed PS fonts. Prints a list of all installed PCL 6 fonts. Displays supported product supports up to 120 phone book entries, which - HP LaserJet M2727 | Service Manual - Page 213
outgoing faxes. Sets the default paper size for documents being scanned from the flatbed scanner. Sets whether the product should use tone or pulse dialing. should attempt to redial the recipient fax number if a communication error occurs. Specifies a prefix number that must be dialed when sending - HP LaserJet M2727 | Service Manual - Page 214
pick up the call and determine if the call is a voice or fax call. If the call is a fax call, the product handles the call as usual. If the call is a voice call, an audible synthesized ring is generated to alert the user of an incoming voice call. ● Manual distinctive-ring service). ● problems ENWW - HP LaserJet M2727 | Service Manual - Page 215
Sub-menu item Block faxes Add entry Delete entry Clear all Private receive On Off All faxes Print faxes Reprint faxes F/T ring time Print duplex Error correction Fax Speed On Off 20 30 40 70 On Off On Off Fast(V.34) Medium(V.17) Slow(V.29) Description Modifies the blocked fax list - HP LaserJet M2727 | Service Manual - Page 216
at which the control panel generates a low-toner message. Sets how the product reacts when it detects that the print cartridge is out. Sets how much toner the product should apply to thicken lines and identification number (PIN). Sets Courier font values. 198 Chapter 6 Solve problems ENWW - HP LaserJet M2727 | Service Manual - Page 217
are available from the control-panel secondary menu: ● Use the Secondary service menu to print service reports, calibrate the scanner, reset the telecom country/region location, test the control-panel display, and view the firmware version. ● Use the Developer's menu to test telecom settings, enter - HP LaserJet M2727 | Service Manual - Page 218
, and then press OK 5. After the product returns to the Ready state, turn the power off, and then on. Table 6-11 Secondary service menu Menu item Sub-menu item Sub-menu item Service Reports Cont. Self-Test Extended Keymap Error Report Cont. Self-Test [Cancel] to stop 200 Chapter 6 Solve - HP LaserJet M2727 | Service Manual - Page 219
Table 6-11 Secondary service menu (continued) Menu item Sub-menu item Scan Calibration Calibrate Corrected Tables Location Display test Button test Show FW Version Ethernet reset USA LED test, show: - HP LaserJet M2727 | Service Manual - Page 220
-menu item Scanner Settings Scan Test Mode ADF Starve Start Configure for scan test mode ADF Starve Start (0-16) ADF Starve Start [value] ADF Starve Run ADF Starve Run (0-16) ADF Starve Run Reports) DS No Fax Translations Location codes Error Diffusion 202 Chapter 6 Solve problems ENWW - HP LaserJet M2727 | Service Manual - Page 221
Table 6-12 Developer's menu (continued) Menu item Sub-menu item Clock Dithering On Off Pick and Kick Sub-menu item ENWW Control-panel menus 203 - HP LaserJet M2727 | Service Manual - Page 222
are available, depending on the printer driver that you are using: ● instructions, see the user guide. For Windows 98, Windows 2000, and Windows Me: 1. In the Windows system tray, click Start, select Settings, and then click Printers. 2. Right-click the product icon. 3. Click Properties (in Windows - HP LaserJet M2727 | Service Manual - Page 223
from the HP ToolboxFX. If the page prints, the problem is with the printer driver. Try printing from another printer driver. For example, if you are using the PCL 6 printer driver, print from the PS printer driver. ◦ Use the Add Printer Wizard in the Printers (or Printers and Faxes in Windows XP - HP LaserJet M2727 | Service Manual - Page 224
Example Toner specks appear. Dropouts appear. Vertical streaks or bands appear on the page. Cause Solution The media might not meet HP specifications. Use media that meets HP specifications. Make sure that the media meets specifications in the HP LaserJet Printer Family Print Media Guide. The - HP LaserJet M2727 | Service Manual - Page 225
specifications in the HP LaserJet Printer Family Print Media Guide. If toner smears appear on the leading edge of the paper, the media guides are dirty, or debris has accumulated in the print path. Clean the media guides and the paper path. See Clean the product on page 49. The print cartridge - HP LaserJet M2727 | Service Manual - Page 226
. Make sure that the media meets specifications in the HP LaserJet Printer Family Print Media Guide. The paper path might need to be Clean the product. See Clean the cleaned. product on page 49. The power source might be defective. Plug the product directly into an AC outlet instead - HP LaserJet M2727 | Service Manual - Page 227
The product is not set to print on In the printer driver, make sure the type of media on which you the appropriate media type is want to print. selected. The media might have been in the input tray too long. If the problem persists, select a media type that uses a lower fuser temperature - HP LaserJet M2727 | Service Manual - Page 228
Problem Toner such as high-quality paper that is intended for laser printers. Software settings might affect image printing. In your software restart the print job. Moisture in the product is condensing on the fuser assembly. In excessively hot and humid areas, media retains moisture. Try moving - HP LaserJet M2727 | Service Manual - Page 229
original might have been loaded incorrectly. Use the media guides when you load the originals into the ADF. See Load documents to fax, copy, or scan on page 26. The scanner might be dirty. Clean the scanner. See Clean the product on page 49. The graphics settings might not be Try changing the - HP LaserJet M2727 | Service Manual - Page 230
Problem Part of the image did not scan. The scan takes too long. Cause Solution The original might have been loaded incorrectly. Use the media guides when you load the originals into the ADF. See Load documents to fax, copy, or scan on page 26. A colored background might be causing Try - HP LaserJet M2727 | Service Manual - Page 231
correction fluid, or an unwanted Clean the flatbed scanner surface. See substance might be on the glass. Clean the flatbed scanner glass on page 49. The resolution and color levels may be Verify that you have the correct set incorrectly. resolution and color settings. ENWW Scan problems 213 - HP LaserJet M2727 | Service Manual - Page 232
NOTE: Verify that the media meets HP specifications. If the media meets HP specifications, recurring feed problems indicate the pickup roller or separation pad is worn. Image problems Problem Cause Solution Images are missing or faded. The print-cartridge toner level might be Replace the print - HP LaserJet M2727 | Service Manual - Page 233
fluid, or an unwanted substance might be on the automatic document feeder (ADF) or flatbed scanner. Clean the product. See Clean the product on page 49. Copies are too light or dark. The printer driver or product software settings might be incorrect. Verify that the quality settings are - HP LaserJet M2727 | Service Manual - Page 234
Problem Cause Solution Problems with feeding. The paper has ragged edges. The paper varies from side-to-side. Use high-quality paper that is made for laser printers tray again. Adjust the media guides to the width and length be in manual feed media input tray. mode. ● If Manual feed appears - HP LaserJet M2727 | Service Manual - Page 235
be scanned facing up. On the flatbed scanner, make sure that the original document is placed facedown with the upper-left corner of the document at the lower-right corner of the glass. The media might not meet HP specifications. Use media that meets HP specifications. The print-cartridge toner - HP LaserJet M2727 | Service Manual - Page 236
ring service, see Distinctive ring function on page 88. ● Is a telephone-line splitting device installed? ◦ A telephone-line splitter is a device that splits two or more telephone lines from the same jack. Not all splitters are compatible with the device, and not all countries/regions support the - HP LaserJet M2727 | Service Manual - Page 237
or receiving faxes, connect the device directly to the telephone jack to determine if the problem is in the surge-protection device. ● Is a telephone company voice-message service being used? ◦ If the messaging service rings-to-answer setting is lower than the product rings-to-answer setting, the - HP LaserJet M2727 | Service Manual - Page 238
on, but you do not have the service, or you do have the service and the feature is not set correctly. Check the answer-ring pattern feature to verify that it is set properly. The fax cord might not be correctly See the Getting Started Guide to check connected, or the fax cord - HP LaserJet M2727 | Service Manual - Page 239
Disable the messaging service. ● Get a telephone line that is dedicated to fax calls. ● Set the product answer mode to Manual. In manual mode, you must are printing only on half of the page. The product ran out of toner while printing a fax. The product stores the most recently printed faxes. ( - HP LaserJet M2727 | Service Manual - Page 240
Problems sending faxes Problem ADF). Use the flatbed scanner. The minimum page size for the ADF is 127 x 127 mm (5 x 5 inches). If a jam exists, see Clear jams from the ADF to verify that the telephone line is working. A communication error might be interrupting the fax job. Change the redial-on- - HP LaserJet M2727 | Service Manual - Page 241
that the fax or might have an error condition, such as machine is on and ready to receive being out of paper. faxes. The originals might be incorrectly loaded. Verify that the original documents are correctly loaded into the ADF input tray or flatbed scanner. See Load paper and print media on - HP LaserJet M2727 | Service Manual - Page 242
mode or rings-to-answer settings might not be correctly set. The answering machine or telephone might not be functioning. The problem persists. Solution See the Getting Started Guide to check the installation. The product must be the first device connected to the telephone line. The rings-to-answer - HP LaserJet M2727 | Service Manual - Page 243
jams, see Clear jams on page 179. Problem Print is skewed (crooked). Pages are curled or wrinkled. Cause Solution The media input tray might be overloaded. The media guides might be incorrectly set, broken, or missing. The media might not meet HP specifications. Remove some of the media from - HP LaserJet M2727 | Service Manual - Page 244
Performance problems Problem Cause Solution Faxes are transmitting or being received very slowly. The fax might be very complex, such as one with many are too loud or too The volume setting might not be adjusted Adjust the volume setting. soft. correctly. 226 Chapter 6 Solve problems ENWW - HP LaserJet M2727 | Service Manual - Page 245
correctly and fully seated in the formatter connector (H3). Convenience-stapler problems (HP LaserJet M2727nfs only) The convenience stapler is designed to be free of staple jams jams from the convenience stapler (HP LaserJet M2727nfs MFP only) on page 189. ENWW Control-panel display problems 227 - HP LaserJet M2727 | Service Manual - Page 246
all printers and faxes are compatible with DSL services. HP does not guarantee that the HP LaserJet product will be compatible with all DSL service lines download rates to differ. Because ADSL is a version of DSL, the previous DSL information also applies to ADSL. PABX line problems The HP LaserJet - HP LaserJet M2727 | Service Manual - Page 247
"Scanner error" message continually appears on the control-panel display. Cause Solution The ADF-to-scanner connector is not connected correctly or Reseat the connector. If the problem persists, replace the ADF. the ADF is not functioning. See ADF assembly on page 115. The ADF pickup roller - HP LaserJet M2727 | Service Manual - Page 248
to work. The photosensitive drum receives its drive from the main-drive assembly. NOTE: This test is especially important if refilled print cartridges have been the mark moved. If the mark did not move, inspect the main-drive assembly to make sure that it is meshing with the print cartridge gears. If - HP LaserJet M2727 | Service Manual - Page 249
Engine test The engine test is used to verify that the print engine is functioning correctly. The formatter is bypassed during the engine test. To perform an engine test 1. Remove the left cover. See Left cover on page 102. 2. Use a non-conductive probe to depress the engine-test switch. A single - HP LaserJet M2727 | Service Manual - Page 250
cartridge drum shield to view the drum surface. If a dark and distinct toner image is present on the drum surface, assume that the first two functions are functioning (image formation and development). Problem solve the failure as a transfer or fusing problem. Perform other checks If no image appears - HP LaserJet M2727 | Service Manual - Page 251
Media passes between the heating element and a soft pressure roller to fuse toner to the media. 1. Unplug the product for at least of the print cartridge: drum ground (callout 1), charging (callout 2), and developing roller (callout 3). If they are dirty or corroded, clean the connection. If they - HP LaserJet M2727 | Service Manual - Page 252
Figure 6-3 Print-cartridge high-voltage connection points (left side) 2 3 Check the high-voltage connector assembly Visually inspect the cartridge connection points inside the product to make sure that they are not dirty or corroded. If the pins are dirty, clean - HP LaserJet M2727 | Service Manual - Page 253
on the product. 3. Wait until the message Permanent storage init. appears, and then release the Cancel and left arrow buttons. Service menu NOTE: An asterisk (*) symbol next to a service submenu option indicates that this is the current setting for that option. For more information about using the - HP LaserJet M2727 | Service Manual - Page 254
Off* On Off* On None None Description Use a T.30 trace report to problem solve fax transmission and receive errors. The archive print feature produces output that is less susceptible to toner smearing and dusting. Use archive print to create documents that you want to preserve or archive. Lowers - HP LaserJet M2727 | Service Manual - Page 255
memory. These pages and reports help diagnose and solve problems with the product. NOTE: If the product language was not correctly set during installation, you can set the language manually so the information pages print in one of the supported languages. Change the language by using the System - HP LaserJet M2727 | Service Manual - Page 256
the arrow buttons to select Reports, and then press OK. 3. Use the arrow buttons to select Network report, and then press OK. 238 Chapter 6 Solve problems ENWW - HP LaserJet M2727 | Service Manual - Page 257
This section describes the fax reports that help you diagnose and solve problems with the product. Fax activity log The fax activity log provides a chronological history of the last 40 faxes that were received, sent, or deleted, and any errors that occurred. To print the fax activity log 1. On the - HP LaserJet M2727 | Service Manual - Page 258
configuration and problem solving tool. To view HP ToolboxFX Open HP ToolboxFX in one of these ways: ● On the Windows desktop, double-click the HP ToolboxFX icon. ● On the Windows Start menu, click Programs (All Programs in Windows XP), and then click HP ToolboxFX. Troubleshooting tab HP ToolboxFX - HP LaserJet M2727 | Service Manual - Page 259
menu Use the control-panel Service menu to solve product problems. Restore the factory-set defaults access to HP ToolboxFX, HP recommends cleaning the paper path by using HP ToolboxFX. Clean the paper path 1. On the product control panel, press Setup. 2. Use the arrow buttons to select Service, and - HP LaserJet M2727 | Service Manual - Page 260
trace report to problem-solve fax transmission product control panel, press Setup. 2. Use the arrow buttons to select Service, and then press OK. 3. Use the arrow buttons to select Print Archive print produces output that is less susceptible to toner smearing and dusting. Use archive print to create - HP LaserJet M2727 | Service Manual - Page 261
of the product. On the flash-memory-based product, you can update the firmware code by downloading the latest flash executable file for the product and running the program according to the readme instructions that come with it (go to www.hp.com). Turn the product off and then on before running the - HP LaserJet M2727 | Service Manual - Page 262
244 Chapter 6 Solve problems ENWW - HP LaserJet M2727 | Service Manual - Page 263
Scanner/ADF replacement parts ● Control-panel bezels ● Supplementary documentation and support ● Problem-solve diagrams ● Parts lists and diagrams ● Scanner and ADF assemblies ● Scanner components ● ADF components ● Convenience stapler components (HP LaserJet M2727nfs only) ● Formatter, fax card, HP - HP LaserJet M2727 | Service Manual - Page 264
● Tray 2 cassette and tray 3 cassette/feeder ● Duplexing assembly ● Fuser assembly ● Alphabetical parts list ● Numerical parts list 246 Chapter 7 Parts ENWW - HP LaserJet M2727 | Service Manual - Page 265
Accessories and ordering information Order replacement parts from the following Web sites: ● HP Parts Store: www.partsdirect.hp.com or www2.hp.com/hpparts/default.asp Order supplies from the following Web sites: ● To order supplies in the U.S., go to www.hp.com/sbso/product/supplies. ● To order - HP LaserJet M2727 | Service Manual - Page 266
Q7432-67001 (service) Memory Item Memory upgrades (DIMMs) Memory upgrades (DIMMs) Memory upgrades (DIMMs) Description The standard 64 MB of memory upgrading the DIMM. 64 MB 128 MB 256 MB Part number CB421A CB422A CB423A Cable and interface accessories Item USB cable HP Wireless Printing Upgrade - HP LaserJet M2727 | Service Manual - Page 267
Optional tray 3 cassette/feeder Tray 2 cassette Staple cassette (2 pack) Description Part number 250-sheet input tray/feeder for standard Q7556A (new) sizes. Only one optional 250-sheet tray can be installed. Q7556-67901 (service) 250-sheet input tray for standard sizes RM1-4251-000CN 1,500 - HP LaserJet M2727 | Service Manual - Page 268
a specific product bundle and localized configuration. Table 7-1 Whole unit replacement, product bundle CB532A Country/region Localized configuration Replacement part number Asia Pacific AB0 - Taiwan-Traditional Chinese CB532-67906 AB1 - Korea-Korean localization CB532-67907 AB2 - China - HP LaserJet M2727 | Service Manual - Page 269
- Latin Amer - (120v) Spanish localization AC4 - Brazil-Portuguese AKV - South America-Spanish North America ABA - U. S.-English A2L - Canada-FR/EN Replacement part number CB532-67921 CB532-67922 CB532-67923 CB532-67924 CB532-67925 CB532-67926 CB532-67927 CB532-67928 CB532-67929 CB532-67930 - HP LaserJet M2727 | Service Manual - Page 270
Table 7-2 Whole unit replacement, product bundle CB533A Country/region Localized configuration Replacement part number Asia Pacific AB0 - Taiwan-Traditional Chinese CB533-67901 AB1 - Korea-Korean localization CB533-67902 AB2 - China-Simplified Chinese CB533-67903 AB3 - Thailand-Thai - HP LaserJet M2727 | Service Manual - Page 271
- Latin Amer - (120v) Spanish localization AC4 - Brazil-Portuguese AKV - South America-Spanish North America ABA - U. S.-English A2L - Canada-FR/EN Replacement part number CB533-67916 CB533-67917 CB533-67918 CB533-67919 CB533-67920 CB533-67921 CB533-67922 CB533-67923 CB533-67924 CB533-67925 - HP LaserJet M2727 | Service Manual - Page 272
parts Item Part number PKG FGI ASSY HP LaserJet M2727 SSA (scanner assembly) CB532-67905 PKG FGI ASSY HP LaserJet M2727 ADF (ADF assembly) CB532-67903 HP LaserJet M2727 ADF cover replacement kit ADF flag replacement kit HP LaserJet M2727 input tray assembly Clean out ADF ADF pick roller assembly - HP LaserJet M2727 | Service Manual - Page 273
Chinese (ZHCN) Traditional Chinese (ZHTW) Thai (TH) Vietnamese (VI) Catalan (CA) Romanian (RO) Croation (HR) Slovenian (SL) Indonesian (ID) Kazakh (KK) ENWW Part number CB532-40009 CB532-40013 CB532-40012 CB532-40036 CB532-40015 CB532-40010 CB532-40019 CB532-40014 CB532-40018 CB532-40017 CB532 - HP LaserJet M2727 | Service Manual - Page 274
) Control-panel bezel Ukranian (UK) Control-panel bezel Serbian (SR) Control-panel bezel Lithuanian (LT) Control-panel bezel Estonia (ET) Control-panel bezel Latvian (LV) Part number CB532-40043 CB532-40044 CB532-40045 CB532-40046 CB532-400473 CB532-40048 256 Chapter - HP LaserJet M2727 | Service Manual - Page 275
Supplementary documentation and support Table 7-4 Service and training support Item Part number Service manual (this manual) CB532-90946 A printed copy of the user guide is available in the following languages. Table 7-5 User guides Language Part number English CB532-90901 Chinese, - HP LaserJet M2727 | Service Manual - Page 276
Table 7-7 Technical support Web sites HP Customer Care Online Software drivers, support documentation, and answers to frequently asked questions HP Technical Training (North America) Classes and schedules www.hp.com/support/LJM2727 www.hp.com/go/resellertraining 258 Chapter 7 Parts ENWW - HP LaserJet M2727 | Service Manual - Page 277
Problem-solve diagrams ● Repetitive image defects ● Interface connectors ● Formatter connectors ● Fax card ● Solenoids ● Switches and sensors ● Rollers and pads ● PCAs (base unit) ● Major components (base unit) ● Scanner and ADF ● Circuit diagram (1 of 2) ● Circuit diagram (2 of 2) Repetitive image - HP LaserJet M2727 | Service Manual - Page 278
only installed on products that use the Asian fax control panel display. Not all products will have this PCA installed. J2 Flatbed motor 260 Chapter 7 Parts ENWW - HP LaserJet M2727 | Service Manual - Page 279
) J34 Tray 1 solenoid (MP tray) J35 Memory tag (E-label) J36 ADF motor P104 BDM P108 Serial P109 SPI module P110 Ansible trace monitor Fax card Figure 7-3 Fax card connectors J2 J9 Table 7-11 Fax card Item Description J2 Formatter J9 Fax ports ENWW Problem-solve diagrams 261 - HP LaserJet M2727 | Service Manual - Page 280
Solenoids Figure 7-4 Solenoids 1 2 3 Table 7-12 Solenoids Item Description 1 Duplex solenoid 2 Tray 1 pickup solenoid 3 Tray 2 pickup solenoid 262 Chapter 7 Parts ENWW - HP LaserJet M2727 | Service Manual - Page 281
Switches and sensors Figure 7-5 Switches and sensors 2 3 1 1 Table 7-13 Switches and sensors Item Description 1 Interlock switch 2 Delivery sensor 3 Top-of-page sensor ENWW Problem-solve diagrams 263 - HP LaserJet M2727 | Service Manual - Page 282
Rollers and pads Figure 7-6 Rollers and pads 2 3 1 4 Table 7-14 Rollers and pads Item Description 1 Transfer roller 2 Pressure roller 3 Pickup roller 4 Separation pad 264 Chapter 7 Parts ENWW - HP LaserJet M2727 | Service Manual - Page 283
PCAs (base unit) Figure 7-7 PCAs (base unit) 2 1 Table 7-15 PCAs (base unit) Item Description 1 Engine-controller assembly (ECU) 2 Power-switch PCA ENWW Problem-solve diagrams 265 - HP LaserJet M2727 | Service Manual - Page 284
(base unit) Figure 7-8 Major components (base unit) 1 2 3 6 5 4 Table 7-16 Major components (base unit) Item Description 1 Duplex-drive gears 2 Main-drive assembly 3 Duplex-drive assembly 4 Engine-controller assembly (ECU) 5 Tray 2 cassette 6 Fuser 266 Chapter 7 Parts ENWW - HP LaserJet M2727 | Service Manual - Page 285
Scanner and ADF Figure 7-9 Scanner and ADF 2 1 Table 7-17 Scanner and ADF Item Description 1 Scanner 2 ADF ENWW Problem-solve diagrams 267 - HP LaserJet M2727 | Service Manual - Page 286
ADF cover ADF detect ADF paper 1 ADF paper 2 Circuit diagram (1 of 2) Figure 7-10 Circuit diagram (1 of 2) CCD scanner assembly CCFL LED AC inverter PCA Scanner sub-assembly (SSA) J1 CCD sensor (soldered to PCB) Scanner PCB J2 Flatbed motor 12345 FFC cable P2 Front panel LCD and Key - HP LaserJet M2727 | Service Manual - Page 287
Circuit diagram (2 of 2) Figure 7-11 Circuit diagram (2 of 2) Fuser Engine controller PCA HP LJ 272 7nfs FFC to formatter Paper feeder driver PCA ENWW Problem-solve diagrams 269 - HP LaserJet M2727 | Service Manual - Page 288
the voltage that is listed in the description column to ensure that the part number selected is for the correct product model. NOTE: In this manual, the abbreviation "PCA" stands for "printed circuit board assembly." Components described as a PCA might consist of a single circuit board or a circuit - HP LaserJet M2727 | Service Manual - Page 289
M3X8 M3X8 M4X12 Screw, tapping M3X6 Screw, tapping, truss head M4X10 Screw, tapping binding, head M3X8 Screw, toothed washer M4X6 Screw, TP M3X8 12 mm Part number XA9-1495-000CN XA9-1561-000CN XA9-1504-000CN XA9-1420-000CN XA9-1492-000CN XB9-1503-000CN XB4-7401-005CN XB4-7300-809CN - HP LaserJet M2727 | Service Manual - Page 290
Scanner and ADF assemblies Figure 7-12 Scanner and ADF assemblies 272 Chapter 7 Parts ENWW - HP LaserJet M2727 | Service Manual - Page 291
Description Part number Qty 1 ADF PKG FGI ASSY (automatic document feeder) CB532-67903 1 2 Input tray assembly HP LaserJet M2727 Q6500-60119 1 3 ADF hinge replacement kit Q3948-67905 1 4 SSA PKG FGI ASSY (scanner flatbed assembly) CB532-67905 1 ENWW Scanner and ADF assemblies 273 - HP LaserJet M2727 | Service Manual - Page 292
Scanner components Figure 7-13 Scanner assemblies 274 Chapter 7 Parts ENWW - HP LaserJet M2727 | Service Manual - Page 293
Scanner components Ref Description 1 ADF window replacement kit 2 Bezel, control panel 3 Control panel, Western fax 3 Control panel, Asian fax Part HP jewel, and nameplate on page 280) must be installed on the formatter to support the Asian fax control panel (CB532-60102). ENWW Scanner - HP LaserJet M2727 | Service Manual - Page 294
ADF components Figure 7-14 ADF components 276 Chapter 7 Parts ENWW - HP LaserJet M2727 | Service Manual - Page 295
Table 7-20 ADF components Ref Description 1 ADF cover replacement kit 2 ADF cleanout part 3 ADF flag replacement kit 4 ADF pickup roller assembly 5 ADF separation pad Part number Qty Q6500-67901 1 C7309-40153 1 Q3948-67902 1 5851-2559 1 Q2665-60125 1 ENWW ADF components 277 - HP LaserJet M2727 | Service Manual - Page 296
Convenience stapler components (HP LaserJet M2727nfs only) Figure 7-15 Convenience stapler components (HP LaserJet M2727nfs only) 278 Chapter 7 Parts ENWW - HP LaserJet M2727 | Service Manual - Page 297
components (HP LaserJet M2727nfs only) Ref Description Part number Qty 1 Convenience stapler mechanism HP LaserJet M2727nfs CB532-60105 1 (replacement) 2 Convenience stapler AC inlet cable HP LaserJet M2727nfs Q6501-60101 1 3 Convenience stapler cover door HP LaserJet M2727nfs RC1 - HP LaserJet M2727 | Service Manual - Page 298
Formatter, fax card, HP jewel, and nameplate Figure 7-16 Formatter, fax card, HP jewel, and nameplate 6 5 280 Chapter 7 Parts ENWW - HP LaserJet M2727 | Service Manual - Page 299
nameplate Ref Description Part number Qty 1 Formatter PCA CC370-60001 1 2 Fax card/Formatter FFC CB534-60117 1 3 Fax card US/AP ROHS CC502-60001 1 3 Fax card EMEA ROHS CC369-60001 1 4 Nameplate HP LaserJet M2727nf CB532-00009 1 4 Nameplate HP LaserJet M2727nfs CB532-00003 - HP LaserJet M2727 | Service Manual - Page 300
External covers and panels Figure 7-17 External covers and panels 1 2 7 3 6 See Cartridge door assembly 4 5 282 Chapter 7 Parts ENWW - HP LaserJet M2727 | Service Manual - Page 301
Table 7-23 External covers and panels Ref Description Part number Qty 1 Rear cover assembly RM1-4270-000CN 1 2 Cover right (with dummy stapler cover) DIMM door) RC1-4707-000CN 1 7 Cover dummy (stapler plug; HP LaserJet M2727nf) RC1-7523-000CN 1 ENWW External covers and panels 283 - HP LaserJet M2727 | Service Manual - Page 302
Cartridge door assembly Figure 7-18 Cartridge door assembly 1 2 284 Chapter 7 Parts ENWW - HP LaserJet M2727 | Service Manual - Page 303
Table 7-24 Cartridge door assembly Ref Description All Cartridge door assembly 1 Inner cover 2 Screw, tapping truss Part number Qty RM1-4711-000CN 1 RM1-4712-000CN 1 XB4-7401-000CN 2 ENWW Cartridge door assembly 285 - HP LaserJet M2727 | Service Manual - Page 304
components (1 of 4) Figure 7-19 Internal components (1 of 4) 1 3 29 2 30 4 30 A See Fuser assembly A 4 29 4 4 34 (J5) 4 See Duplexing-drive assembly See Main-drive 28 27 assembly 4 6 7 11 26 16 13 14 17 (PS916) (J208) 15 19 20 18 21 22 21 23 286 Chapter 7 Parts ENWW - HP LaserJet M2727 | Service Manual - Page 305
Table 7-25 Internal components (1 of 4) Ref Description 1 Paper-retaining assembly 2 Roller, face down 3 Paper-feed guide assembly 4 Screw, RS M3X6 6 Guide, DC cable 2 7 Paper-pickup gear assembly 11 MP separation pad (Tray 1) 13 Screw, tapping truss head M4X10 15 Screw, tapping - HP LaserJet M2727 | Service Manual - Page 306
) 3 (J2100) (J210) 38 78 13 7 11 10 (FM1) (J1205) (SL3) (J211) 1 (J209) 7 (J202) (J1202) (M1) 7 A 1 1 33 31 (J1205) 7 7 (SL1) 7 21 22 (J207) 1 1 See Engine-controller assembly (ECU) 27 26 25 A See Duplexing assembly 288 Chapter 7 Parts ENWW - HP LaserJet M2727 | Service Manual - Page 307
Screw, TP M3X8 13 Holder, drawer connector 22 Solenoid (SL1) 25 Guide, cartridge right lower 26 Screw, RS M3X8 27 Guide, cartridge right upper 31 Screw, tap M3X6 33 Motor, DC 38 Scanner assembly (laser/scanner) Part number Qty XA9-1504-000CN 8 RC2-0405-000CN 1 RC2-0392-000CN - HP LaserJet M2727 | Service Manual - Page 308
Internal components (3 of 4) Figure 7-21 Internal components (3 of 4) 1 2 28 20 5 4 6 1 12 15 1 (PS911) 13 (J203) (PS912) 1 (PS913) 8 9 10 290 Chapter 7 Parts ENWW - HP LaserJet M2727 | Service Manual - Page 309
guide open 4 Registration assembly 5 Label, clear jam 6 Label, fixing (fusing) pressure release 8 Shutter link assembly 9 Screw, RS M3X8 10 Top-sensor assembly RS M3X6 15 Paper-width sensor assembly 20 Screw, w/washer M3X8 28 Roller, transfer Part number Qty XB4-7401-005CN 7 - HP LaserJet M2727 | Service Manual - Page 310
Internal components (4 of 4) Figure 7-22 Internal components (4 of 4) 35 32 31 34 32 33 36 (J1101) (J101) 42 (J1102) 43 4 12 21 4 12 (SW301) 12 4 12 10 (J4) 12 (SL2) 11 12 1 4 3 4 292 Chapter 7 Parts ENWW - HP LaserJet M2727 | Service Manual - Page 311
(SL2) 12 Screw, RS M3X6 31 MP left cam 32 MP roller 33 MP paper-pickup roller holder 34 MP pickup roller 35 MP paper-pickup roller cover 36 MP right cam 42 Screw, toothed washer M4X6 43 Screw, w/washer M3X8 Part number Qty RC2-0425-000CN 1 RC2-0339-000CN 1 XA9-1504-000CN - HP LaserJet M2727 | Service Manual - Page 312
Engine-controller assembly (ECU) Figure 7-23 Engine-controller assembly 2 2 2 2 1 (J1) 3 (J7) 294 Chapter 7 Parts ENWW - HP LaserJet M2727 | Service Manual - Page 313
Table 7-29 Engine-controller assembly Ref Description 1 Engine-controller PCA (110 to 127 v) 1 Engine-controller PCA (220 to 240 v) 2 Screw, w/washer M3X8 3 Screw, RS M3X6 Part number Qty RM1-4940-000CN 1 RM1-4941-000CN 1 XA9-1420-000CN 4 XA9-1495-000CN 1 ENWW Engine-controller - HP LaserJet M2727 | Service Manual - Page 314
Main-drive assembly Figure 7-24 Main-drive assembly 296 Chapter 7 Parts ENWW - HP LaserJet M2727 | Service Manual - Page 315
Table 7-30 Main-drive assembly Ref Description all Main-drive assembly Part number Qty RM1-4253-000CN 1 ENWW Main-drive assembly 297 - HP LaserJet M2727 | Service Manual - Page 316
Duplexing-drive assembly Figure 7-25 Duplexing-drive assembly 1 2 298 Chapter 7 Parts ENWW - HP LaserJet M2727 | Service Manual - Page 317
Table 7-31 Duplexing-drive assembly Ref Description all Duplexing-drive assembly 1 Normal-rotation drive assembly 2 Reverse-rotation drive assembly Part number Qty RM1-4255-000CN 1 RM1-4256-000CN 1 RM1-4257-000CN 1 ENWW Duplexing-drive assembly 299 - HP LaserJet M2727 | Service Manual - Page 318
Tray 2 cassette and tray 3 cassette/feeder Figure 7-26 Tray 2 cassette and tray 3 cassette/feeder 300 Chapter 7 Parts ENWW - HP LaserJet M2727 | Service Manual - Page 319
) 2 Cassette/feeder, tray 3 (250-sheet) Not shown Separation pad, tray 2 and optional tray 3 Part number Qty RM1-4251-000CN 1 Q7556-67901 1 RM1-1292-000CN 1 NOTE: Paper trays are not serviceable. Replace the entire tray if needed. ENWW Tray 2 cassette and tray 3 cassette/feeder 301 - HP LaserJet M2727 | Service Manual - Page 320
Duplexing assembly Figure 7-27 Duplexing assembly 1 302 Chapter 7 Parts A15 ENWW - HP LaserJet M2727 | Service Manual - Page 321
Table 7-33 Duplexing assembly Ref Description all Duplexing assembly 1 Size-change assembly Part number Qty RM1-4258-000CN 1 RM1-1318-000CN 1 ENWW Duplexing assembly 303 - HP LaserJet M2727 | Service Manual - Page 322
Fuser assembly Figure 7-28 Fuser assembly 304 Chapter 7 Parts ENWW - HP LaserJet M2727 | Service Manual - Page 323
Table 7-34 Fuser assembly Ref Description all Fuser (110 to 127 v) all Fuser (220 to 240 v) Part number Qty RM1-4247-000CN 1 RM1-4248-000CN 1 ENWW Fuser assembly 305 - HP LaserJet M2727 | Service Manual - Page 324
-67905 Scanner and ADF assemblies on page 273 ADF pickup roller assembly 5851-2559 ADF components on page 277 ADF PKG FGI ASSY (automatic document feeder) CB532-67903 Scanner and ADF assemblies on page 273 ADF separation pad Q2665-60125 ADF components on page 277 ADF window replacement - HP LaserJet M2727 | Service Manual - Page 325
and strap HP LaserJet CB532-67902 M2727nfs Convenience stapler power supply HP LaserJet M2727nfs Q7429-60501 Cover dummy (stapler plug; HP LaserJet M2727nf) Cover front Cover left (with DIMM door) Cover right (with dummy stapler cover) Cover top Duplexing assembly Duplexing-drive assembly Engine - HP LaserJet M2727 | Service Manual - Page 326
HP LaserJet M2727 Jewel, HP Label, clear jam Label, fixing (fusing) pressure release Label, stapler prohibition Label, transfer guide open Left bushing Main-drive assembly Motor, DC MP left cam MP paper-pickup roller cover MP paper-pickup roller holder MP pickup roller MP right cam MP roller Part - HP LaserJet M2727 | Service Manual - Page 327
7-35 Alphabetical parts list (continued) Description MP separation pad (Tray 1) MP solenoid holder Nameplate HP LaserJet M2727nf Nameplate HP LaserJet M2727nfs Normal-rotation drive assembly Paper-feed guide assembly Paper-pickup drive shaft Paper-pickup gear assembly Paper-retaining assembly Paper - HP LaserJet M2727 | Service Manual - Page 328
washer M4X12 Separation pad base Separation pad, tray 2 and optional tray 3 Part number XA9-1495-000CN XA9-1495-000CN XA9-1495-000CN XA9-1504-000CN on page 289 Internal components (1 of 4) on page 287 Cartridge door assembly on page 285 Internal components (1 of 4) on page 287 Internal components - HP LaserJet M2727 | Service Manual - Page 329
assembly Size-change assembly Solenoid (SL1) Solenoid (SL2) Solenoid (SL3) Speaker assembly Spring, compression Spring, compression SSA PKG FGI ASSY (scanner flatbed assembly) Top-sensor assembly Part 4) on page 287 Scanner and ADF assemblies on page 273 Internal components (3 of 4) on page - HP LaserJet M2727 | Service Manual - Page 330
kit Scanner and ADF assemblies on page 273 Q6500-60119 Input tray assembly HP LaserJet M2727 Scanner and ADF assemblies on page 273 Q6500-67901 ADF cover replacement kit ADF components on page 277 Q6500-67904 ADF window replacement kit Scanner components on page 275 312 Chapter 7 Parts - HP LaserJet M2727 | Service Manual - Page 331
) Part number Description Table and page Q6501-60101 Convenience stapler AC inlet cable HP LaserJet M2727nfs Convenience stapler components (HP LaserJet M2727nfs only) on page 279 Q7429-60501 Convenience stapler power supply HP LaserJet M2727nfs Convenience stapler components (HP LaserJet - HP LaserJet M2727 | Service Manual - Page 332
Table 7-36 Numerical parts list (continued) Part number Description RC2-0346-000CN Guide, cartridge right lower RC2-0386-000CN MP paper-pickup roller holder RC2-0387-000CN MP left cam RC2-0388-000CN MP right cam RC2-0392-000CN Arm, tag RC2-0396-000CN Holder, drawer connector RC2- - HP LaserJet M2727 | Service Manual - Page 333
-000CN Reverse-rotation drive assembly RM1-4258-000CN Duplexing assembly RM1-4262-000CN Scanner assembly (laser/scanner) RM1-4263-000CN Paper-feed guide assembly RM1-4265-000CN Paper-retaining assembly RM1-4270-000CN Rear cover assembly RM1-4279-000CN Roller, transfer RM1-4708-000CN - HP LaserJet M2727 | Service Manual - Page 334
316 Chapter 7 Parts Table and page Cartridge door assembly on page 285 Engine-controller assembly on page 295 Engine-controller assembly on page 295 287 Scanner components on page 275 Internal components (3 of 4) on page 291 Internal components (4 of 4) on page 293 Engine-controller assembly on - HP LaserJet M2727 | Service Manual - Page 335
Table 7-36 Numerical parts list (continued) Part number Description XA9-1504-000CN Screw, RS M3X8 components (1 of 4) on page 287 Internal components (3 of 4) on page 291 Cartridge door assembly on page 285 Internal components (1 of 4) on page 287 Internal components (3 of 4) on page - HP LaserJet M2727 | Service Manual - Page 336
318 Chapter 7 Parts ENWW - HP LaserJet M2727 | Service Manual - Page 337
A Service and support Hewlett-Packard limited warranty statement HP PRODUCT HP LaserJet M2727nf and M2727nfs DURATION OF LIMITED WARRANTY One-year limited warranty HP warrants to you, the end-user customer, that HP hardware and accessories will be free from defects in materials and workmanship - HP LaserJet M2727 | Service Manual - Page 338
NOT EXCLUDE, RESTRICT OR MODIFY AND ARE IN ADDITION TO THE MANDATORY STATUTORY RIGHTS APPLICABLE TO THE SALE OF THIS PRODUCT TO YOU. 320 Appendix A Service and support ENWW - HP LaserJet M2727 | Service Manual - Page 339
product or (c) exhibit wear from ordinary use. To obtain warranty service, please return the product to place of purchase (with a written description of the problem and print samples) or contact HP customer support. At HP's option, HP will either replace products that prove to be defective or refund - HP LaserJet M2727 | Service Manual - Page 340
322 Appendix A Service and support ENWW - HP LaserJet M2727 | Service Manual - Page 341
B Specifications This section contains the following information about the product: ● Physical specifications ● Electrical specifications ● Power consumption ● Environmental specifications ● Acoustic emissions ENWW 323 - HP LaserJet M2727 | Service Manual - Page 342
watts)1, 5 Product model Printing2 Copying2 Ready/Sleep3, 4 Off2 HP LaserJet M2727nf 410 W 410 W 13 W - HP LaserJet M2727 | Service Manual - Page 343
(A) [64 dB (A)] Inaudible Sound Pressure Level - Bystander Position Declared per ISO 92961 Printing (26 ppm) LpAm = 50 dB(A) Ready Inaudible 1 Values are based on preliminary data. See www.hp.com/support/LJM2727 for current information. 2 Configuration tested: HP LaserJet M2727nf printing - HP LaserJet M2727 | Service Manual - Page 344
326 Appendix B Specifications ENWW - HP LaserJet M2727 | Service Manual - Page 345
C Regulatory information This section contains the following regulatory information: ● FCC compliance ● Environmental product stewardship program ● Telephone Consumer Protection Act (United States) ● IC CS-03 requirements ● EU statement for telecom operation ● New Zealand telecom statements ● - HP LaserJet M2727 | Service Manual - Page 346
to make the necessary modifications in order to maintain uninterrupted service. If trouble is experienced with this equipment, please see the numbers in the front of this manual for repair and (or) warranty information. If the trouble is causing harm to the telephone network, the telephone company - HP LaserJet M2727 | Service Manual - Page 347
and instructions are included in every new HP LaserJet print cartridge and supplies package. You help reduce the toll on the environment further when you return multiple cartridges together rather than separately. HP is committed to providing inventive, high-quality products and services that - HP LaserJet M2727 | Service Manual - Page 348
The enclosed label in the HP LaserJet toner cartridge box is for the return and recycling of one or more HP LaserJet print cartridges after use. Please follow the applicable instructions below. Multiple returns (two to eight cartridges) 1. Package each HP LaserJet print cartridge in its original - HP LaserJet M2727 | Service Manual - Page 349
HP LaserJet M2727 Type Weight Location User-removable Carbon monofluoride lithium 0.8 g On formatter board No For recycling information, you can go to www.hp your household waste disposal service or the shop where toner) can be obtained by contacting the HP Web site at www.hp.com/go/msds or www.hp - HP LaserJet M2727 | Service Manual - Page 350
obtain information about these environmental topics: ● Product environmental profile sheet for this and many related HP products ● HP's commitment to the environment ● HP's environmental management system ● HP's end-of-life product return and recycling program ● Material Safety Data Sheets Visit www - HP LaserJet M2727 | Service Manual - Page 351
an acceptable method of connection. The customer should be aware that compliance with the above conditions may not prevent degradation of service in some situations. Repairs to certified equipment should be coordinated by a representative designated by the supplier. Any repairs or alterations made - HP LaserJet M2727 | Service Manual - Page 352
its connection to the PSTN. Please follow the instructions provided in the user manual. If you experience network compatibility issues, please does it imply that any product is compatible with all of Telecom's network services. This equipment may not provide for the effective hand-over of a call - HP LaserJet M2727 | Service Manual - Page 353
Regulatory Model Number2) HP LaserJet M2727 nf and M2727nfs BOISB-0602-01 CE-Marking accordingly. This Device complies with Part 15 of the FCC Rules. Operation is Service Office or Hewlett-Packard GmbH, Department HQ-TRE / Standards Europe,, Herrenberger Strasse 140, , D-71034, Böblingen, (FAX: +49 - HP LaserJet M2727 | Service Manual - Page 354
Class 1" laser product under the U.S. Department of Health and Human Services (DHHS) Radiation Performance Standard according to the Radiation Control for , or performing procedures other than those specified in this user guide may result in exposure to hazardous radiation. Canadian DOC regulations - HP LaserJet M2727 | Service Manual - Page 355
sätt än i bruksanvisning specificerats, kan användaren utsättas för osynlig laserstrålning, som överskrider gränsen för laserklass 1. HUOLTO HP LaserJet M2727nf, M2727nfs - kirjoittimen sisällä ei ole käyttäjän huollettavissa olevia kohteita. Laitteen saa avata ja huoltaa ainoastaan sen huoltamiseen - HP LaserJet M2727 | Service Manual - Page 356
Substances table (China) 338 Appendix C Regulatory information ENWW - HP LaserJet M2727 | Service Manual - Page 357
5 operations 73 page sizes supported 222 paper path 74 part numbers 254, 272 pickup-roller assembly, replacing 110 removing scanner assembly 117 scanner assembly, removing 117 scanner glass, removing 113 sensors 74 trailing edge detection 75 troubleshooting 229 ADF jam detection document-feeder jam - HP LaserJet M2727 | Service Manual - Page 358
95 troubleshooting 166 checks drum rotation 230 engine 231 half-self-test 232 heating element 233 high-voltage power supply 233 circuit diagram (1 of 2) 268 circuit diagram (2 of 2) 269 classes, HP Technical Training 258 cleaning ADF pickup-roller assembly 55 exterior of product 49 flatbed scanner - HP LaserJet M2727 | Service Manual - Page 359
204 specifications 4 drivers specifications 4 supported 9 drum rotation test 230 DSL, troubleshooting 228 duplex assembly, removing 135 assembly (ECU), part numbers 294 environmental specifications 20, 325 environmental stewardship program 329 error mesages ADF paper jams 75 paper jams, ADF 75 error - HP LaserJet M2727 | Service Manual - Page 360
280 removing 132 fraud hotline 48 fuser error 177 warranty 321 fuser assembly, part number 304 fuser, removing 147 G gears duplex-drive, removing 143 Getting Started Guide 2, 258 glass, cleaning 49 gray background, troubleshooting 207 guides. See documentation H half-self-test functional check - HP LaserJet M2727 | Service Manual - Page 361
158 main-drive assembly, part numbers 296 major component diagrams 266 managing product HP ToolboxFX 58 manuals. See documentation material restrictions 330 Material Safety Data Sheet (MSDS) 331 media ADF feeding operations 73 ADF, sizes supported 222 curled, troubleshooting 209, 236 default - HP LaserJet M2727 | Service Manual - Page 362
critical 177 Microsoft Windows drivers supported 9 model number, locating 8 moisture on the trailing edge, troubleshooting 210 motor, removing main 158 multipurpose tray. See tray 2 N nameplate, part numbers 280 network device polling, HP Toolbox FX 65 DSL, troubleshooting 228 HP ToolboxFX, device - HP LaserJet M2727 | Service Manual - Page 363
321 print defects troubleshooting 205 print driver included components list 9 included components list, Macintosh 10 print drivers supported 9 print drivers, PCL 5e HP ToolboxFX settings 66 print drivers, PostScript HP ToolboxFX settings 66 print engine laser/scanner assembly, removing 137 removing - HP LaserJet M2727 | Service Manual - Page 364
registration-roller assembly 161 scanner assembly 117 scanner glass, ADF 113 screws 94 speaker 128 stapler ac inlet cable 126 stapler assembly 122 stapler bracket and strap 127 transfer roller 160 removing parts ADF assembly 115 ADF pickup-roller assembly 110 ADF scanner glass 113 assembly, internal - HP LaserJet M2727 | Service Manual - Page 365
, troubleshooting 210, 259 replace supplies, life expectancies 34 replacing ADF pickup-roller assembly 110 ADF scanner glass 113 assemblies, internal 122 internal assemblies 122 pads, separation 45 parts 93 pickup roller, tray 2 40 pickup-roller assembly, ADF 110 roller, pickup 40 scanner glass, ADF - HP LaserJet M2727 | Service Manual - Page 366
209 slow speed, troubleshooting faxing 226 scanning 212 smeared toner, troubleshooting 207 software components 9 drivers supported 9 HP ToolboxFX 58 Macintosh 13 Macintosh Configure Device 67 supported operating systems 9 system requirements 21 uninstall 15 Windows 12 software installation included - HP LaserJet M2727 | Service Manual - Page 367
208 scatter, troubleshooting 210 smeared, troubleshooting 207 specks, troubleshooting 206 toner cartridges. See print cartridges tools, required user-replaceable parts 95 top cover, removing 108 trailing edge detection ADF 75 Training, HP Technical 258 transfer roller, removing 160 transfer - HP LaserJet M2727 | Service Manual - Page 368
included 4 User Guide 2 User guide part numbers 257 user-replaceable parts required tools 95 tools required 95 white or faded stripes 214 Windows software components 12 system requirements 21 uninstall software 15 wrinkles, troubleshooting 209 V vertical lines, troubleshooting 206 vertical white - HP LaserJet M2727 | Service Manual - Page 369
- HP LaserJet M2727 | Service Manual - Page 370
© 2007 Hewlett-Packard Development Company, L.P. www.hp.com *CB532-90946* *CB532-90946* CB532-90946
-
 1
1 -
 2
2 -
 3
3 -
 4
4 -
 5
5 -
 6
6 -
 7
7 -
8
-
9
-
10
-
11
-
12
-
13
-
14
-
15
-
16
-
17
-
18
-
19
-
20
-
21
-
22
-
23
-
24
-
25
-
26
-
27
-
28
-
29
-
30
-
31
-
32
-
33
-
34
-
35
-
36
-
37
-
38
-
39
-
40
-
41
-
42
-
43
-
44
-
45
-
46
-
47
-
48
-
49
-
50
-
51
-
52
-
53
-
54
-
55
-
56
-
57
-
58
-
59
-
60
-
61
-
62
-
63
-
64
-
65
-
66
-
67
-
68
-
69
-
70
-
71
-
72
-
73
-
74
-
75
-
76
-
77
-
78
-
79
-
80
-
81
-
82
-
83
-
84
-
85
-
86
-
87
-
88
-
89
-
90
-
91
-
92
-
93
-
94
-
95
-
96
-
97
-
98
-
99
-
100
-
101
-
102
-
103
-
104
-
105
-
106
-
107
-
108
-
109
-
110
-
111
-
112
-
113
-
114
-
115
-
116
-
117
-
118
-
119
-
120
-
121
-
122
-
123
-
124
-
125
-
126
-
127
-
128
-
129
-
130
-
131
-
132
-
133
-
134
-
135
-
136
-
137
-
138
-
139
-
140
-
141
-
142
-
143
-
144
-
145
-
146
-
147
-
148
-
149
-
150
-
151
-
152
-
153
-
154
-
155
-
156
-
157
-
158
-
159
-
160
-
161
-
162
-
163
-
164
-
165
-
166
-
167
-
168
-
169
-
170
-
171
-
172
-
173
-
174
-
175
-
176
-
177
-
178
-
179
-
180
-
181
-
182
-
183
-
184
-
185
-
186
-
187
-
188
-
189
-
190
-
191
-
192
-
193
-
194
-
195
-
196
-
197
-
198
-
199
-
200
-
201
-
202
-
203
-
204
-
205
-
206
-
207
-
208
-
209
-
210
-
211
-
212
-
213
-
214
-
215
-
216
-
217
-
218
-
219
-
220
-
221
-
222
-
223
-
224
-
225
-
226
-
227
-
228
-
229
-
230
-
231
-
232
-
233
-
234
-
235
-
236
-
237
-
238
-
239
-
240
-
241
-
242
-
243
-
244
-
245
-
246
-
247
-
248
-
249
-
250
-
251
-
252
-
253
-
254
-
255
-
256
-
257
-
258
-
259
-
260
-
261
-
262
-
263
-
264
-
265
-
266
-
267
-
268
-
269
-
270
-
271
-
272
-
273
-
274
-
275
-
276
-
277
-
278
-
279
-
280
-
281
-
282
-
283
-
284
-
285
-
286
-
287
-
288
-
289
-
290
-
291
-
292
-
293
-
294
-
295
-
296
-
297
-
298
-
299
-
300
-
301
-
302
-
303
-
304
-
305
-
306
-
307
-
308
-
309
-
310
-
311
-
312
-
313
-
314
-
315
-
316
-
317
-
318
-
319
-
320
-
321
-
322
-
323
-
324
-
325
-
326
-
327
-
328
-
329
-
330
-
331
-
332
-
333
-
334
-
335
-
336
-
337
-
338
-
339
-
340
-
341
-
342
-
343
-
344
-
345
-
346
-
347
-
348
-
349
-
350
-
351
-
352
-
353
-
354
-
355
-
356
-
357
-
358
-
359
-
360
-
361
-
362
-
363
-
364
-
365
-
366
-
367
-
368
-
369
-
370
 |
 |

HP LaserJet M2727 MFP Series
Service Manual