HP Nc6220 Using LightScribe (Select Models Only) - Page 10
Add Image, LightScribe Print, Print, The estimated time - keyboard removal
 |
View all HP Nc6220 manuals
Add to My Manuals
Save this manual to your list of manuals |
Page 10 highlights
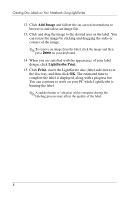
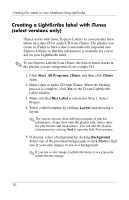
Creating Disc Labels on Your Notebook Using LightScribe 12. Click Add Image and follow the on-screen instructions to browse to and select an image file. 13. Click and drag the image to the desired area on the label. You can resize the image by clicking and dragging the sides or corners of the image. ✎ To remove an image from the label, click the image and then press Delete on your keyboard. 14. When you are satisfied with the appearance of your label design, click LightScribe Print. 15. Click Print, insert the LightScribe disc (label-side down) in the disc tray, and then click OK. The estimated time to complete the label is displayed, along with a progress bar. You can continue to work on your PC while LightScribe is burning the label. ✎ A sudden bump or vibration of the computer during the labeling process may affect the quality of the label. 8
-
 1
1 -
2
-
3
-
4
-
 5
5 -
 6
6 -
 7
7 -
 8
8 -
 9
9 -
 10
10 -
 11
11 -
 12
12 -
 13
13
 |
 |