HP Nc6220 Using LightScribe (Select Models Only) - Page 12
Creating a LightScribe label with iTunes (select versions only) - project playlist
 |
View all HP Nc6220 manuals
Add to My Manuals
Save this manual to your list of manuals |
Page 12 highlights
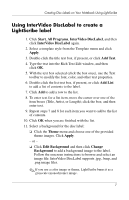
Creating Disc Labels on Your Notebook Using LightScribe Creating a LightScribe label with iTunes (select versions only) iTunes works with Sonic Express Labeler to conveniently burn labels on a data CD or audio CD from iTunes. The playlist you create in iTunes to burn a disc is automatically imported into Express Labeler so that this information is available for you to use on your LightScribe label. ✎ To use Express Labeler from iTunes, the data or music tracks in the playlist you are using must fit on a single CD. 1. Click Start, All Programs, iTunes, and then click iTunes again. 2. Burn a data or audio CD with iTunes. When the burning process is complete, click Yes on the Create LightScribe Label window. 3. Make sure that Disc Label is selected in Step 1: Select Project. 4. Select a label template by clicking Layout and choosing a layout. ✎ The various layouts show different amounts of playlist information. Some show only the playlist title, others show the playlist title and track names. You can edit the playlist information by clicking Text to open the Edit Text window. 5. If desired, select a background by clicking Background. Select one of the provided backgrounds or click More to find one of your own images to use as a background. ✎ If you use a color image, LightScribe burns it as a grayscale (monochrome) image. 10
-
 1
1 -
2
-
3
-
4
-
5
-
6
-
 7
7 -
 8
8 -
 9
9 -
 10
10 -
 11
11 -
 12
12 -
 13
13
 |
 |