HP Photosmart C8100 Getting Started Guide - Page 4
minutes, le temps que la d'alignement
 |
View all HP Photosmart C8100 manuals
Add to My Manuals
Save this manual to your list of manuals |
Page 4 highlights
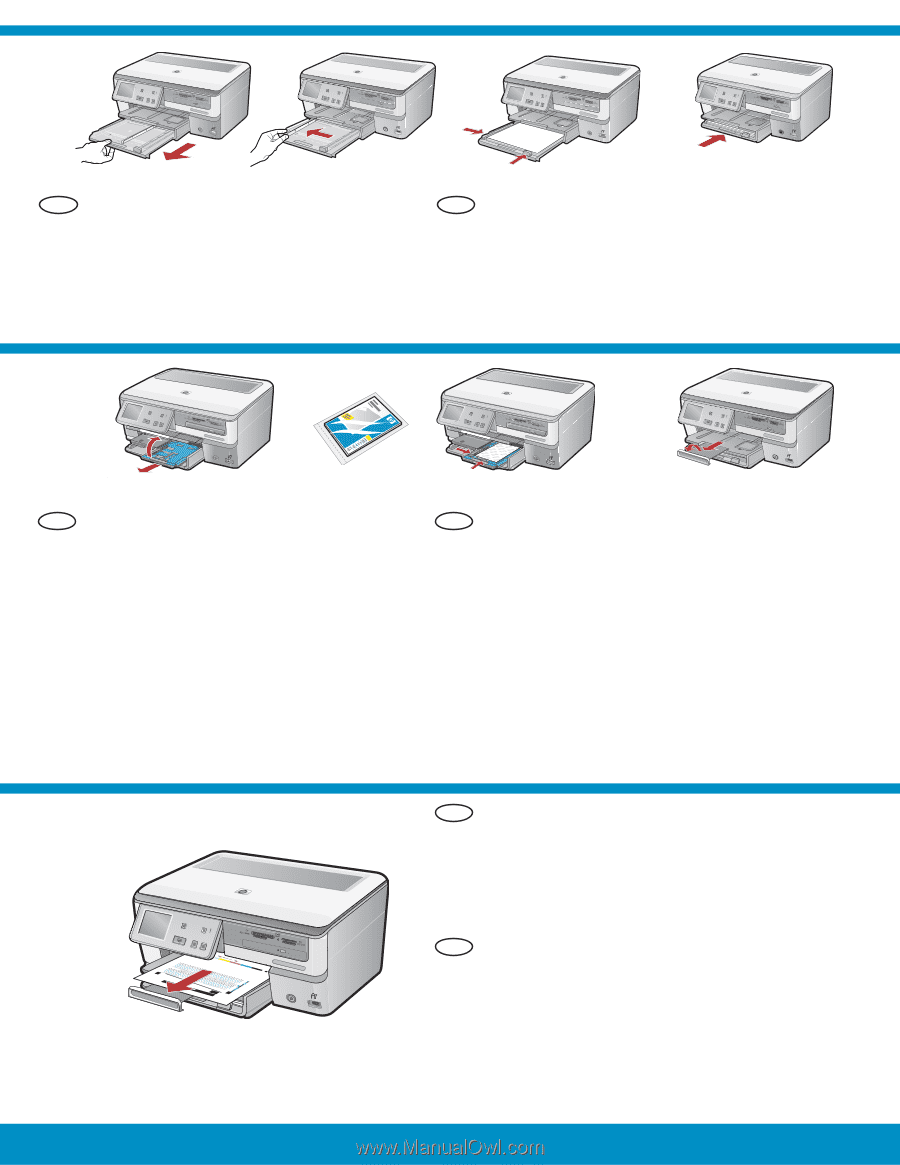
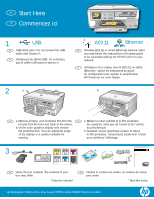
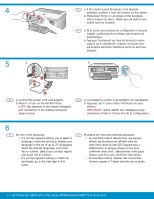
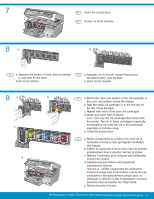
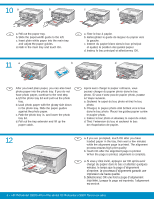
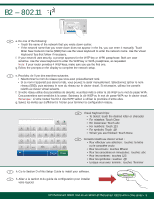
10 a b c d EN a. Pull out the paper tray. b. Slide the paper-width guide to the left. c. Insert plain white paper into the main tray and adjust the paper guides. d. Push in the main tray and touch OK. FR a. Tirez le bac à papier. b. Faites glisser le guide de largeur du papier vers la gauche. c. Insérez du papier blanc dans le bac principal et ajustez la position des guides papier. d. Insérez le bac principal et sélectionnez OK. 11 a b d EN After you load plain paper, you can also load FR Après avoir chargé le papier ordinaire, vous photo paper into the photo tray. If you do not pouvez charger du papier photo dans le bac have photo paper, continue to the next step. photo. Si vous n'avez pas de papier photo, passez a. Lift the photo tray lid and pull out the photo à l'étape suivante. tray. a. Soulevez le capot du bac photo et tirez le bac b. Load photo paper with the glossy side down photo. in the photo tray. Slide the paper guides b. Chargez le papier photo côté brillant vers le bas against the photo paper. dans le bac photo. Placez les guides papier contre c. Push the photo tray in, and lower the photo le papier photo. tray lid. c. Insérez le bac photo et abaissez le capot de celuici. d. Pull out the tray extender and lift up the d. Tirez l'extension du bac et soulevez le bac paper catch. de récupération de papier. 12 EN a. If you are prompted, touch OK after you have loaded paper in the tray, then wait a few minutes while the alignment page is printed. The alignment process ensures high print quality. b. Touch OK after the alignment page is printed. When the page is printed, alignment is complete. FR a.Si vous y êtes invité, appuyez sur OK après avoir chargé du papier dans le bac et attentez quelques minutes, le temps que la page d'alignement s'imprime. Le processus d'alignement garantit une impression de haute qualité. b.Sélectionnez OK une fois la page d'alignement imprimée. Lorsque la page est imprimée, l'alignement est terminé. 4 • HP Photosmart C8100 All-in-One series/HP Photosmart C8100 Tout-en-un série
-
 1
1 -
 2
2 -
 3
3 -
 4
4 -
 5
5 -
 6
6 -
 7
7 -
 8
8 -
 9
9 -
 10
10 -
11
-
12
-
13
-
14
-
15
-
16
 |
 |