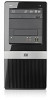
HP Pro 3000 Hardware Reference Guide - HP Pro 2000 and 3000 Series Microtower - Page 20
Installing Additional Drives - light
 |
View all HP Pro 3000 manuals
Add to My Manuals
Save this manual to your list of manuals |
Page 20 highlights
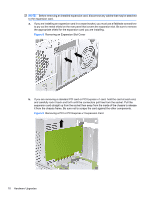
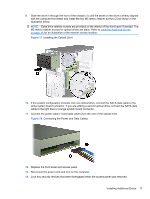
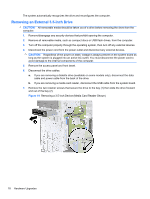
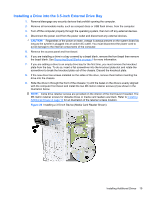
Installing Additional Drives When installing additional drives, follow these guidelines: ● The primary Serial ATA (SATA) hard drive must be connected to the dark blue primary SATA connector on the system board. ● Connect the first SATA optical drive to the white SATA connector on the system board. ● Always populate the dark blue and white connectors before the light blue and orange connectors. ● The system does not support Parallel ATA (PATA) optical drives or PATA hard drives. ● If needed, HP has provided extra drive retainer screws on the interior of the front bezel that are used to secure the drives in the drive cage. Hard drives use 6-32 standard screws. All other drives use M3 metric screws. The HP-supplied M3 metric guide screws (1) are black. The HP-supplied 6-32 standard screws (2) are silver. Figure 14 Extra Drive Retainer Screws Location CAUTION: To prevent loss of work and damage to the computer or drive: If you are inserting or removing a drive, shut down the operating system properly, turn off the computer, and unplug the power cord. Do not remove a drive while the computer is on or in standby mode. Before handling a drive, ensure that you are discharged of static electricity. While handling a drive, avoid touching the connector. For more information about preventing electrostatic damage, refer to Appendix A, Electrostatic Discharge on page 35. Handle a drive carefully; do not drop it. Do not use excessive force when inserting a drive. Avoid exposing a hard drive to liquids, temperature extremes, or products that have magnetic fields such as monitors or speakers. If a drive must be mailed, place the drive in a bubble-pack mailer or other protective packaging and label the package "Fragile: Handle With Care." 14 Hardware Upgrades
-
 1
1 -
2
-
3
-
4
-
5
-
6
-
7
-
8
-
9
-
10
-
11
-
12
-
13
-
14
-
 15
15 -
 16
16 -
 17
17 -
 18
18 -
 19
19 -
 20
20 -
 21
21 -
 22
22 -
 23
23 -
 24
24 -
 25
25 -
26
-
27
-
28
-
29
-
30
-
31
-
32
-
33
-
34
-
35
-
36
-
37
-
38
-
39
-
40
-
41
-
42
-
43
-
44
 |
 |
