HP Rx1955 HP iPAQ rx1950 Pocket PC Series Additional Product Information
HP Rx1955 - iPAQ Pocket PC Manual
 |
UPC - 829160944791
View all HP Rx1955 manuals
Add to My Manuals
Save this manual to your list of manuals |
HP Rx1955 manual content summary:
- HP Rx1955 | HP iPAQ rx1950 Pocket PC Series Additional Product Information - Page 1
HP iPAQ Additional Product Information Learning the Basics Viewing the Operating System Information Adjusting the Volume Changing Power Management Settings Dimming or Adjusting the Brightness of the Backlight Charging the Battery Manually Checking the Battery Entering Text Using the Keyboard iii - HP Rx1955 | HP iPAQ rx1950 Pocket PC Series Additional Product Information - Page 2
Synchronizing Copying (or Transferring) Files Wireless Synchronization Cost Saving Tips Calendar Accessing Calendar Changing the Display of the Work Week Scheduling an Appointment Editing an Appointment Setting a Default Reminder for All New Appointments Contacts Accessing Contacts Creating a - HP Rx1955 | HP iPAQ rx1950 Pocket PC Series Additional Product Information - Page 3
of an Expansion Card Connections Connections Infrared Receiving an Infrared Beam Synchronizing with the Infrared Connection Beaming an Item Wi-Fi Wi-Fi Wi-Fi Terms Monitoring Signal Strength and Status Entering New Settings Deleting a Wireless Network Logging on to Network Services Connecting to - HP Rx1955 | HP iPAQ rx1950 Pocket PC Series Additional Product Information - Page 4
Advanced Network Settings Looking Up an IP Address Setting Up a VPN Server Connection Setting Up Proxy Server Settings Configuring Advanced Proxy Settings Changing a Connection Group Name Changing an Intranet URL Setting Up a Wireless Access Point (WAP) Gateway Changing Modem Connection Settings - HP Rx1955 | HP iPAQ rx1950 Pocket PC Series Additional Product Information - Page 5
Viewing the Operating System Information Tap Start > Settings > System tab > About. The version of the operating system on your device will be listed near the top of the screen. 2 - HP Rx1955 | HP iPAQ rx1950 Pocket PC Series Additional Product Information - Page 6
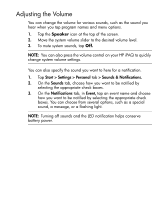
3. To mute system sounds, tap Off. NOTE: You can also press the volume control on your HP iPAQ to quickly change system volume settings. You can also specify the sound you want to here for a flashing light. NOTE: Turning off sounds and the LED notification helps conserve battery power. 3 - HP Rx1955 | HP iPAQ rx1950 Pocket PC Series Additional Product Information - Page 7
Settings 1. Tap Start > Settings > System tab > Power. 2. Tap the Main tab to view how much battery power is available. 3. Tap the Advanced tab to select the length of time the HP iPAQ stays on when using battery power or external power. 4. Tap the Wireless tab to select the WLAN Power save mode. 4 - HP Rx1955 | HP iPAQ rx1950 Pocket PC Series Additional Product Information - Page 8
of the Backlight You can set the backlight to dim after a specified amount of time has elapsed. 1. Tap Start > Settings > System tab > Backlight. 2. Tap the Battery power tab or the External power tab. 3. Select the Turn off backlight if device is not used for check box, then specify the time delay - HP Rx1955 | HP iPAQ rx1950 Pocket PC Series Additional Product Information - Page 9
There are several ways to charge the battery on your HP iPAQ including: • AC Adapter • Optional Automobile Adapter • HP Desktop Cradle and AC Adapter • HP Desktop Cradle and USB Cable Charging the Battery with the AC Adapter The standard AC Adapter works in a standard electrical outlet. You can - HP Rx1955 | HP iPAQ rx1950 Pocket PC Series Additional Product Information - Page 10
CAUTION: To avoid damaging your HP iPAQ or the cradle, check to be sure the HP iPAQ and cradle connectors are properly aligned before pushing the HP iPAQ into the HP Desktop Cradle. NOTE: The amber charge light on the front of the HP iPAQ blinks while the battery is recharging and turns solid amber - HP Rx1955 | HP iPAQ rx1950 Pocket PC Series Additional Product Information - Page 11
USB port on your USB powered device, such as a laptop computer. NOTE: The HP iPAQ charges slower when using an USB cable than with an AC Adapter. If the battery won't stay charged, try the following: • Always keep the HP iPAQ connected to the AC Adapter when you are not using it. • In the backlight - HP Rx1955 | HP iPAQ rx1950 Pocket PC Series Additional Product Information - Page 12
To use a shortcut to view your battery charge level, tap the Battery icon located in TodayPanel Lite. TIP: To save battery power, tap Start > Settings > System tab > Power > Advanced tab, then tap the Turn off device if not used for checkbox and set it to turn your HP iPAQ off after a short time of - HP Rx1955 | HP iPAQ rx1950 Pocket PC Series Additional Product Information - Page 13
Adding a Custom Background Image You can use one of your own pictures as the background image on the Today screen. 1 Tap Start > Settings > Today. 2 Select the Use this picture as the background check box and tap Browse to view a list of your picture files. 3 Tap the filename of the picture you want - HP Rx1955 | HP iPAQ rx1950 Pocket PC Series Additional Product Information - Page 14
Locking and Unlocking the Today Screen To prevent accidental screen taps when you are not using your HP iPAQ, you can lock the Today screen so that taps are not recognized. To lock the Today screen, tap the Open Lock icon. The icon changes - HP Rx1955 | HP iPAQ rx1950 Pocket PC Series Additional Product Information - Page 15
To install programs on your HP iPAQ: 1. Use the HP Desktop Cradle or autosync cable to connect your HP iPAQ to your personal computer. 2. Follow the instructions in the Installation Wizard provided with the program you want to install. 3. Check the screen on your HP iPAQ to see if any further - HP Rx1955 | HP iPAQ rx1950 Pocket PC Series Additional Product Information - Page 16
want from the list. If you don't see the program you want, tap Start > Programs. In most cases, programs automatically stop to free needed memory. However, you can close programs manually if you prefer. 1. Tap Start > Settings > System tab > Memory > Running Programs tab. 2. In the Running Programs - HP Rx1955 | HP iPAQ rx1950 Pocket PC Series Additional Product Information - Page 17
Reassigning Programs or Shortcuts to Program Buttons Your HP iPAQ comes with programs already assigned to hardware buttons. You can customize these buttons to open the programs you use most or to perform certain shortcuts - HP Rx1955 | HP iPAQ rx1950 Pocket PC Series Additional Product Information - Page 18
Setting Alarms 1. Tap Start > Settings > System tab > Clock & Alarms > Alarms tab. 2. Tap and enter a name for the alarm. 3. Tap the day of the week for the alarm. You can select multiple days by tapping each desired day. 4. Tap the time to open a clock and set the time for the alarm. - HP Rx1955 | HP iPAQ rx1950 Pocket PC Series Additional Product Information - Page 19
Shortcut Menus A shortcut menu appears when you tap and hold an item. The menu displays the most common commands for the specific item. For example, you can delete an appointment or send a text message to a contact by using commands on a shortcut menu. To use a shortcut menu, tap and hold the item. - HP Rx1955 | HP iPAQ rx1950 Pocket PC Series Additional Product Information - Page 20
Showing the Clock in All Programs The clock may not show in the title bar of certain programs by default. To choose to have the clock always show in the title bar: 1. Tap Start > Settings > System tab > Clock & Alarms. 2. On the More tab, click to select the Display the clock on the title bar in all - HP Rx1955 | HP iPAQ rx1950 Pocket PC Series Additional Product Information - Page 21
Creating or Assigning a Category In the Calendar, Contacts, and Tasks programs, you can use categories to help you organize and group your appointments, contacts, and tasks. 1. From the program, tap an existing item or create a new one. 2. Do one of the following: • For an existing item in Calendar - HP Rx1955 | HP iPAQ rx1950 Pocket PC Series Additional Product Information - Page 22
Adjusting the Speed for Scrolling Through Items in a List You can scroll through items in a list by pressing and holding the Navigation button up or down. To change the speed at which scrolling occurs: 1. Tap Start > Settings > Personal tab > Buttons > Up/ Down Control tab. 2. Under Delay before - HP Rx1955 | HP iPAQ rx1950 Pocket PC Series Additional Product Information - Page 23
Realigning the Touch Screen 1. Tap Start > Settings > System tab > Screen. 2. Tap Align Screen and follow the instructions. 12 - HP Rx1955 | HP iPAQ rx1950 Pocket PC Series Additional Product Information - Page 24
Entering Text Depending on your preference, you can use the on-screen keyboard or a handwriting recognition feature such as Block Regognizer, Letter Recognizer, or Transcriber to enter text in programs. Experiment with the methods and select the one - HP Rx1955 | HP iPAQ rx1950 Pocket PC Series Additional Product Information - Page 25
Entering Text using Block Recognizer 1. From any program, tap the Input Selector arrow, and then Block Recognizer. 2. Write characters, numbers, and symbols in the designated writing area. • Enter letters by writing in the abc (left) area of the box. • Enter numbers by writing in the 123 (right) - HP Rx1955 | HP iPAQ rx1950 Pocket PC Series Additional Product Information - Page 26
Entering Text using Letter Recognizer 1. From any program, tap the Input Selector arrow, and then Letter Recognizer. 2. Write characters, numbers, and symbols in the designated writing area. • Enter capital letters by writing in the ABC (left) area of the box. • Enter lowercase letters by writing in - HP Rx1955 | HP iPAQ rx1950 Pocket PC Series Additional Product Information - Page 27
Transcriber works transparently in the background of programs, recognizing words with its integrated dictionary. When Transcriber is turned on, it interprets stylus movement anywhere on the screen as handwriting input. To write with Transcriber: 1. From any program, position the cursor where you - HP Rx1955 | HP iPAQ rx1950 Pocket PC Series Additional Product Information - Page 28
keys to make them easier to tap. 1. Tap Start > Settings > Personal tab > Input. 2. On the Input Method tab, select Keyboard as the input method, and tap Large Keys. 3. Tap OK. NOTE: You can enlarge the keys even more by selecting the Use gestures for the - HP Rx1955 | HP iPAQ rx1950 Pocket PC Series Additional Product Information - Page 29
your computer using Explore in ActiveSync and Windows Explorer. To copy (transfer) files: 1. Insert your HP iPAQ into the sync cradle. 2. From the Start menu on your computer, click Programs > Microsoft ActiveSync. 3. Click Explore. 4. Double-click My Pocket PC. 5. On your computer, right-click the - HP Rx1955 | HP iPAQ rx1950 Pocket PC Series Additional Product Information - Page 30
synchronizing wirelessly from your HP iPAQ depends on your priorities. To Do this Reduce network connection or Increase the time between scheduled data transfer costs synchronizations, or synchronize manually. Check the details of your rate plan. Extend battery life Schedule synchronization - HP Rx1955 | HP iPAQ rx1950 Pocket PC Series Additional Product Information - Page 31
the day on the Today screen. To access Calendar, tap Start > Calendar. If you use Outlook on your computer, you can synchronize appointments between your HP iPAQ and computer. For more information on using Microsoft Outlook, refer to Outlook Help. 23 - HP Rx1955 | HP iPAQ rx1950 Pocket PC Series Additional Product Information - Page 32
Changing the Display of the Work Week You can customize your calendar so that a work week starts on Sunday or Monday and has from five to seven days. 1. Tap Start > Calendar. 2. Tap Menu > Options and do one or both of the following: • To specify the first day of the week, in the 1st day of week box - HP Rx1955 | HP iPAQ rx1950 Pocket PC Series Additional Product Information - Page 33
Scheduling an Appointment 1. Tap Start > Calendar. 2. Tap Menu > New Appointment. 3. Enter a name for the appointment and information such as start and end times. To schedule an all-day event, in the All Day box, tap Yes. 4. When finished, tap OK to return to the calendar. NOTE: All-day events do - HP Rx1955 | HP iPAQ rx1950 Pocket PC Series Additional Product Information - Page 34
Editing an Appointment 1. Tap Start > Calendar. 2. Tap Menu > Edit. 3. Make the necessary edits. 4. Tap OK. NOTE: To cancel an appointment, tap the appointment and tap Menu > Delete. 26 - HP Rx1955 | HP iPAQ rx1950 Pocket PC Series Additional Product Information - Page 35
Setting a Default Reminder for All New Appointments You can have a reminder automatically turned on for all new appointments you schedule. 1. Tap Start > Calendar. 2. Tap Menu > Options > Appointments tab. 3. Select the Set reminders for new items check box. 4. Set the time when you want the - HP Rx1955 | HP iPAQ rx1950 Pocket PC Series Additional Product Information - Page 36
contact information. From the Contacts menu, you can call or send a message. If you use Outlook on your computer, you can synchronize contacts between your HP iPAQ and computer. 29 - HP Rx1955 | HP iPAQ rx1950 Pocket PC Series Additional Product Information - Page 37
someone who isn't in your list of contacts calls you or sends you a message, you can create a contact from Call History (not available on all models) or from the message by tapping Menu > Save to Contacts. 30 - HP Rx1955 | HP iPAQ rx1950 Pocket PC Series Additional Product Information - Page 38
Changing Contact Information 1. Tap Start > Contacts. 2. Tap the contact. 3. Tap Menu > Edit and enter the changes. 4. When finished, tap OK. To include a nickname, title, and more, for an existing contact in the contact list, tap the contact, tap Menu > Edit, and tap the Name arrow. 31 - HP Rx1955 | HP iPAQ rx1950 Pocket PC Series Additional Product Information - Page 39
Copying a Contact 1. Tap Start > Contacts. 2. Tap and hold the contact you want to copy. 3. Tap Copy Contact. 4. Tap the copy of the contact. 5. Tap Menu > Edit. 6. Change the contact information as needed and tap OK. NOTE: The displayed category is automatically assigned to the new contact. 32 - HP Rx1955 | HP iPAQ rx1950 Pocket PC Series Additional Product Information - Page 40
Working with the Contact List There are several ways to use and customize the contact list. Here are a few tips on how to make it work for you. 1. Tap Start > Contacts. 2. In the contact list, do any of the following: • In Name view, search for a contact by entering a name or number, or by using the - HP Rx1955 | HP iPAQ rx1950 Pocket PC Series Additional Product Information - Page 41
Finding a Contact To find a contact on a long list: 1. Tap Start > Contacts. 2. If you are not in Name view, tap Menu > View By > Name. 3. Do one of the following: • Begin entering a name or phone number in the provided text box until the contact you want is displayed. To show all contacts again, - HP Rx1955 | HP iPAQ rx1950 Pocket PC Series Additional Product Information - Page 42
Sending an E-mail Message to a Contact 1. Tap Start > Contacts. 2. Tap the contact you want to send a message to. 3. Tap the address you want to send a message to. 4. Tap the account you want to send the message from. NOTE: To quickly add a contact's address to a new message, tap the To, Cc, or Bcc - HP Rx1955 | HP iPAQ rx1950 Pocket PC Series Additional Product Information - Page 43
your message. To quickly add common messages, tap Menu > My Text and tap a desired message. NOTE: To enter symbols, tap Shift using the on-screen keyboard. 5. To check the spelling, tap Menu > Spell Check. NOTE: To set the priority, tap Menu > Message Options. 6. Tap Send. If you are working offline - HP Rx1955 | HP iPAQ rx1950 Pocket PC Series Additional Product Information - Page 44
Tasks You can create a list of tasks and your HP iPAQ will remind you of what they are and when they are due. You can sort tasks by status, priority, subject, or start or due date. - HP Rx1955 | HP iPAQ rx1950 Pocket PC Series Additional Product Information - Page 45
Locating a Task When your list of tasks is long, you can display a subset of the tasks or sort the list to quickly find a specific task. 1. Tap Start > Programs > Tasks. 2. In the task list, do one of the following: • Sort the list. Tap Menu > Sort by, and tap a sort option. • Filter the list by - HP Rx1955 | HP iPAQ rx1950 Pocket PC Series Additional Product Information - Page 46
Setting the Start and Due Dates for a Task 1. Tap Start > Programs > Tasks. 2. Tap the task you want to set start and due dates for. 3. Tap Edit and do one or both of the following: • Tap Starts to enter a start date for the task. • Tap Due to enter a due date for the task. 4. Tap OK. 40 - HP Rx1955 | HP iPAQ rx1950 Pocket PC Series Additional Product Information - Page 47
Showing Start and Due Dates in the Task List 1. Tap Start > Programs > Tasks. 2. Tap Menu > Options. 3. Select the Show start and due dates check box. 4. Tap OK. 41 - HP Rx1955 | HP iPAQ rx1950 Pocket PC Series Additional Product Information - Page 48
Setting Options for Displaying Tasks on the Today Screen If you have a large number of tasks, you may want to specify the kind of tasks that show on the Today screen. 1. Tap Start > Settings > Personal tab > Today. 2. Tap the Items tab. 3. Select Tasks, then tap Options. 4. Under Display number of, - HP Rx1955 | HP iPAQ rx1950 Pocket PC Series Additional Product Information - Page 49
Marking a Task as Completed 1. Tap Start > Programs > Tasks. 2. In the task list, select the check box next to the task you want to mark as completed. NOTE: To mark an open task as completed, tap Edit, and in the Status box, tap Completed. 43 - HP Rx1955 | HP iPAQ rx1950 Pocket PC Series Additional Product Information - Page 50
and receive e-mail, you must have access to an email account through an Internet Service Provider (ISP) or a VPN server connection (typically a work account). To set up an e-mail account on your HP iPAQ: 1. Tap Start > Messaging. 2. Tap Menu > Tools > New Account. 3. Enter your e-mail address, and - HP Rx1955 | HP iPAQ rx1950 Pocket PC Series Additional Product Information - Page 51
Changing E-mail Download Options You can customize the following download options for each e-mail account that you have with an Internet Service Provider (ISP) or that you access using a VPN server connection (typically a work account). You can choose: • Whether messages are downloaded automatically - HP Rx1955 | HP iPAQ rx1950 Pocket PC Series Additional Product Information - Page 52
ActiveSync. To send and receive e-mail messages accessed from an Internet Service Provider (ISP) e-mail account or a VPN server connection ( getting full copy, get attachments. 6. To store attachments on a storage card rather than on the device, tap Menu > Tools > Options > Storage tab, and - HP Rx1955 | HP iPAQ rx1950 Pocket PC Series Additional Product Information - Page 53
. Use of dial-up and wireless Internet, e-mail, corporate networks, and other wireless communications, such as Bluetooth-enabled devices, might standard Wi-Fi infrastructure and a separately purchased service contract. Check with your service provider for availability and coverage in your area. - HP Rx1955 | HP iPAQ rx1950 Pocket PC Series Additional Product Information - Page 54
Replying to or Forwarding a Message 1. Open the message and tap Reply, or Menu > Reply All, or Menu > Forward. 2. Enter your response. To quickly add common messages, tap Menu > My Text and tap a desired message. NOTE: To edit a My Text message, in a new message, tap Menu > My Text > Edit My Text - HP Rx1955 | HP iPAQ rx1950 Pocket PC Series Additional Product Information - Page 55
Adding an Attachment to a Message 1. In an open message, tap Menu > Insert and tap the item you want to attach: Picture, Voice Note, or File. 2. Select the file you want to attach or record a voice note. NOTE: Embedded objects cannot be attached to messages. 50 - HP Rx1955 | HP iPAQ rx1950 Pocket PC Series Additional Product Information - Page 56
directory service, or if you want to use additional services: 1. If you are adding a new account, ask your network administrator: • for the name of the directory service check box, and enter your user name and password. 8. To have Messaging check this service, select the Check name against this server - HP Rx1955 | HP iPAQ rx1950 Pocket PC Series Additional Product Information - Page 57
tap Delete. While synchronizing your Outlook E-mail account, disable any directory services you have installed by clearing the Check name against this server check box. This helps avoid getting error messages when Messaging tries to verify names against the service that you are not connected to. 52 - HP Rx1955 | HP iPAQ rx1950 Pocket PC Series Additional Product Information - Page 58
Managing Folders You can create, rename, or delete a folder or select it for synchronization. 1. Tap Menu > Switch Accounts, and select the account. 2. Tap Menu > Tools > Manage Folders. 3. Do one of the following: • To create a subfolder, tap and hold a folder, and tap New. • To change the name of - HP Rx1955 | HP iPAQ rx1950 Pocket PC Series Additional Product Information - Page 59
. 2. Tap Menu > Tools > Clear . All messages and folders linked to the selected account are cleared, and memory is expanded on the HP iPAQ without deleting messages on the server. The next time you connect, the messages and folders are downloaded again. NOTE: You cannot clear messages and - HP Rx1955 | HP iPAQ rx1950 Pocket PC Series Additional Product Information - Page 60
Digital (SD) memory card • Adding functionality such as a Secure Digital Input/Output (SDIO) camera NOTE: Expansion cards must be purchased separately and are not included with your HP iPAQ. To locate information about expansion cards, visit the HP Web site at www.hp.com/go/ipaqaccessories. 56 - HP Rx1955 | HP iPAQ rx1950 Pocket PC Series Additional Product Information - Page 61
firmly into the expansion slot. NOTE: If your expansion card is not recognized, follow the card manufacturer's instructions to install it. If you have trouble installing an expansion card, try the following: • Be sure the label is facing the front of the HP iPAQ. • Be sure you are not inserting the - HP Rx1955 | HP iPAQ rx1950 Pocket PC Series Additional Product Information - Page 62
expansion slot. CAUTION: SD cards must be unlocked before removal. To remove a Compact Flash (CF) expansion card from the expansion slot on the HP iPAQ, pull it from the expansion slot. NOTE: HP recommends inserting the protective plastic cards that came with your HP iPAQ into the expansion slots - HP Rx1955 | HP iPAQ rx1950 Pocket PC Series Additional Product Information - Page 63
and folders. If the HP iPAQ does not recognize your expansion card, try the following: • Be sure you have firmly pushed the expansion card down into the expansion slot. • Be sure to install any drivers that came with the expansion card. • Reset the HP iPAQ by using the stylus to lightly press the - HP Rx1955 | HP iPAQ rx1950 Pocket PC Series Additional Product Information - Page 64
You can use your HP iPAQ to connect to and exchange information with other handheld devices, your computer, various network types, or the Internet. There are several ways to get connected, including: • Infrared (Beam) • Wi-Fi • Bluetooth (not available on all models) All these connection types - HP Rx1955 | HP iPAQ rx1950 Pocket PC Series Additional Product Information - Page 65
62 - HP Rx1955 | HP iPAQ rx1950 Pocket PC Series Additional Product Information - Page 66
detects and notifies you of IR beams. 1. Tap Start > Settings > Connections tab > Beam. 2. Select the Receive all incoming beams check box. 3. Be sure your HP iPAQ is turned on and within close range of the device that is beaming the information. 4. When prompted to receive an incoming beam, tap Yes - HP Rx1955 | HP iPAQ rx1950 Pocket PC Series Additional Product Information - Page 67
Windows 2000 or XP operating systems installed. To set up an infrared connection to a computer: 1. Synchronize your HP iPAQ with your computer using the desktop cradle or autosync cable 's instructions to install and set up an infrared port. 3. Remove the HP iPAQ from the cradle or autosync cable and - HP Rx1955 | HP iPAQ rx1950 Pocket PC Series Additional Product Information - Page 68
Mobile, Word Mobile, and PowerPoint Mobile, you can beam files and information to other devices using infrared. 1. From the program, select the item you want to beam, such as an appointment in Calendar, a task in Tasks, a contact card If you want your HP iPAQ to detect or receive beams, tap Start > - HP Rx1955 | HP iPAQ rx1950 Pocket PC Series Additional Product Information - Page 69
the Internet • Send and receive e-mail • Access corporate network information • Use virtual private networks (VPNs) for secure remote access • Use hotspots for wireless connectivity Press the iPAQ Wireless button located on the bottom-right of the HP iPAQ to access the Wi-Fi features. NOTE: Use of - HP Rx1955 | HP iPAQ rx1950 Pocket PC Series Additional Product Information - Page 70
of Electrical and Electronic Engineers (IEEE) used for wireless local area networks (WLANs). A mode that does not use access points. It provides any unauthorized person(s). Public or private areas where you can access WiFi service. These wireless connections can be located, for example, at a library - HP Rx1955 | HP iPAQ rx1950 Pocket PC Series Additional Product Information - Page 71
(WPA) Windows Internet Naming Service (WINS) Definition service set (ESS). An SSID is the 1-32 alphanumeric, case-sensitive name given to each ESS. The Wi-Fi encryption method that protects unauthorized network access by utilizing a setup password (for personal use) or by verifying network users - HP Rx1955 | HP iPAQ rx1950 Pocket PC Series Additional Product Information - Page 72
(continued) Term Wired Equivalent Privacy (WEP) Wireless Access Point Wireless Fidelity (Wi-Fi) Definition Basic wireless security provided by Wi-Fi. This security uses an encryption key that automatically encrypts outgoing wireless data. On the receiving side, the same encryption key enables the - HP Rx1955 | HP iPAQ rx1950 Pocket PC Series Additional Product Information - Page 73
Wi-Fi connection: 1. Tap the Connections icon in the Navigation bar. 2. When the Connectivity box displays, you will be able to view the type of network the HP iPAQ is connected to (for example, Work or Internet) and an icon displaying the signal strength. NOTE: The Signal Strength icon will not be - HP Rx1955 | HP iPAQ rx1950 Pocket PC Series Additional Product Information - Page 74
can add a wireless network when the network is detected. Or, you can manually add it by entering settings information. 1. To manually enter information, tap Start > Settings > Connections tab > Network Cards > Wireless tab. 2. Tap Add New. If the network was detected, tap the network name. 3. In the - HP Rx1955 | HP iPAQ rx1950 Pocket PC Series Additional Product Information - Page 75
Deleting a Wireless Network You can delete networks you manually entered. However, if a network was automatically detected, you are not able to delete it. To delete an existing or available wireless network: 1. Press the iPAQ Wireless button on the bottom-right of the HP iPAQ. 2. Tap the Wi-Fi icon - HP Rx1955 | HP iPAQ rx1950 Pocket PC Series Additional Product Information - Page 76
Before you begin, obtain the following information from your network administrator: • user name • password • domain To log on to a network service: 1. Enter your user name, password, and domain. 2. To save your password so that you can be prompted each time you connect, select the Save password - HP Rx1955 | HP iPAQ rx1950 Pocket PC Series Additional Product Information - Page 77
Connecting to Intranet URLs If you want to connect to intranet sites that have periods in their URLs (for example, intranet.companyname.com), you must add them to the Work URL Exceptions list. 1. Tap Start > Settings > Connections tab. 2. Tap Connections > Advanced tab > Exceptions. 3. Tap Add new - HP Rx1955 | HP iPAQ rx1950 Pocket PC Series Additional Product Information - Page 78
, insert any necessary equipment into your HP iPAQ, such as a modem card or network (Ethernet) card. Begin using the desired program. For example, switch to Internet Explorer Mobile and browse the Internet. Your HP iPAQ will connect automatically. To manually start a connection, tap and hold the - HP Rx1955 | HP iPAQ rx1950 Pocket PC Series Additional Product Information - Page 79
Network Cards and set up a network card or a wireless network connection. 3. To start a connection, insert your modem card or network card. Begin using the desired program. For example, switch to Internet Explorer Mobile and browse the Internet. Your HP iPAQ will connect automatically. To manually - HP Rx1955 | HP iPAQ rx1950 Pocket PC Series Additional Product Information - Page 80
a modem or VPN, tap Connections icon > Disconnect. • When connected via a cable or cradle, detach your device from the cable or cradle. • When connected via infrared or Bluetooth, move the HP iPAQ away from the other computer or device. • When connected via a network (Ethernet) card, remove the card - HP Rx1955 | HP iPAQ rx1950 Pocket PC Series Additional Product Information - Page 81
completed this step. 4. From the Connections screen, set up your Dialing Rules and Exceptions and press OK. 5. From the iPAQ Wireless screen, tap the Wi-Fi Settings button > Network Adapters tab. 6. Tap the appropriate adapter to modify the settings. The IP address appears in the IP Address box. 81 - HP Rx1955 | HP iPAQ rx1950 Pocket PC Series Additional Product Information - Page 82
administrator: • user name • password • domain name • TCP/IP settings • host name or IP address of the VPN server To set up a VPN server connection: 1. Tap Start > Settings > Connections tab > Connections. 2. Under My Work Network, tap Add a new VPN server connection and follow the instructions in - HP Rx1955 | HP iPAQ rx1950 Pocket PC Series Additional Product Information - Page 83
NOTE: To change existing settings, under My Work Network, tap Manage existing connections > VPN tab. Select the desired VPN connection, tap Edit, then follow the instructions on the screen. To manually start a connection, tap and hold the connection, then tap Connect. To delete a connection, tap and - HP Rx1955 | HP iPAQ rx1950 Pocket PC Series Additional Product Information - Page 84
are not on your computer or need to be changed, you can change them manually. Before you begin, obtain the following information from your Internet Service Provider (ISP) or network administrator: • user name • password • server type • proxy server name • port • type of Socks protocol used To - HP Rx1955 | HP iPAQ rx1950 Pocket PC Series Additional Product Information - Page 85
Configuring Advanced Proxy Settings 1. For the appropriate server type, enter the proxy server name and port. 2. If necessary, enter the credentials for connecting with your proxy server. 3. If you are configuring a Socks proxy, select Socks 4 or Socks 5. If using Socks 5, enter the credentials for - HP Rx1955 | HP iPAQ rx1950 Pocket PC Series Additional Product Information - Page 86
set up with two groups of connection settings: My ISP and My Work Network. You can change the name of these groups to something more meaningful. For example, if you put all of your corporate settings under My Work Network connections, you can change the name to your company's name. 1. Tap Start - HP Rx1955 | HP iPAQ rx1950 Pocket PC Series Additional Product Information - Page 87
Changing an Intranet URL 1. Tap Start > Settings > Connections tab. 2. Tap Connections > Advanced tab > Exceptions. 3. Tap the intranet URL exception you want to change, then make the desired changes. NOTE: To delete a work URL exception, tap and hold it in the list, then tap Delete. 87 - HP Rx1955 | HP iPAQ rx1950 Pocket PC Series Additional Product Information - Page 88
to the Internet with WAP gateway settings. Before you begin, obtain the following information from your Internet Service Provider (ISP), wireless service provider, or network administrator: • user name • password • ISP server phone number • WAP gateway server name • port number To set up a WAP - HP Rx1955 | HP iPAQ rx1950 Pocket PC Series Additional Product Information - Page 89
: 1. Insert a modem card. 2. Tap Start > Settings > Connections tab > Connections. 3. In either My ISP or My Work Network, tap Manage existing connections. 4. Select the desired modem connection, tap Edit, then follow the instructions in the connection wizard. NOTE: To manually start a connection - HP Rx1955 | HP iPAQ rx1950 Pocket PC Series Additional Product Information - Page 90
Before performing these steps, determine if authentication information is needed. 1. To manually enter information, tap Start > Settings > Connections tab > Network Cards > Wireless tab. 2. In Wireless networks, select the network you want to configure. 3. For increased security, tap 802.1X tab - HP Rx1955 | HP iPAQ rx1950 Pocket PC Series Additional Product Information - Page 91
installed and used in accordance with the instructions, may cause harmful interference to radio communications user to be notified that any changes or modifications made to this device that are not expressly approved by Hewlett-Packard Company may void the authority to operate the equipment. Cables - HP Rx1955 | HP iPAQ rx1950 Pocket PC Series Additional Product Information - Page 92
questions regarding this FCC declaration, contact: Hewlett-Packard Company P. O. Box 692000, Mail Stop 510101 Houston, Texas 77269-2000 Or, call (281) 514-3333 To identify this product, refer to the Part, Series, or Model HP-provided and CE marked AC adapter. 31 - HP Rx1955 | HP iPAQ rx1950 Pocket PC Series Additional Product Information - Page 93
directives implies conformity to harmonized European standards (European Norms) which are listed on the EU Declaration of Conformity issued by Hewlett-Packard for this product or product family. This compliance is indicated by the following conformity marking placed on the product: This marking - HP Rx1955 | HP iPAQ rx1950 Pocket PC Series Additional Product Information - Page 94
HP spare. CAUTION: Risk of explosion if battery is replaced by an incorrect type. Dispose of used batteries according to the instructions. Because of the type of battery used in your iPAQ Pocket PC or cable. When unplugging from the electrical outlet, grasp the cord by the plug or, in the case of - HP Rx1955 | HP iPAQ rx1950 Pocket PC Series Additional Product Information - Page 95
use converter kits sold for appliances to power your iPAQ Pocket PC. Airline Travel Notice Use of electronic equipment aboard commercial should be minimized. This PDA has been tested and demonstrated compliance when Bluetooth and WLAN are transmitting simultaneously. This PDA must not be colocated or - HP Rx1955 | HP iPAQ rx1950 Pocket PC Series Additional Product Information - Page 96
your particular model, on your HP iPAQ, tap Start > Settings > System tab > HP Asset Viewer. System Feature Description Processor 300 MHz Samsung processor RAM (Random Access Memory) 32 MB SDRAM Flash memory (non- 64 MB storage volatile memory) SD I/O slot SD/SDIO/MMC card support Display - HP Rx1955 | HP iPAQ rx1950 Pocket PC Series Additional Product Information - Page 97
replacement. Extended Series: Removable/rechargeable 1800 mAh, 3.6 Volt, Lithium ion battery with internal backup battery to maintain data during main battery replacement. Physical Specifications NOTE: Weight varies on different models. Length Width Depth Weight US 4.47 in 2.75 in .53 in 4.41 - HP Rx1955 | HP iPAQ rx1950 Pocket PC Series Additional Product Information - Page 98
Operating Environment Environment Temperature Relative Humidity Maximum Altitude Operating Nonoperating Operating Nonoperating Operating Nonoperating US 32° to 104° F -4° to 140° F up to 80% above 80% 15,000 ft 40,000 ft Metric 0° to 40° C -20° to 60° C up to 80% above 80% 572 m 12,192 m 3 - HP Rx1955 | HP iPAQ rx1950 Pocket PC Series Additional Product Information - Page 99
© 2005 Hewlett-Packard Development Company, L.P. Microsoft, Windows, the Windows logo, Outlook, and ActiveSync are trademarks of Microsoft Corporation in the U.S. and other countries. HP iPAQ Products are Powered by Microsoft® Windows MobileTM 5.0 software for Pocket PC. SD Logo is a trademark of
-
 1
1 -
 2
2 -
 3
3 -
 4
4 -
 5
5 -
 6
6 -
 7
7 -
8
-
9
-
10
-
11
-
12
-
13
-
14
-
15
-
16
-
17
-
18
-
19
-
20
-
21
-
22
-
23
-
24
-
25
-
26
-
27
-
28
-
29
-
30
-
31
-
32
-
33
-
34
-
35
-
36
-
37
-
38
-
39
-
40
-
41
-
42
-
43
-
44
-
45
-
46
-
47
-
48
-
49
-
50
-
51
-
52
-
53
-
54
-
55
-
56
-
57
-
58
-
59
-
60
-
61
-
62
-
63
-
64
-
65
-
66
-
67
-
68
-
69
-
70
-
71
-
72
-
73
-
74
-
75
-
76
-
77
-
78
-
79
-
80
-
81
-
82
-
83
-
84
-
85
-
86
-
87
-
88
-
89
-
90
-
91
-
92
-
93
-
94
-
95
-
96
-
97
-
98
-
99
 |
 |

iii
Learning the Basics
Viewing the Operating System Information
Adjusting the Volume
Changing Power Management Settings
Dimming or Adjusting the Brightness of the Backlight
Charging the Battery
Manually Checking the Battery Charge Level
Adding a Custom Background Image
Locking and Unlocking the Today Screen
Installing and Removing Programs
Opening and Closing Programs
Reassigning Programs or Shortcuts to Program Buttons
Setting Alarms
Shortcut Menus
Showing the Clock in All Programs
Creating or Assigning a Category
Adjusting the Speed for Scrolling Through Items in a List
Realigning the Touch Screen
Entering Text
Entering Text
Entering Text using Block Recognizer
Entering Text using Letter Recognizer
Writing with Transcriber
Entering Text Using the Keyboard
HP iPAQ Additional Product Information