HP Scanjet Enterprise 7000n HP Scanjet Enterprise 7000n - (multiple language) - Page 10
Connect an Ethernet cable
 |
View all HP Scanjet Enterprise 7000n manuals
Add to My Manuals
Save this manual to your list of manuals |
Page 10 highlights
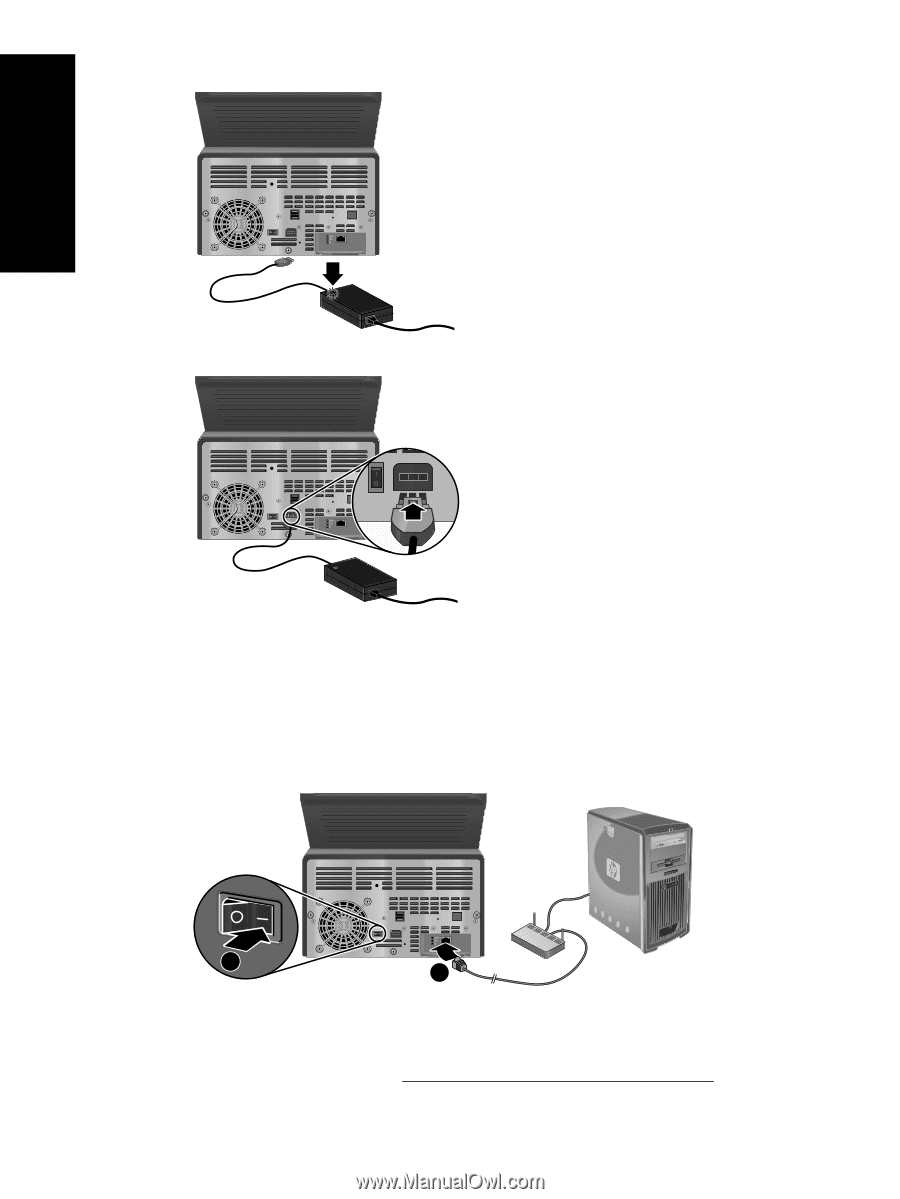
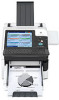
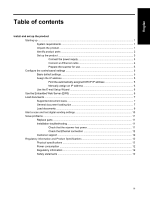
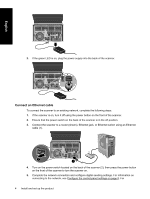
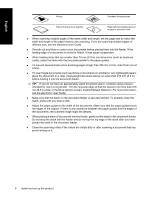
English 3. If the green LED is on, plug the power supply into the back of the scanner. Connect an Ethernet cable To connect the scanner to an existing network, complete the following steps. 1. If the scanner is on, turn it off using the power button on the front of the scanner. 2. Ensure that the power switch on the back of the scanner is in the off position. 3. Connect the scanner to a router (shown), Ethernet jack, or Ethernet switch using an Ethernet cable (1). 2 1 4. Turn on the power switch located on the back of the scanner (2), then press the power button on the front of the scanner to turn the scanner on. 5. Complete the network connection and configure digital sending settings. For information on connecting to the network, see Configure the control-panel settings on page 5. For 4 Install and set up the product
-
 1
1 -
2
-
3
-
4
-
 5
5 -
 6
6 -
 7
7 -
 8
8 -
 9
9 -
 10
10 -
 11
11 -
 12
12 -
 13
13 -
 14
14 -
 15
15 -
16
-
17
-
18
-
19
-
20
-
21
-
22
-
23
-
24
-
25
-
26
-
27
-
28
-
29
-
30
-
31
-
32
-
33
-
34
-
35
-
36
-
37
-
38
-
39
-
40
-
41
-
42
-
43
-
44
-
45
-
46
-
47
-
48
-
49
-
50
-
51
-
52
-
53
-
54
-
55
-
56
-
57
-
58
-
59
-
60
-
61
-
62
-
63
-
64
-
65
-
66
-
67
-
68
 |
 |