HP Scanjet Enterprise 7000n HP Scanjet Enterprise 7000n - (multiple language) - Page 14
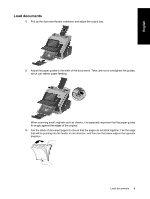
Adjust the paper guides to the width of the documents. Make sure that the paper guides touch
 |
View all HP Scanjet Enterprise 7000n manuals
Add to My Manuals
Save this manual to your list of manuals |
Page 14 highlights
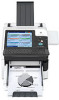
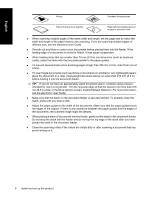
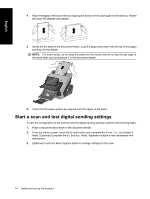
English Photos Overhead transparencies Papers that are stuck together Paper with wet substances such as glue or correction fluid ● When scanning multiple pages of the same width and length, set the page size to match the width and length of the paper that you are scanning. If you are scanning multiple pages of different size, see the electronic User Guide. ● Smooth out any folds or curls in your documents before placing them into the feeder. If the leading edge of a document is curled or folded, it may cause a paper jam. ● When loading items that are smaller than 74 mm (2.9 in) one dimension (such as business cards), place the items with the long side parallel to the paper guides. ● To prevent skewed scans when scanning pages longer than 356 mm (14 in), scan them one at a time. ● To scan fragile documents (such as photos or documents on wrinkled or very lightweight paper), place the document in a clear, heavyweight document sleeve no wider than 216 mm (8.5 in) before loading it into the document feeder. TIP: If you do not have an appropriately-sized document sleeve, consider using a sleeve intended for use in a ring binder. Trim the ring-side edge so that the sleeve is no more than 216 mm (8.5 in) wide. In the More Options screen, disable Misfeed Detection. For more information, see the electronic User Guide. ● Make sure that the hatch on the document feeder is securely latched. To properly close the hatch, press until you hear a click. ● Adjust the paper guides to the width of the documents. Make sure that the paper guides touch the edges of the original. If there is any clearance between the paper guides and the edges of the documents, the scanned image might be skewed. ● When placing a stack of documents into the feeder, gently set the stack in the document feeder. Do not drop the stack into the feeder and do not tap the top edge of the stack after you have placed the stack in the document feeder. ● Clean the scanning rollers if the rollers are visibly dirty or after scanning a document that has pencil writing on it. 8 Install and set up the product
-
 1
1 -
2
-
3
-
4
-
5
-
6
-
7
-
8
-
 9
9 -
 10
10 -
 11
11 -
 12
12 -
 13
13 -
 14
14 -
 15
15 -
 16
16 -
 17
17 -
 18
18 -
 19
19 -
20
-
21
-
22
-
23
-
24
-
25
-
26
-
27
-
28
-
29
-
30
-
31
-
32
-
33
-
34
-
35
-
36
-
37
-
38
-
39
-
40
-
41
-
42
-
43
-
44
-
45
-
46
-
47
-
48
-
49
-
50
-
51
-
52
-
53
-
54
-
55
-
56
-
57
-
58
-
59
-
60
-
61
-
62
-
63
-
64
-
65
-
66
-
67
-
68
 |
 |