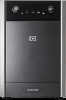
HP T1000 IEC-320-C14 HP UPS R/T3000 Installation Instructions - Page 7
Connecting the battery leads, Rotating the logo badge, Attaching the UPS front bezel
 |
View all HP T1000 IEC-320-C14 manuals
Add to My Manuals
Save this manual to your list of manuals |
Page 7 highlights
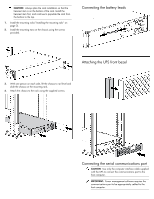
Connecting the battery leads WARNING: To reduce the risk of personal injury or damage to the equipment, the tower conversion stands must be properly attached when the unit is installed as a tower. Using the preinstalled screws, attach the tower conversion stands to the unit. Rotating the logo badge Gently pull out the logo badge, rotate it 90 degrees, and then replace it in the bezel. Continuing the installation To continue the UPS installation, follow the instructions starting with "Connecting the serial communications port (on page 4)." Attaching the UPS front bezel Attaching the tower conversion stands
-
 1
1 -
 2
2 -
 3
3 -
 4
4 -
 5
5 -
 6
6 -
 7
7 -
 8
8
 |
 |

Connecting the battery leads
Rotating the logo badge
Gently pull out the logo badge, rotate it 90 degrees, and then
replace it in the bezel.
Attaching the UPS front bezel
Attaching the tower conversion stands
WARNING:
To reduce the risk of personal injury or
damage to the equipment, the tower conversion stands
must be properly attached when the unit is installed as a
tower.
Using the preinstalled screws, attach the tower conversion stands to
the unit.
Continuing the installation
To continue the UPS installation, follow the instructions starting with
"Connecting the serial communications port (on page 4)."