HP t505 Administrator Guide - Page 8
Image Downloads, Downloading an image to a USB drive or local storage, Configuring custom proxy
 |
View all HP t505 manuals
Add to My Manuals
Save this manual to your list of manuals |
Page 8 highlights
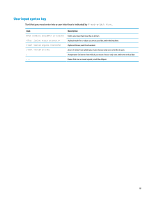
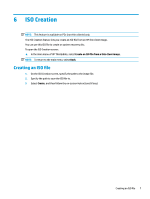
2 Image Downloads The Image Downloads feature lets you download an image from HP to either local storage or a USB drive. The USB drive option creates a bootable USB drive that can be used to deploy the image to other thin clients. To open the Image Downloads screen: ▲ In the main menu of HP ThinUpdate, select Download a thin client recovery image to local storage or a USB drive. NOTE: To return to the main menu, select Back. Downloading an image to a USB drive or local storage 1. On the Image Downloads screen, select a thin client platform from the list. 2. Select an operating system from the list. 3. Select an image from the list. 4. To create a bootable USB drive: CAUTION: This process formats the USB drive and deletes any existing data on the drive. ▲ Select USB drive as the target destination, select a local USB drive from the list, select Create, and then follow the on-screen instructions (if any). - or - To save the image to local storage or a network hard drive: ▲ Select Hard drive as the target destination, specify the destination path on the local drive or network drive, select Download, and then follow the on-screen instructions (if any). NOTE: To abort the download process, select Abort. If downloading to a USB drive, you cannot abort the process until after the drive formatting phase is complete. HP ThinUpdate reduces the size of the USB drive to 30 GB if the drive is larger than 32 GB, if you selected an HP ThinPro image, and if you are running HP ThinUpdate on Windows 7 or Windows Embedded Standard 7. Configuring custom proxy settings 1. On the Image Downloads screen, select Options. 2. Select Custom proxy, specify the proxy address and port, and then select OK. NOTE: To return to the system default proxy settings, follow the above procedure, but select System default instead. Viewing release notes for the selected image ▲ On the Image Downloads screen, select Release notes. NOTE: Release notes might not be available for some images. 2 Chapter 2 Image Downloads
-
 1
1 -
2
-
 3
3 -
 4
4 -
 5
5 -
 6
6 -
 7
7 -
 8
8 -
 9
9 -
 10
10 -
 11
11 -
 12
12 -
 13
13 -
14
-
15
-
16
 |
 |
