Hitachi DH18DLP4 Instruction Manual
Hitachi DH18DLP4 - 18V Li-Ion 2-Mode SDS Rotary Hammer Manual
 |
UPC - 717709011649
View all Hitachi DH18DLP4 manuals
Add to My Manuals
Save this manual to your list of manuals |
Hitachi DH18DLP4 manual content summary:
- Hitachi DH18DLP4 | Instruction Manual - Page 1
about product safety. Please read and understand this manual BEFORE operating the power tool. Please keep this manual available for other users and owners before they use the power tool. This manual should be stored in safe place. INSTRUCTIONS DE SECURITE ET MODE D'EMPLOI AVERTISSEMENT Une - Hitachi DH18DLP4 | Instruction Manual - Page 2
SAFETY 3 GENERAL SAFETY RULES 3 SPECIFIC SAFETY RULES AND SYMBOLS ......... 5 IMPORTANT SAFETY INSTRUCTIONS FOR USE OF THE CORDLESS ROTARY HAMMER 6 IMPORTANT SAFETY INSTRUCTIONS FOR BATTERY CHARGER 6 IMPORTANT SAFETY INSTRUCTIONS FOR USE OF THE BATTERY AND BATTERY CHARGER 7 CAUTION ON LITHIUM - Hitachi DH18DLP4 | Instruction Manual - Page 3
prevent bodily injury or machine damage are identified by WARNINGS on the power tool and in this Instruction Manual. NEVER use this power tool in a manner that has not been specifically recommended by HITACHI. MEANINGS OF SIGNAL WORDS WARNING indicates a potentially hazardous situations which, if - Hitachi DH18DLP4 | Instruction Manual - Page 4
persons unfamiliar tool is maintained. with the power tool or these instructions to operate the power tool. -WARNING- Power tools are dangerous in the hands of To reduce the risk of injury, user must read untrained users. instruction manual. e) Maintain power tools. Check for misalignment - Hitachi DH18DLP4 | Instruction Manual - Page 5
, or otherwise appears defective, stop using it immediately and arrange for repairs by a Hitachi authorized service center. 13. Carefully handle power tools. Should a power tool be dropped or struck against hard materials inadvertently, it may be deformed, cracked, or damaged. 14. Do not wipe - Hitachi DH18DLP4 | Instruction Manual - Page 6
Do not disassemble battery charger; take it to a qualified serviceman when service or repair is required. Incorrect reassembly may result in a risk of HITACHI battery operated tools as a standard accessory. In this case, please confirm Instruction Manual of the HITACHI battery operated tools - Hitachi DH18DLP4 | Instruction Manual - Page 7
You must charge the battery before you can use the power tool. Before using the model UC18YRL or UC18YFL battery charger, be sure to read all instructions and cautionary statements on it, the battery and in this manual. REMEMBER: USE ONLY HITACHI BATTERY TYPE EB7, EB9, EB12, EB14, EB18, BCL14, BCL18 - Hitachi DH18DLP4 | Instruction Manual - Page 8
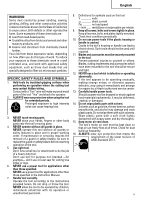
in the safe operation and maintenance of the power tool. NEVER operate, or attempt any maintenance on the tool unless you have first read and understood all safety instructions contained in this manual. Some illustrations in this Instruction Manual may show details or attachments that differ from - Hitachi DH18DLP4 | Instruction Manual - Page 9
⅜ Battery Terminal Hole English Terminal Hole Latch Nameplate 2. Battery Charger (UC18YRL, UC18YFL) Caution Plate Body Fig. 1 Latch Nameplate Overheat lamp (green) Charge status lamp (red) Battery installation hole Nameplate Fig. 2 9 - Hitachi DH18DLP4 | Instruction Manual - Page 10
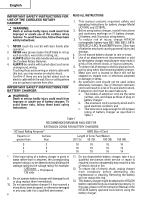
boring holes with the wood drill. There is a likelihood that the motor will burn out. 2. Battery Charger (UC18YRL) Model UC18YRL UC18YFL Input power source Single phase: AC 120 V 60 Hz Charging time (At a temperature of 68°F (20°C)) Approx. 20 min. .....BCL1815 Approx. 45 min. .....EBM1830 - Hitachi DH18DLP4 | Instruction Manual - Page 11
BATTERY ⅜ How to install the battery. Align the battery with the groove in tool handle and slip it into place. Always insert it all the way until : Before plugging into the receptacle, make sure the following points. ⅜ The power source voltage is stated on the nameplate. ⅜ The cord is not damaged. - Hitachi DH18DLP4 | Instruction Manual - Page 12
Remove the battery from the battery charger. Supporting the battery charger with hand, pull out the is malfunctioning. Take it to your authorized Service Center. ⅜ Since the built-in micro power of the tool becomes weaker, stop using the tool and recharge its battery. If you continue to use the tool - Hitachi DH18DLP4 | Instruction Manual - Page 13
it to the groove on the grip. (Fig. 8) (1) Clean the shank portion of the drill bit. (2) Insert the drill bit in a twisting manner into the tool holder until it latches itself. (Fig. 5) The grip need not be adjusted during bit installation. (3) Check the latching by pulling on the drill bit. (4) To - Hitachi DH18DLP4 | Instruction Manual - Page 14
damaged unless a bit appropriate for the screw diameter is employed to drive in the screws. 5. Confirm the direction of bit rotation (Fig The push button cannot be switched while the power tool is turning. To switch the push button, stop the power tool, then set the push button. 6. Continuous - Hitachi DH18DLP4 | Instruction Manual - Page 15
English Switch Fig. 11 Spring Fig. 12 Fig. 14 CAUTION: Do not look directly into the light. Such actions could result in eye injury. (4) Replacing the batteries (a) Loosen the hook screw with a phillips-head screwdriver (No. 1). (Fig. 15) Remove the hook cover by pushing in the direction of the - Hitachi DH18DLP4 | Instruction Manual - Page 16
drill bit. Therefore, refer to the item of "Mounting ⅜ When the switch trigger is depressed, the tool the drill bit" for attaching it. rotates. When the switch trigger is released, the tool stops. ⅜ The rotational speed of the rotary hammer can be controlled by varying the amount that the - Hitachi DH18DLP4 | Instruction Manual - Page 17
edge of the drill bit and reduce the service life of the rotary hammer in addition. ⅜ strike the head of the cotter with a hammer supporting on the rest. (Fig. 24) Grip Drill bit hardness of the wood into consideration. Should the hole be excessively small or shallow, requiring much power to drive - Hitachi DH18DLP4 | Instruction Manual - Page 18
tool will cause motor When replacing the carbon brush with a new one, malfunctioning and degraded efficiency, replace be sure to use the Hitachi 19. Lastly, install the brush cap. power tool. Exercise due care to ensure the winding brush can result in motor trouble, replace ● Caution must be - Hitachi DH18DLP4 | Instruction Manual - Page 19
parts list CAUTION: Repair, modification and inspection of Hitachi Power Tools must be carried out by a Hitachi Authorized Service Center. This Parts List will be helpful if presented with the tool to the Hitachi Authorized Service Center when requesting repair or other maintenance. In the operation - Hitachi DH18DLP4 | Instruction Manual - Page 20
. NEVER use replacement parts or accessories which are not intended for use with this tool. Contact HITACHI if you are not sure whether it is safe to use a particular replacement part or accessory with your tool. The use of any other attachment or accessory can be dangerous and could cause - Hitachi DH18DLP4 | Instruction Manual - Page 21
and Adapter Tool ⅷ Drilling holes in concrete or tile Drill bit (Slender shaft) ⅷ chuck (SDS-plus shank) Rotation only Anchor setting adapter ⅷ Demolishing operation Bull point (Round type) ⅷ Driving screws , Driver bit - Driver bit ⅷ Drilling in steel or wood Drill bit for steel Drill bit - Hitachi DH18DLP4 | Instruction Manual - Page 22
English ⅷ Drilling holes in concrete or tile Drill Bit (Slender shaft) Outer dia. 1/8" (3.4 mm) 9/64" (3.5 mm) Drill Bit (Slender Shaft) Effective Length 1-25/32" (45 mm) 1-25/32" (45 mm) Overall Length 3-35/64" (90 mm) 3-35/64" (90 mm) Code No. 306369 306368 Adaptor for Slender Shaft Code No - Hitachi DH18DLP4 | Instruction Manual - Page 23
mm) 6-1/4" 10-1/4" (160 mm) (260 mm) 303622 302977 Anchor setting adaptor (for Manual hammer) - Hitachi DH18DLP4 | Instruction Manual - Page 24
de ce mode d'emploi et dans les sections qui contiennent les instructions de fonctionnement et d'entretien. Les dangers qui doivent être évités manière qui n'est pas spécifiquement recommandée par HITACHI. SIGNIFICATION DES MOTS D'AVERTISSEMENT AVERTISSEMENT indique des situations potentiellement - Hitachi DH18DLP4 | Instruction Manual - Page 25
électrique, les accessoires et engendrer des blessures. les mèches de l'outil, etc. conformément à e) Ne pas trop se pencher. Toujours garder une ces instructions et de la manière destinée bonne assise et un bon équilibre pendant le pour le type précis d'outil électrique, en travail. tenant - Hitachi DH18DLP4 | Instruction Manual - Page 26
entre en contact avec les yeux, consulter un médecin. Le liquide émis par la batterie peut entraîner des irritations et des brûlures. 6) Service a) Faire entretenir l'outil électrique par un technicien habilité à l'aide de pièces de rechange identiques exclusivement. Cela garantira le maintien de la - Hitachi DH18DLP4 | Instruction Manual - Page 27
ter de l'utiliser immédiatement et le faire réparer par un centre de service Hitachi autorisé. 13. Manipuler l'outil motorisé avec précaution. Si un outil 2. Avant d'utiliser le chargeur de batterie, lire toutes les étiquettes d'instruction et de précaution apposées sur (1) le chargeur de batterie, - Hitachi DH18DLP4 | Instruction Manual - Page 28
toutes les consignes et les avertissements signalés sur le chargeur, sur la batterie ou dans ce manuel. BIEN NOTER: UTILISER EXCLUSIVEMENT LE BATTERIE HITACHI DE SÉRIE EB7, EB9, EB12, EB14, EB18, BCL14, BCL18 ET EBM18. LES AUTRES TYPES DE BATTERIE POURRAIENT EXPLOSER OU PROVOQUER DES BLESSURES - Hitachi DH18DLP4 | Instruction Manual - Page 29
anomalies lors de la première utilisation de la batterie, n'utilisez pas cette dernière et renvoyez-la au fournisseur ou au fabricant. CONSERVER CES INSTRUCTIONS ET LES METTRE A LA DISPOSITION DES AUTRES UTILISATEURS ET PROPRIETAIRES DE CET OUTIL! 29 - Hitachi DH18DLP4 | Instruction Manual - Page 30
et un entretien de l'outil motorisé. NE JAMAIS utiliser ni entreprendre une révision de l'outil sans avoir d'abord lu et compris toutes les instructions de sécurité contenues dans ce manuel. Certaines illustrations dans ce mode d'emploi peuvent montrer des détails ou des accessoires différents de - Hitachi DH18DLP4 | Instruction Manual - Page 31
de la batterie Plaque signalétique Fig. 2 SPECIFICATIONS 1. Marteau rotatif à batterie (DH18DL) Moteur Moteur CC Vitesse à vide SAVE/POWER Vitesse de percussion à pleine charge SAVE/POWER 0-750 tr/mn / 0-1,500 tr/mn 0-3,100 tr/mn / 0-6,200 tr/mn Béton 5/8″ (16 mm) Capacité Perçage - Hitachi DH18DLP4 | Instruction Manual - Page 32
Français ASSEMBLAGE ET FONCTIONNEMENT UTILISATIONS Par action combinée de rotation et de frappe ⅜ Perçage de trous d'ancrage ⅜ Perçage de trous dans béton ⅜ Perçage de trous dans une tuile Par action de rotation uniquement ⅜ Perçage de l'acier ou du bois ⅜ Serreage de vis mécaniques et de vis à - Hitachi DH18DLP4 | Instruction Manual - Page 33
Français Voyant d'état Avant la de charge recharge (rouge) Clignote (ROUGE) Tableau 2 Indications de la lampe S'allume pendant 0.5 seconde. Ne s'allume pas pendant 0.5 seconde. (Eteint pendant 0.5 seconde) Pendant la recharge Recharge terminée S'allume (ROUGE) Clignote (ROUGE) S'allume sans - Hitachi DH18DLP4 | Instruction Manual - Page 34
Français ⅜ Eviter d'effectuer la recharge sous des températures élevées. Une batterie est toujours chaude immédiatement après son utilisation. Si la batterie est rechargée immédiatement après utilisation, les substances chimiques internes risquent de se détériorer et la durée de vie de la batterie - Hitachi DH18DLP4 | Instruction Manual - Page 35
Français Collecteur à poussière (B) Poussoir L Repére L R L R Repére R Fig. 8 ATTENTION : ⅜ La capuchon à poussière et le collecteur à poussière (B) ne sont destinés à être utilisés que lors du perçage de béton. Ne pas les utiliser lors du perçage de pièces en bois ou métalliques. ⅜ Insérer le - Hitachi DH18DLP4 | Instruction Manual - Page 36
Français On risque de provoquer des blessures si l'on transporte l'outil accroché à la ceinture avec des accessoires à bout pointu, par exemple un foret, fixés sur l'outil. 1. Utilisation d'un crochet muni d'un éclairage Le crochet muni d'un éclairage se fixe soit à droite soit à gauche, et son - Hitachi DH18DLP4 | Instruction Manual - Page 37
Français ATTENTION : Ne pas regarder la lampe directement. Cela pourrait abîmer les yeux. REMARQUE : Ne pas trop serrer la vis. Cela pourrait abîmer le filetage. (4) Remplacement des piles (a) Desserrer la vis du crochet avec un tournevis à tête phillips (no. 1). (Fig. 15) Retirer le cache du - Hitachi DH18DLP4 | Instruction Manual - Page 38
frappe quand la mandrin porte-foret et le raccord de mandrin sont montés sur la machine. Cela risquerait d'abréger considérablement la durée de service de chaque élément du perforateur percussion. ATTENTION : Ne manquez pas de prendre en considération la dureté du bois quand vous préparez un trou - Hitachi DH18DLP4 | Instruction Manual - Page 39
avec le mode "SAVE". Le moteur pourrait brûler en se verrouillant du fait de la faiblesse de la puissance. Support Fig. 24 8. Commutation entre les modes "SAVE" et "POWER" Il est possible d'augmenter ou de diminuer la force de percussion du perforateur en fonction du travail à effectuer, à l'aide - Hitachi DH18DLP4 | Instruction Manual - Page 40
librement dans les supports. REMARQUE: Lors du remplacement des balais en carbone par des neufs, bien utiliser des balais en carbone Hitachi, No. de jeter cette batterie aux ordures ménagères. Vérifier auprès de son service de ramassage d'ordures les options de recyclage et la procédure correcte de - Hitachi DH18DLP4 | Instruction Manual - Page 41
seules des pièces de rechange autorisées seront utilisées, tous les entretiens et les réparations doivent être effectués uniquement par UN CENTRE DE SERVICE HITACHI AUTORISÉ. 11. Liste des pièces de rechange PRECAUTION: Les réparations, modifications et inspections des outils électriques - Hitachi DH18DLP4 | Instruction Manual - Page 42
prévus pour être utilissl avec cet outil. En cas de doute, contacter HITACHI pour savoir si une pièce de rechange ou un accessoire particulier peuvent ê : Les accessoires sont sujets à changement sans obligation de la part de HITACHI. ACCESSOIRES STANDARD DH18DL (2MRK) DH18DL (2LFK) DH18DL (NN) 1 - Hitachi DH18DLP4 | Instruction Manual - Page 43
2. Outil et adaptateur Rotation + percussion L'outil ⅷ Percer des trous dans du béton ou un carreau Foret de perçage (Tige fine) ⅷ Percer des trous dans du béton ou un carreau Foret de perçage ⅷ Perçage de trous d'ancrage Foret de perçage (queue conique) ⅷ Forage de trous dans le béton ( ) Mèche à - Hitachi DH18DLP4 | Instruction Manual - Page 44
Français ⅷ Percer des trous dans du béton ou un carreau Foret de perçage (Tige fine) dia. extérieur 1/8" (3.4 mm) 9/64" (3.5 mm) Foret de perçage (Tige fine) Longueur effective 1-25/32" (45 mm) 1-25/32" (45 mm) Longueur totale 3-35/64" (90 mm) 3-35/64" (90 mm) No. de code 306369 306368 - Hitachi DH18DLP4 | Instruction Manual - Page 45
Vis spéciale Mandrin porte-foret Porte-mandrin 981122 321814 303623 REMARQUE : Les spécifications sont sujettes à modification sans aucune obligation de la part de HITACHI. 45 - Hitachi DH18DLP4 | Instruction Manual - Page 46
, los riesgos están identificados con ADVERTENCIAS en dicha herramienta y en este Manual de instrucciones. No utilice NUNCA esta herramienta eléctrica de ninguna forma que no esté específicamente recomendada por HITACHI. SIGNIFICADO DE LAS PALABRAS DE SEÑALIZACIÓN ADVERTENCIA indica situaciones - Hitachi DH18DLP4 | Instruction Manual - Page 47
Español d) No utilice el cable incorrectamente. No utilice 4) Utilización y mantenimiento de las herramientas el cable para transportar, tirar de la eléctricas herramienta eléctrica o desenchufarla. a) No fuerce la herramienta eléctrica. Utilice la Mantenga el cable alejado del calor, del - Hitachi DH18DLP4 | Instruction Manual - Page 48
á el mantenimiento de la seguridad de la herramienta eléctrica. -ADVERTENCIA- Para disminuir el riesgo de lesiones, el usuario debe leer el manual de instrucciones. ADVERTENCIA: Algunos polvos creados por el lijado mecánico, el aserrado, el esmerilado, el taladrado y otras actividades de construcci - Hitachi DH18DLP4 | Instruction Manual - Page 49
ofrecidas a continuación. LEA TODAS LAS INSTRUCCIONES 1. Este manual contiene instrucciones importantes de seguridad para el cargador de producto que utiliza la batería. 3. Para reducir el riesgo de lesiones, cargue la batería HITACHI del tipo de la serie EB7, EB9, EB12, EB14, EB18, BCL14, BCL18 y - Hitachi DH18DLP4 | Instruction Manual - Page 50
de baterías puede utlizarse con herramientas alimendadas con batería HITACHI como acccesorio estándar. En este caso, antes de utilizarlo, lea los manuales de instrucciones de las herramientas alimentadas con baterías HITACHI. INSTRUCCIONES IMPORTANTES DE SEGURIDAD PARA LA BATERÍA Y EL CARGADOR DE - Hitachi DH18DLP4 | Instruction Manual - Page 51
Español 12. SIEMPRE utilice el cargador con un tomacorriente (120 voltios). La utilización de un cargador con cualquier otra tensión podría hacer que éste se recalentase y dañase. 13. SIEMPRE espere 15 minutos por lo menos entre las cargas para evitar que el cargador se recaliente. 14. SIEMPRE - Hitachi DH18DLP4 | Instruction Manual - Page 52
el mantenimiento de la herramienta antes de leer y comprender todas las instrucciones de seguridad contenidas en este manual. Algunas ilustraciones de este Manual de Instrucciones pueden mostrar detalles o accesorios diferentes a los de la propia herramienta eléctrica. NOMENCLATURA 1. Taladro de - Hitachi DH18DLP4 | Instruction Manual - Page 53
características Fig. 2 1. Taladro de percusión sin cable (DH18DL) Motor Motor de CC Velocidad sin carga SAVE/POWER 0-750/mn / 0-1,500/mn Régimen de impacto a plena carga SAVE/POWER 0-3,100/mn / 0-6,200/mn Hormigón 5/8″ (16 mm) Capacidad Taladrado Acero 1/2″ (13 mm) Madera 11/16″ (18 mm - Hitachi DH18DLP4 | Instruction Manual - Page 54
Español MONTAJE Y OPERACIÓN APLICACIONES Acción combinada de rotación y golpeteo ⅜ Perforación de orificios de anclaje ⅜ Perforación de orificios de hormigón ⅜ Perforación de orficios de baldosa Rotación solamente ⅜ Perforación de orificios en hormigón o madera ⅜ Apretar tornillos en metal o - Hitachi DH18DLP4 | Instruction Manual - Page 55
Español Lámpara de indicación del estado de la carga (roja) Antes de la carga Durante la carga Carga completa Carga imposible Tabla 2 Parpadeo (ROJA) Indicaciones de la lámpara piloto Se encenderá durante 0.5 segundos. No se encenderá durante 0.5 segundos. (Apagada durante 0.5 segundos) - Hitachi DH18DLP4 | Instruction Manual - Page 56
Español ANTES DE LA UTILIZACIÓN Compruebe el área de trabajo para cerciorarse de que esté libre de escombros y bien ordenada. Despeje el área de personal innecesario. Cerciórese de que la iluminación y la ventilación sean adecuadas. ANTES DE LA OPERACIÓN 1. Montaje de la broca (Fig. 5, 6) PRECAUCI - Hitachi DH18DLP4 | Instruction Manual - Page 57
Español ⅜ Inserte completamente el colector de polvo (B) en la parte del portabrocas de la unidad principal. ⅜ Cuando ponga en funcionamiento el martillo perforador a batería mientras el colector de polvo (B) esté separado de la superficie de hormigón, dicho colector girará junto con la broca. - Hitachi DH18DLP4 | Instruction Manual - Page 58
Español 4 3 2 (B) 1 5 Gancho (A) Fig. 10 (2) Cambio de la posición del gancho El diámetro más grande queda en dirección opuesta Fig. 13 PRECAUCIÓN: La instalación incompleta del gancho puede provocar lesiones corporales durante el uso. (a) Sujete firmemente la unidad principal y saque el - Hitachi DH18DLP4 | Instruction Manual - Page 59
Español (b) Retire las pilas usadas e introduzca las pilas nuevas. Alineélas con las indicaciones del gancho y posicione correctamente los terminales positivo (+) y negativo (-). (Fig. 17) (c) Haga coincidir la muesca del cuerpo principal del gancho con el saliente de la tapa del gancho, presione - Hitachi DH18DLP4 | Instruction Manual - Page 60
Español instalados. Esto reducirá considerablemente la vida útil de cada componente de la máquina. Fig. 19 (3) No es necesario presionar con fuerza. Presionar ligeramente de forma que el polvo producido al taladrar salga al exterior gradualmente. PRECAUCIÓN: Cuando la broca toque una barra de - Hitachi DH18DLP4 | Instruction Manual - Page 61
cabeza de l chaveta con un Modo "SAVE" martillo. Usar apoyos como se muestra en la Fig. 24. Broca Sujetador Perilla de cambio Modo "POWER" Adaptador de la espiga ahusada Cubierta frontal Fig. 23 Chaveta Adaptador de la espiga ahusada Fig. 25 (1) Modo"SAVE"... disminución de la fuerza de - Hitachi DH18DLP4 | Instruction Manual - Page 62
de carbón y compruebe si se mueven libremente dentro de sus portaescobillas. NOTA: Cuando reemplace las escobillas de carbón por otras nuevas, utilice escobillas Hitachi con número de código 328481. 5. Reemplazar el carbón de contacto Extraiga la escobilla de carbón quitando primero la tapa y despu - Hitachi DH18DLP4 | Instruction Manual - Page 63
y el mantenimiento de las herramientas eléctricas, se deberán observar las normas y reglamentos vigentes en cada país. MODIFICACIONES: Hitachi Power Tools introduce constantemente mejoras y modificaciones para incorporar los últimos avances tecnológicos. Por consiguiente, algunas partes pueden ser - Hitachi DH18DLP4 | Instruction Manual - Page 64
herramienta. Si tiene dudas en cuanto a la seguridad de usar determinado repuesto o accesorio junto con su herramienta, póngase en contacto con HITACHI. La utilización de otros accesorios puede resultar peligrosa y causar lesiones o daños mecánicos. NOTA: Las especificaciones están sujetas a cambio - Hitachi DH18DLP4 | Instruction Manual - Page 65
Rotación + golpeteo 2. Herramienta y adaptador Herramienta Perforación de agujeros en cemento o losa Broca de taladro (Eje fino) Perforación de agujeros en cemento o losa Broca de taladro Taladrar orificios de anclaje Broca de taladro (Vástago cónico) Perforación de orificios en hormigón (Broca de - Hitachi DH18DLP4 | Instruction Manual - Page 66
Español Perforación de agujeros en cemento o losa Broca de taladro (Eje fino) dia. externo 1/8" (3.4 mm) 9/64" (3.5 mm) Broca de taladro (Eje fino) Longueur effective 1-25/32" (45 mm) 1-25/32" (45 mm) Longueur totale 3-35/64" (90 mm) 3-35/64" (90 mm) Núm. de código 306369 306368 Adaptador - Hitachi DH18DLP4 | Instruction Manual - Page 67
(9.5 mm) 6-1/4" 10-1/4" (160 mm) (260 mm) 303622 302977 Adaptador de montaje de ancla (para Martillo manual) Medida de ancla án sujetas a cambio sin ninguna obligación por parte de HITACHI. 67 - Hitachi DH18DLP4 | Instruction Manual - Page 68
68 - Hitachi DH18DLP4 | Instruction Manual - Page 69
D4 × 16 CARBON BRUSH BRUSH CAP TAPPING SCREW (W/FLANGE) D4 × 20 HOUSING (A),(B) SET PUSHING BUTTON DC SPEED CONTROL SWITCH LEVER (B) BATTERY TERMINAL HITACHI LABEL HOOK ASS'Y (W/LIGHT) TAPPING SCREW D2 × 6 LEVER (A) V-LOCK NUT M5 STRAP HOOK SPRING SPECIAL SCREW (A) M5 BATTERY CASE SIDE HANDLE DEPTH - Hitachi DH18DLP4 | Instruction Manual - Page 70
70 - Hitachi DH18DLP4 | Instruction Manual - Page 71
71 - Hitachi DH18DLP4 | Instruction Manual - Page 72
. Con respecto a la RECOLECCIÓN de baterías, póngase en contacto con HITACHI KOKI U.S.A. LTD. número 1-800-59-TOOLS (llamada gratis), o con HITACHI AUTORIZED POWER TOOL SERVICE CENTER. Issued by Hitachi Koki Co., Ltd. Shinagawa Intercity Tower A, 15-1, Konan 2-chome, Minato-ku, Tokyo 108-6020
-
 1
1 -
 2
2 -
 3
3 -
 4
4 -
 5
5 -
 6
6 -
 7
7 -
8
-
9
-
10
-
11
-
12
-
13
-
14
-
15
-
16
-
17
-
18
-
19
-
20
-
21
-
22
-
23
-
24
-
25
-
26
-
27
-
28
-
29
-
30
-
31
-
32
-
33
-
34
-
35
-
36
-
37
-
38
-
39
-
40
-
41
-
42
-
43
-
44
-
45
-
46
-
47
-
48
-
49
-
50
-
51
-
52
-
53
-
54
-
55
-
56
-
57
-
58
-
59
-
60
-
61
-
62
-
63
-
64
-
65
-
66
-
67
-
68
-
69
-
70
-
71
-
72
 |
 |

INSTRUCTIONS DE SECURITE ET MODE D’EMPLOI
AVERTISSEMENT
Une utilisation
INCORRECTE OU DANGEREUSE
de cet outil motorisé peut entraîner
la mort ou de sérieuses blessures corporelles !
Ce mode d’emploi contient d’importantes informations à propos de la sécurité de
ce produit. Prière de lire et de comprendre ce mode d’emploi AVANT d’utiliser
l’outil motorisé. Garder ce mode d’emploi à la disponibilité des autres utilisateurs
et propriétaires avant qu’ils utilisent l’outil motorisé. Ce mode d’emploi doit être
conservé dans un endroit sûr.
SAFETY INSTRUCTIONS AND INSTRUCTION MANUAL
WARNING
IMPROPER OR UNSAFE
use of this power tool can result in death or serious bodily
injury!
This manual contains important information about product safety. Please read
and understand this manual BEFORE operating the power tool. Please keep this
manual available for other users and owners before they use the power tool. This
manual should be stored in safe place.
INSTRUCCIONES DE SEGURIDAD Y MANUAL DE INSTRUCCIONES
ADVERTENCIA
¡La utilización
INAPROPIADA O PELIGROSA
de esta herramienta eléctrica puede
resultar en lesiones de gravedad o la muerte!
Este manual contiene información importante sobre la seguridad del producto.
Lea y comprenda este manual ANTES de utilizar la herramienta eléctrica. Guarde
este manual para que puedan leerlo otras personas antes de utilizar la herramienta
eléctrica. Este manual debe ser guardado en un lugar seguro.
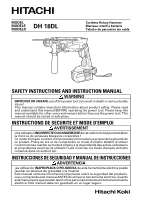
MODEL
Cordless Rotary Hammer
MODÈLE
Marteau rotatif à batterie
MODELO
Taladro de percusión sin cable
DH 18DL