Honeywell HE220 Owner's Manual - Page 3
WARNING, CAUTION, Installing the Humidifier - installation kit
 |
View all Honeywell HE220 manuals
Add to My Manuals
Save this manual to your list of manuals |
Page 3 highlights
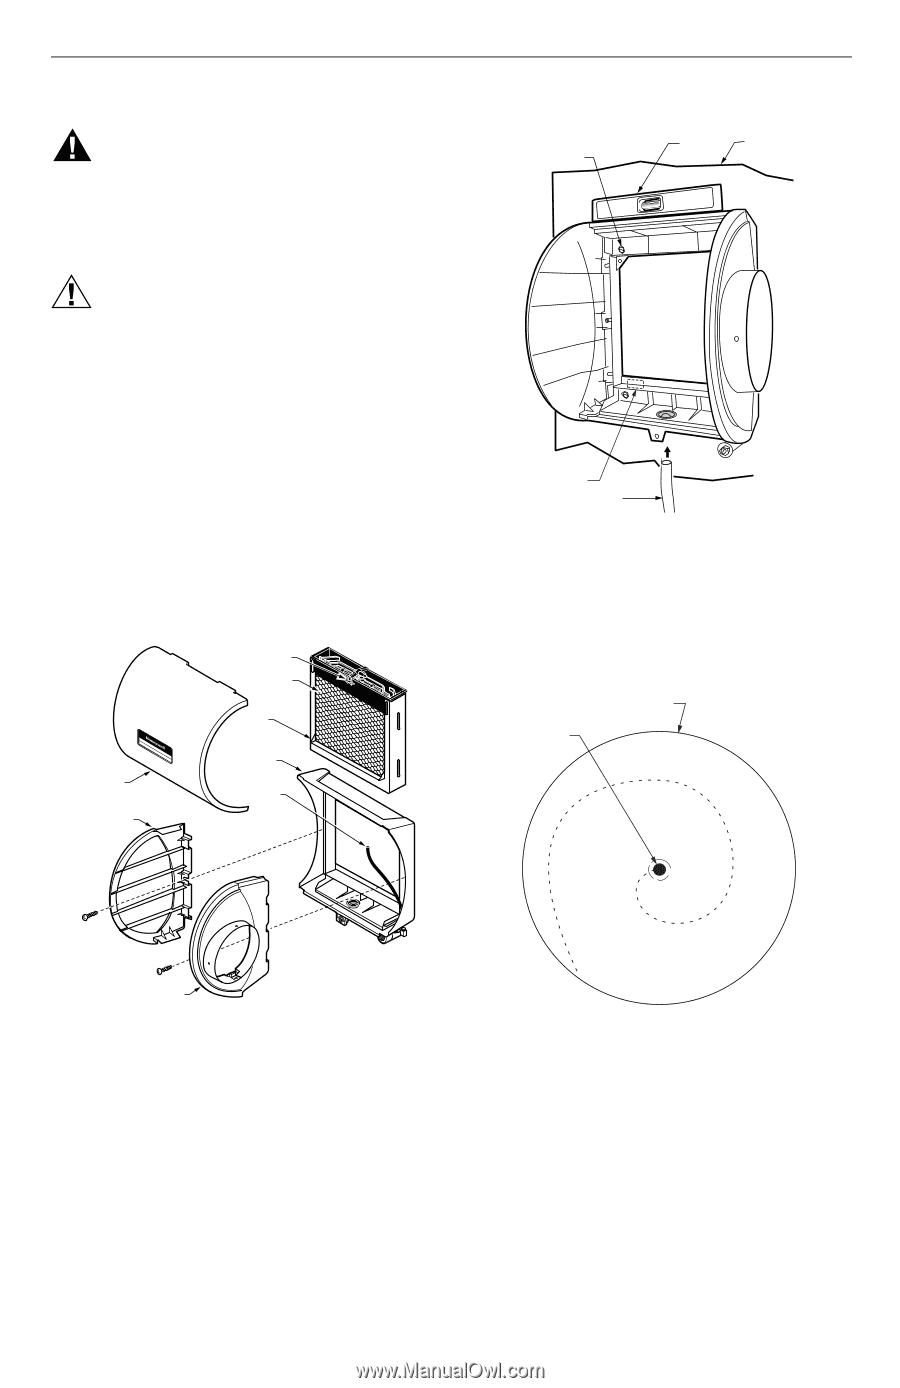
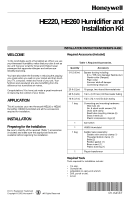
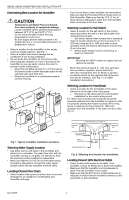
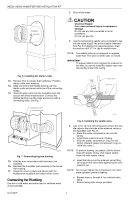
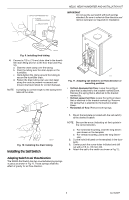
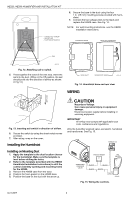
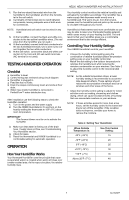
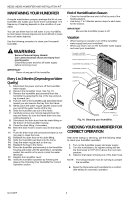
Installing the Humidifier WARNING Hazardous Voltage Can cause personal injury or equipment damage. Do not cut or drill into any air conditioning or electrical accessory. HE220, HE260 HUMIDIFIER AND INSTALLATION KIT 8. Secure the humidifier housing to the opening at the top and bottom using sheet metal screws. SHEET METAL SCREWS (4) LEVEL DUCT CAUTION Sharp Edges Installation Hazard. Can cause personal injury. Wear gloves and safety glasses. 1. Turn off power to the air handing system at the circuit breaker. 2. Draw a level line on the plenum in the location chosen for the humidifier. (Leveling assures optimal humidifier performance.) 3. Locate the template (form number 69-1650 included in the box). For the HE220 model, cut out the template along the dotted line. 4. Tape the template in position and trace around the template. 5. Remove the template and carefully cut the rectangular opening. 6. Disassemble the humidifier; remove the cover and take out the humidifier pad assembly. See Fig. 3. WATER FEED NOZZLE HUMIDIFIER PAD ASSEMBLY COVER SIDEWALL FRAME HUMIDIFIER HOUSING WATER FEED TUBE OPENING TO AIR DUCT PLASTIC TABS (2) DRAIN TUBING M20171 Fig. 4. Installing humidifier on duct. 9. Use the 6 in. (155 mm) starter collar as a template to mark the opening for the bypass. 10. Carefully cut the opening for a 6 in. (155 mm) starter collar. See Fig. 5. Use a drill, punch or awl to start the cut in the middle of the circle. Cut in an outward spiral to assist in controlling the cut. 6 IN. ROUND TEMPLATE STARTING HOLE BY-PASS SIDEWALL M12304A Fig. 3. Disassembling humidifier. 7. Make sure the humidifier housing is level, then position it in the opening so the plastic tabs are in place on the lower sheet metal edge of the opening. Use pliers, as necessary, to flatten cut edges. See Fig. 4. M20172 Fig. 5. Cutting bypass opening. 11. Assemble the summer shutoff damper into the starter collar. Verify that the damper rotates freely between the open and closed positions. Make sure the handle is accessible. Mark the damper Closed position as Summer and the Open position as Winter. See Fig. 6. 3 69-1645EF
-
 1
1 -
 2
2 -
 3
3 -
 4
4 -
 5
5 -
 6
6 -
 7
7 -
 8
8 -
 9
9 -
10
-
11
-
12
-
13
-
14
-
15
-
16
-
17
-
18
-
19
-
20
-
21
-
22
-
23
-
24
 |
 |