Husqvarna 520iHT4 Owner Manual - Page 14
Maintenance
 |
View all Husqvarna 520iHT4 manuals
Add to My Manuals
Save this manual to your list of manuals |
Page 14 highlights
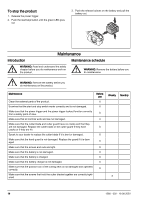
To stop the product 1. Release the power trigger. 2. Push the start/stop button until the green LED goes out. 3. Push the release buttons on the battery and pull the battery out. Maintenance Introduction Maintenance schedule WARNING: Read and understand the safety chapter before you do maintenance work on the product. WARNING: Remove the battery before you do maintenance. WARNING: Remove the battery before you do maintenance on the product. Maintenance Clean the external parts of the product. Examine that the start and stop switch works correctly and is not damaged. Make sure that the power trigger and the power trigger lockout function correctly from a safety point of view. Make sure that all controls work and are not damaged. Make sure that the cutter blade and cutter guard have no cracks and that they are not damaged. Replace the cutter blade or the cutter guard if they have cracks or if they are hit. Speak to your dealer to replace the cutter blade if it is bent or damaged. Make sure that the hand guard is not damaged. Replace the guard if it is damaged. Make sure that the screws and nuts are tight. Make sure that the battery is not damaged. Make sure that the battery is charged. Make sure that the battery charger is not damaged. Make sure that the position lock of the cutting deck is not damaged and operates correctly. Make sure that the screws that hold the cutter blades together are correctly tightened. Before use X X X X X X X X X X X X Weekly Monthly X 14 1266 - 002 - 19.08.2020
-
 1
1 -
2
-
3
-
4
-
5
-
6
-
7
-
8
-
 9
9 -
 10
10 -
 11
11 -
 12
12 -
 13
13 -
 14
14 -
 15
15 -
 16
16 -
 17
17 -
 18
18 -
 19
19 -
20
-
21
-
22
-
23
-
24
-
25
-
26
-
27
-
28
-
29
-
30
-
31
-
32
-
33
-
34
-
35
-
36
-
37
-
38
-
39
-
40
-
41
-
42
-
43
-
44
-
45
-
46
-
47
-
48
-
49
-
50
-
51
-
52
-
53
-
54
-
55
-
56
 |
 |
