Husqvarna AUTOMOWER 220 AC Owners Manual - Page 57
Advanced 3-4, Check loop 3-4-1, Inside, Outside, No loop signal, Check loop, Drive past wire 3-4-2
 |
View all Husqvarna AUTOMOWER 220 AC manuals
Add to My Manuals
Save this manual to your list of manuals |
Page 57 highlights
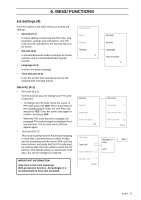
6. MENU FUNCTIONS Advanced (3-4) • Check loop (3-4-1) This function allows you to check the mower's signal reception from the boundary wire, and to determine exactly where in the lawn the boundary wire is routed. The sensor used for this function sits concealed directly under the catch button for the cutting height adjustment cover. The sensor detects the position of Automower in relation to the loop. Inside, Outside or No loop signal are shown on the display. If the mower is inside the loop, Inside is shown, etc. If the mower is set with sound on, a constant beep is also heard when the mower is outside and a pulsating beep when it cannot detect a signal. If the mower is inside the loop no beep is heard. To: • Check the signal reception: Move the cursor to Check loop and press YES. • Find wire: Move Automower over the outer edge of the working area and select Check loop. Repeat until you find the boundary between Inside and Outside. You now know where the wire is. • Drive past wire (3-4-2) The front of Automower always passes the boundary wire by a specific distance before the mower turns. The default distance is 27 cm (11"), but this can be changed if required. The minimum value is 15 cm (6") and the maximum value is 50 cm (20"). To adjust the distance: Move the cursor to Drive past wire and press YES. Now specify the number of centimeters you want Automower to pass the boundary wire. Exit angles Follow loop Garden shape Advanced 3-4 Exit angles Follow loop Garden shape Advanced 3-4 Check loop Drive past wire 3-4-1 Check loop Drive past wire 3-4-2 58 - English
-
 1
1 -
2
-
3
-
4
-
5
-
6
-
7
-
8
-
9
-
10
-
11
-
12
-
13
-
14
-
15
-
16
-
17
-
18
-
19
-
20
-
21
-
22
-
23
-
24
-
25
-
26
-
27
-
28
-
29
-
30
-
31
-
32
-
33
-
34
-
35
-
36
-
37
-
38
-
39
-
40
-
41
-
42
-
43
-
44
-
45
-
46
-
47
-
48
-
49
-
50
-
51
-
 52
52 -
 53
53 -
 54
54 -
 55
55 -
 56
56 -
 57
57 -
 58
58 -
 59
59 -
 60
60 -
 61
61 -
 62
62 -
63
-
64
-
65
-
66
-
67
-
68
-
69
-
70
-
71
-
72
-
73
-
74
-
75
-
76
-
77
-
78
-
79
-
80
-
81
-
82
 |
 |
