IBM 3580-H23 Setup Guide - Page 5

Contents, Appendix B. Performing Diagnostic

Page 5 highlights

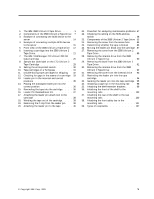
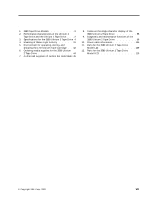
Contents Figures v Tables vii Safety and Environmental Notices . . . ix Danger Notice ix Caution Notice ix Attention Notice xi Performing the Safety Inspection Procedure . . . . xi End of Life (EOL) Plan xi Preface xiii Related Publications xiv Chapter 1. Introduction 1 Drive Performance 2 Supported Servers and Operating Systems . . . . 3 Supported Device Drivers 3 TapeAlert Support 4 Specifications 4 Chapter 2. Installing the 3580 Ultrium 2 Tape Drive 5 Step 1. Unpacking the Tape Drive 5 Step 2. Using the Inventory Checklist 6 Step 3. Installing the Rackmount Kit 6 Step 4. Inspecting the Power Cord and Outlet . . . 6 Step 5. Setting the SCSI ID 8 Step 6. Positioning the Tape Drive 8 Step 7. Connecting Power 9 Step 8. Running the Fast Read/Write Test . . . . 9 Step 9. Installing the SCSI Host Adapter Card (if required 12 Step 10. Installing Device Drivers 12 Step 11. Connecting the SCSI Bus Cable . . . . . 13 Step 12. Configuring the 3580 Ultrium 2 Tape Drive to the Server 15 Chapter 3. Operating the 3580 Ultrium 2 Tape Drive 17 Power Switch 17 Unload Button 18 Status Light 19 Message Display 20 Single-Character Display 20 Inserting a Tape Cartridge 20 Removing a Tape Cartridge 21 Performing Diagnostic and Maintenance Functions 22 Updating the Drive Firmware 22 Cleaning the Drive Head 22 Cleaning the 3580 Ultrium 2 Tape Drive . . . . . 23 Chapter 4. Using Ultrium Media . . . . 25 © Copyright IBM Corp. 2003 Data Cartridge 26 Cleaning Cartridge 27 Bar Code Label 28 Guidelines for Using Bar Code Labels . . . . 29 Setting the Write-Protect Switch 30 Handling the Cartridges 30 Provide Training 30 Ensure Proper Packaging 31 Provide Proper Acclimation and Environmental Conditions 32 Perform a Thorough Inspection 32 Handle the Cartridge Carefully 33 Examples of Cartridge Problems 34 Repositioning or Reattaching a Leader Pin . . . . 35 Repositioning a Leader Pin 35 Reattaching a Leader Pin 37 Environmental and Shipping Specifications for Tape Cartridges 42 Disposing of Tape Cartridges 43 Ordering Media Supplies 43 Ordering Bar Code Labels 45 Chapter 5. Troubleshooting 47 Procedure 1 48 Procedure 2 49 Procedure 3 49 Procedure 4 50 Pre-Call Checklist 50 Replacing the Tape Drive 52 Appendix A. Codes on the Single-Character Display 55 Appendix B. Performing Diagnostic and Maintenance Functions 59 Placing the Tape Drive in Maintenance Mode . . . 61 Performing a Diagnostic or Maintenance Function 62 Function Code 1: Run Tape Drive Diagnostics . . 62 Function Code 2: Update Tape Drive Firmware from FMR Tape 64 Function Code 3: Create FMR Tape . . . . . 65 Function Code 4: Force a Drive Dump . . . . 67 Function Code 5: Copy the Drive Dump to Tape (at Beginning of Tape 68 Function Code 6: Run SCSI Wrap Test . . . . 69 Function Code 7: Run RS-422 Wrap Test . . . . 72 Function Code 8: Unmake FMR Tape . . . . . 72 Function Code 9: Display Error Code Log . . . 73 Function Code A: Clear Error Code Log . . . . 74 Function Code C: Insert Cartridge into Tape Drive 75 Function Code E: Test Cartridge & Media . . . 75 Function Code F: Fast Read/Write Test . . . . 77 Function Code H: Test Head 79 Function Code P: Enable Post Error Reporting . . 81 iii

  • 1
  • 2
  • 3
  • 4
  • 5
  • 6
  • 7
  • 8
  • 9
  • 10
  • 11
  • 12
  • 13
  • 14
  • 15
  • 16
  • 17
  • 18
  • 19
  • 20
  • 21
  • 22
  • 23
  • 24
  • 25
  • 26
  • 27
  • 28
  • 29
  • 30
  • 31
  • 32
  • 33
  • 34
  • 35
  • 36
  • 37
  • 38
  • 39
  • 40
  • 41
  • 42
  • 43
  • 44
  • 45
  • 46
  • 47
  • 48
  • 49
  • 50
  • 51
  • 52
  • 53
  • 54
  • 55
  • 56
  • 57
  • 58
  • 59
  • 60
  • 61
  • 62
  • 63
  • 64
  • 65
  • 66
  • 67
  • 68
  • 69
  • 70
  • 71
  • 72
  • 73
  • 74
  • 75
  • 76
  • 77
  • 78
  • 79
  • 80
  • 81
  • 82
  • 83
  • 84
  • 85
  • 86
  • 87
  • 88
  • 89
  • 90
  • 91
  • 92
  • 93
  • 94
  • 95
  • 96
  • 97
  • 98
  • 99
  • 100
  • 101
  • 102
  • 103
  • 104
  • 105
  • 106
  • 107
  • 108
  • 109
  • 110
  • 111
  • 112
  • 113
  • 114
  • 115
  • 116
  • 117
  • 118
  • 119
  • 120
  • 121
  • 122
  • 123
  • 124
  • 125
  • 126
  • 127
  • 128
  • 129
  • 130
  • 131
  • 132
  • 133
  • 134
  • 135
  • 136
  • 137
  • 138
  • 139
  • 140
  • 141
  • 142
  • 143
  • 144
  • 145
  • 146
  • 147
  • 148
  • 149

Contents
Figures
.
.
.
.
.
.
.
.
.
.
.
.
.
.
.
v
Tables
.
.
.
.
.
.
.
.
.
.
.
.
.
.
.
vii
Safety and Environmental Notices .
.
. ix
Danger Notice
.
.
.
.
.
.
.
.
.
.
.
.
.
ix
Caution Notice
.
.
.
.
.
.
.
.
.
.
.
.
.
ix
Attention Notice
.
.
.
.
.
.
.
.
.
.
.
.
.
xi
Performing the Safety Inspection Procedure
.
.
.
.
xi
End of Life (EOL) Plan
.
.
.
.
.
.
.
.
.
.
.
xi
Preface
.
.
.
.
.
.
.
.
.
.
.
.
.
.
xiii
Related Publications
.
.
.
.
.
.
.
.
.
.
.
xiv
Chapter 1. Introduction
.
.
.
.
.
.
.
.
1
Drive Performance
.
.
.
.
.
.
.
.
.
.
.
.
2
Supported Servers and Operating Systems
.
.
.
.
3
Supported Device Drivers
.
.
.
.
.
.
.
.
.
.
3
TapeAlert Support
.
.
.
.
.
.
.
.
.
.
.
.
4
Specifications
.
.
.
.
.
.
.
.
.
.
.
.
.
.
4
Chapter 2. Installing the 3580 Ultrium 2
Tape Drive
.
.
.
.
.
.
.
.
.
.
.
.
.
.
5
Step 1. Unpacking the Tape Drive
.
.
.
.
.
.
.
5
Step 2. Using the Inventory Checklist
.
.
.
.
.
.
6
Step 3. Installing the Rackmount Kit
.
.
.
.
.
.
6
Step 4. Inspecting the Power Cord and Outlet
.
.
.6
Step 5. Setting the SCSI ID
.
.
.
.
.
.
.
.
.
.
8
Step 6. Positioning the Tape Drive
.
.
.
.
.
.
.
8
Step 7. Connecting Power
.
.
.
.
.
.
.
.
.
.
9
Step 8. Running the Fast Read/Write Test
.
.
.
.
9
Step 9. Installing the SCSI Host Adapter Card (if
required)
.
.
.
.
.
.
.
.
.
.
.
.
.
.
.
12
Step 10. Installing Device Drivers
.
.
.
.
.
.
.
12
Step 11. Connecting the SCSI Bus Cable
.
.
.
.
.
13
Step 12. Configuring the 3580 Ultrium 2 Tape Drive
to the Server
.
.
.
.
.
.
.
.
.
.
.
.
.
.
15
Chapter 3. Operating the 3580 Ultrium 2
Tape Drive
.
.
.
.
.
.
.
.
.
.
.
.
.
17
Power Switch
.
.
.
.
.
.
.
.
.
.
.
.
.
.
17
Unload Button
.
.
.
.
.
.
.
.
.
.
.
.
.
18
Status Light
.
.
.
.
.
.
.
.
.
.
.
.
.
.
19
Message Display
.
.
.
.
.
.
.
.
.
.
.
.
.
20
Single-Character Display
.
.
.
.
.
.
.
.
.
.
20
Inserting a Tape Cartridge
.
.
.
.
.
.
.
.
.
20
Removing a Tape Cartridge
.
.
.
.
.
.
.
.
.
21
Performing Diagnostic and Maintenance Functions
22
Updating the Drive Firmware
.
.
.
.
.
.
.
.
22
Cleaning the Drive Head
.
.
.
.
.
.
.
.
.
.
22
Cleaning the 3580 Ultrium 2 Tape Drive
.
.
.
.
.
23
Chapter 4. Using Ultrium Media
.
.
.
.
25
Data Cartridge
.
.
.
.
.
.
.
.
.
.
.
.
.
26
Cleaning Cartridge
.
.
.
.
.
.
.
.
.
.
.
.
27
Bar Code Label
.
.
.
.
.
.
.
.
.
.
.
.
.
28
Guidelines for Using Bar Code Labels
.
.
.
.
29
Setting the Write-Protect Switch
.
.
.
.
.
.
.
30
Handling the Cartridges
.
.
.
.
.
.
.
.
.
.
30
Provide Training
.
.
.
.
.
.
.
.
.
.
.
.
30
Ensure Proper Packaging
.
.
.
.
.
.
.
.
.
31
Provide Proper Acclimation and Environmental
Conditions
.
.
.
.
.
.
.
.
.
.
.
.
.
.
32
Perform a Thorough Inspection
.
.
.
.
.
.
.
32
Handle the Cartridge Carefully
.
.
.
.
.
.
.
33
Examples of Cartridge Problems
.
.
.
.
.
.
34
Repositioning or Reattaching a Leader Pin
.
.
.
.
35
Repositioning a Leader Pin
.
.
.
.
.
.
.
.
35
Reattaching a Leader Pin
.
.
.
.
.
.
.
.
.
37
Environmental and Shipping Specifications for Tape
Cartridges
.
.
.
.
.
.
.
.
.
.
.
.
.
.
.
42
Disposing of Tape Cartridges
.
.
.
.
.
.
.
.
43
Ordering Media Supplies
.
.
.
.
.
.
.
.
.
.
43
Ordering Bar Code Labels
.
.
.
.
.
.
.
.
45
Chapter 5. Troubleshooting
.
.
.
.
.
.
47
Procedure 1
.
.
.
.
.
.
.
.
.
.
.
.
.
.
48
Procedure 2
.
.
.
.
.
.
.
.
.
.
.
.
.
.
49
Procedure 3
.
.
.
.
.
.
.
.
.
.
.
.
.
.
49
Procedure 4
.
.
.
.
.
.
.
.
.
.
.
.
.
.
50
Pre-Call Checklist
.
.
.
.
.
.
.
.
.
.
.
.
50
Replacing the Tape Drive
.
.
.
.
.
.
.
.
.
.
52
Appendix A. Codes on the
Single-Character Display
.
.
.
.
.
.
.
55
Appendix B. Performing Diagnostic and
Maintenance Functions
.
.
.
.
.
.
.
59
Placing the Tape Drive in Maintenance Mode .
.
. 61
Performing a Diagnostic or Maintenance Function
62
Function Code 1: Run Tape Drive Diagnostics .
. 62
Function Code 2: Update Tape Drive Firmware
from FMR Tape
.
.
.
.
.
.
.
.
.
.
.
.
64
Function Code 3: Create FMR Tape
.
.
.
.
.
65
Function Code 4: Force a Drive Dump
.
.
.
.
67
Function Code 5: Copy the Drive Dump to Tape
(at Beginning of Tape)
.
.
.
.
.
.
.
.
.
.
68
Function Code 6: Run SCSI Wrap Test
.
.
.
.
69
Function Code 7: Run RS-422 Wrap Test
.
.
.
.
72
Function Code 8: Unmake FMR Tape
.
.
.
.
.
72
Function Code 9: Display Error Code Log
.
.
. 73
Function Code A: Clear Error Code Log
.
.
.
.
74
Function Code C: Insert Cartridge into Tape
Drive
.
.
.
.
.
.
.
.
.
.
.
.
.
.
.
75
Function Code E: Test Cartridge & Media
.
.
. 75
Function Code F: Fast Read/Write Test
.
.
.
.
77
Function Code H: Test Head
.
.
.
.
.
.
.
.
79
Function Code P: Enable Post Error Reporting .
. 81
© Copyright IBM Corp. 2003
iii