IBM 867282X Installation Guide - Page 19
Installing Options, Removing the cover, Working with adapters
 |
UPC - 087944650966
View all IBM 867282X manuals
Add to My Manuals
Save this manual to your list of manuals |
Page 19 highlights
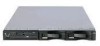
Chapter 2. Installing Options This chapter provides basic information that is needed to install hardware options in your server. For more detailed installation information, refer to the User's Reference on the IBM xSeries Documentation CD. Removing the cover Complete the following steps to remove the server cover: 1. Review the information in "Before you begin" on page 3. 2. Turn off the server and all attached devices and disconnect all external cables and power cords. Cover release lever Screws 3. Remove the two screws from the rear of the server. 4. Pull out on the cover-release lever at the back of the server to release the cover. 5. Slide the cover back, then up and off the server. Attention: For proper cooling and airflow, replace the cover before turning on the server. Operating the server for extended periods of time (over 30 minutes) with the cover removed might damage server components. Working with adapters Your server comes with two peripheral component interconnect (PCI) adapter slots on the system board with riser cards installed in them. Note: Some models come with a SCSI adapter card installed in PCI slot 2. Attention: Your server comes with an integrated video controller on the system board. When you install a video adapter in a PCI slot, the server BIOS automatically disables the integrated video controller. This enables the video adapter in the PCI slot to control the video functions for your monitor. The following illustration shows the location of the 33 MHz PCI expansion slots on the system board. Note: The illustrations in this document might differ slightly from your hardware. © Copyright IBM Corp. 2001 7
-
 1
1 -
2
-
3
-
4
-
5
-
6
-
7
-
8
-
9
-
10
-
11
-
12
-
13
-
 14
14 -
 15
15 -
 16
16 -
 17
17 -
 18
18 -
 19
19 -
 20
20 -
 21
21 -
 22
22 -
 23
23 -
 24
24 -
25
-
26
-
27
-
28
-
29
-
30
-
31
-
32
-
33
-
34
-
35
-
36
-
37
-
38
-
39
-
40
-
41
-
42
-
43
-
44
-
45
-
46
-
47
-
48
-
49
-
50
-
51
-
52
-
53
-
54
-
55
-
56
-
57
-
58
 |
 |
