InSinkErator Model Hot1 Owners Manual
InSinkErator Model Hot1 Manual
 |
View all InSinkErator Model Hot1 manuals
Add to My Manuals
Save this manual to your list of manuals |
InSinkErator Model Hot1 manual content summary:
- InSinkErator Model Hot1 | Owners Manual - Page 1
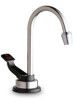
Model Hot1 Instant Hot Water Dispenser Owner's Manual Installation, Care & Use Instalacion, cuidado & uso Installation, soin et utilisation - InSinkErator Model Hot1 | Owners Manual - Page 2
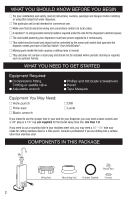
WHAT YOU SHOULD KNOW BEFORE YOU BEGIN I For your satisfaction and safety, read all instructions, cautions, warnings and dangers before installing or using this instant hot water dispenser. I This particular unit is not intended for commercial use. I Make sure that all electrical wiring and - InSinkErator Model Hot1 | Owners Manual - Page 3
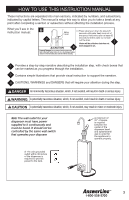
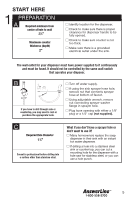
the instruction manual: B 2 Valve Lever Press valve lever down for about 20 seconds until water freely illustrations that provide visual instruction to support the narrative. 3 CAUTIONS injury. Note: The wall outlet for your dispenser must have power supplied to it continuously and must - InSinkErator Model Hot1 | Owners Manual - Page 4
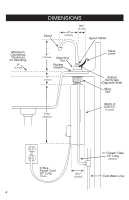
) Wing Nut 11¾8" (28.9cm) Width of Unit 5¼" (13.3cm) 3 Wire Power Cord 30" Long (76cm) 2¼9 16 " (6.5cm) ¼" Copper Tube 16" Long (40.6cm) Cold Water Line 4 - InSinkErator Model Hot1 | Owners Manual - Page 5
a surface other than stainless steel. What if you don't have a sprayer hole or don't want to use it? I Many homeowners replace the soap dispenser in their sink with an instant hot water dispenser. I If drilling a hole into a stainless steel sink or counter top, you can cut a mounting hole for the - InSinkErator Model Hot1 | Owners Manual - Page 6
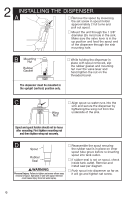
. The dispenser must be mounted in the upright (vertical) position only. C I Align spout so water runs into the sink and secure the dispenser by tightening spout. Operation of unit with spout removed could cause injury from hot water spray. I Reassemble the spout ensuring the rubber seal is in - InSinkErator Model Hot1 | Owners Manual - Page 7
attachment" included with the valve. I Connect the 16" (40.6 cm) long, 1/4" diameter copper tube on the dispenser to the saddle valve as shown (see step 4). I Open the valve and let a small amount of water run through it into a pan. This will flush the line of sediment. Attach the valve to a cold - InSinkErator Model Hot1 | Owners Manual - Page 8
A I Bend and position the 1/4" copper line from the dispenser so it fits into the cold water supply. With one hand, support the copper line coming out of the tank and bend the tube with the other hand. I Do not kink. Bend tube carefully. Property Damage: Make - InSinkErator Model Hot1 | Owners Manual - Page 9
. If you suspect the thermal fuse is open, contact your Authorized Service Center. I Check all connections to ensure they are tight and that there are no leaks, then plug in instant hot water tank. I Allow 10-15 minutes for water to reach target temperature. Gurgling or hissing is normal during the - InSinkErator Model Hot1 | Owners Manual - Page 10
the instant hot water dispenser is properly grounded. Personal Injury: This tank is a non-pressurized tank. DO NOT modify this system. DO NOT close vent tube or connect other type dispensers or valves to the tank. Use only the InSinkErator dispenser faucet supplied. Use only parts provided. Contact - InSinkErator Model Hot1 | Owners Manual - Page 11
of leakage. If there are signs of water damage, immediately remove the unit from service. I To avoid water damage from leakage, replace all cut, loose could cause property damage. SEASONAL STORAGE/DRAINAGE Anytime the instant hot water dispenser is not used for extended periods of time, unplug and - InSinkErator Model Hot1 | Owners Manual - Page 12
Troubleshooting Guide and/or visit www.insinkerator.com before calling AnswerLine™ TROUBLESHOOTING PROBLEM Water and steam spits forcefully from spout without turning on the dispenser that the outlet is not switched off. Water is too hot or not hot enough • Thermostat is not adjusted to your - InSinkErator Model Hot1 | Owners Manual - Page 13
Modelo Hot1 Dispensador de agua caliente instantánea Manual del usuario Instalacion, cuidado & uso Installation, Care & Use Installation, soin et utilisation - InSinkErator Model Hot1 | Owners Manual - Page 14
un fusible y no debe ser controlado por el mismo interruptor de pared que opera el surtidor, salvo que usted cuente con un SinkTop Switch™ de InSinkErator®. I Es normal que las piezas móviles dentro del tanque causen un ruido de golpeteo. I Esta unidad no contiene un tapón de desagüe y no deber - InSinkErator Model Hot1 | Owners Manual - Page 15
en cualquier momento después de concluir una sección o subsección sin afectar el proceso de instalación. Lo que usted verá en el manual de instrucciones: 2 1 3 1 Proporciona una narración paso a paso que describe el paso de instalación, con casillas de comprobación que pueden marcarse conforme - InSinkErator Model Hot1 | Owners Manual - Page 16
DIMENSIONES 16 - InSinkErator Model Hot1 | Owners Manual - Page 17
agua. I Si va a usar el orificio de la manguera del aspersor del fregadero, quite la tuerca que está conectada a la manguera del aspersor en la parte inferior del grifo. I Con una llave inglesa, quite la tuerca que conecta la brida de la arandela del aspersor en el orificio del aspersor. I Tape - InSinkErator Model Hot1 | Owners Manual - Page 18
el tubo surtidor de agua de modo que el agua corra hacia el fregadero y asegure el surtidor apretando la tuerca de mariposa desde la parte inferior del fregadero. El tubo surtidor y el porta-tubo correspondiente no deben quedar flojos después del montaje. Apriete primero la tuerca de montaje - InSinkErator Model Hot1 | Owners Manual - Page 19
3 OPCIONES DE CONEXIÓN DE AGUA Opción de válvula de compresión o conector en T (no incluido): I Si la línea de agua fría de su grifo ya tiene una válvula de cierre, se podría agregar un conector en T o una válvula de compresión para dar abasto al surtidor de agua caliente al instante. I Conecte el - InSinkErator Model Hot1 | Owners Manual - Page 20
4 CONEXIÓN DE AGUA AL SURTIDOR A I Doble y coloque la línea de cobre de 1/4" del surtidor de modo que se ajuste al suministro de agua fría. Con una mano, sostenga la línea de cobre que proviene del tanque y doble el tubo con la otra mano. Daño a la propiedad: Asegúrese que los dobleces en - InSinkErator Model Hot1 | Owners Manual - Page 21
5 LLENADO DEL TANQUE Y CONEXIÓN DE LA ENERGÍA A I En primer lugar, abra por completo la válvula de cierre y observe si sus conexiones son herméticas. Si hay alguna fuga, vuelva a apretar con sumo cuidado todas las conexiones. Daño a la propiedad: Nunca coloque una restricción en el - InSinkErator Model Hot1 | Owners Manual - Page 22
de instalación en su hogar. Si durante el periodo de garantía se requiere de su servicio, póngase en contacto con un agente de servicio InSinkErator autorizado para reemplazar o reparar la unidad en su hogar sin costo alguno para usted. Si su surtidor es reemplazado en lugar de ser reparado, la - InSinkErator Model Hot1 | Owners Manual - Page 23
CUIDADO Y USO Peligro de descarga eléctrica: Para prevenir una descarga eléctrica, desconecte la energía antes de dar servicio y mantenimiento a la unidad. Use sólo un tomacorriente correctamente conectado a tierra y polarizado. AJUSTE DEL TERMOSTATO La temperatura de fábrica preestablecida es 190 - InSinkErator Model Hot1 | Owners Manual - Page 24
Por favor, lea la Guía de Solución de Problemas y/o visite www.insinkerator.com antes de llamar a AnswerLine™ SOLUCIÓN DE PROBLEMAS PROBLEMA CAUSA POSIBLE Brota agua o vapor con • La unidad está en el punto fuerza del tubo surtidor - InSinkErator Model Hot1 | Owners Manual - Page 25
Modèle Hot1 Distributeur d'eau très chaude instantanée Manuel du propriétaire Installation, soin et utilisation Installation, Care & Use Instalacion, cuidado & uso - InSinkErator Model Hot1 | Owners Manual - Page 26
Pour votre satisfaction et votre sécurité, lisez toutes les instructions, mises en garde, avertissements et dangers avant d'installer ou mural que le broyeur de déchets, à moins que vous n'ayez un SinkTop Switch™ d'InSinkErator®. I Il est normal pour les pièces mobiles à l'intérieur du réservoir d'é - InSinkErator Model Hot1 | Owners Manual - Page 27
tape décrivant l'installation, avec des cases à cocher pour suivre votre progrès durant l'installation. 2 Contient de simples illustrations comme instructions visuelles à l'appui du narratif. 3 MISES EN GARDE, AVERTISSEMENTS et DANGERS qui exigeront votre attention durant l'étape. Une situation - InSinkErator Model Hot1 | Owners Manual - Page 28
DIMENSIONS 28 - InSinkErator Model Hot1 | Owners Manual - Page 29
COMMENCEZ ICI 1 PRÉPARATION A Minimum requis du centre du trou au mur 9,5 cm (33⁄4 po) Épaisseur maximale du comptoir (profondeur) 5,08 cm (2 po) I Identifiez l'emplacement du distributeur. I Vérifiez pour vous assurer d'avoir un dégagement approprié pour ouvrir complètement la poignée du - InSinkErator Model Hot1 | Owners Manual - Page 30
l'eau coule dans l'évier et fixez le distributeur en resserrant l'écrou à oreilles en passant sous l'évier. Le bec verseur et son support ne doivent pas être desserrés après le montage. Resserrez d'abord l'écrou de montage et resserrez ensuite l'écrou à oreilles. D Blessures personnelles : ne - InSinkErator Model Hot1 | Owners Manual - Page 31
3 OPTIONS DE RACCORD D'EAU Option à valve de compression ou raccord en T (non fournis) : I Si la conduite d'alimentation d'eau froide de votre robinet a déjà un robinet de sectionnement, vous pouvez ajouter un raccord en T ou une valve de compression pour l'alimentation du distributeur d'eau chaude - InSinkErator Model Hot1 | Owners Manual - Page 32
4 RACCORDER L'EAU AU DISTRIBUTEUR A I Pliez et placez la conduite de cuivre de 1/4 po du distributeur pour qu'elle s'ajuste dans l'alimentation d'eau froide. Supportez d'une main la conduite de cuivre sortant du réservoir et repliez le tube de l'autre main. Dommages à la propriété : - InSinkErator Model Hot1 | Owners Manual - Page 33
: ne retirez et ne modifiez pas le fusible thermique de sécurité. Si vous croyez que le fusible thermique est ouvert, contactez votre centre de service autorisé. I Vérifiez tous les raccords pour assurer leur étanchéité et qu'il n'y a pas de fuites, puis branchez le réservoir d'eau chaude instantan - InSinkErator Model Hot1 | Owners Manual - Page 34
la durée de la garantie à partir de la date d'installation dans votre maison. S'il faut un service sous garantie durant la période de garantie, contactez un agent de service autorisé InSinkErator pour remplacer ou réparer l'appareil dans votre foyer, sans frais pour vous. Si votre distributeur est - InSinkErator Model Hot1 | Owners Manual - Page 35
PROPRIÉTÉ I Inspectez régulièrement l'appareil pour tout signe de fuite. S'il y a des signes de dommages d'eau, retirez immédiatement tout appareil du service. I Pour éviter les dommages causés par l'eau de fuite, remplacez tous les tubes coupés, desserrés ou fendus. I Un bac de récupération, plomb - InSinkErator Model Hot1 | Owners Manual - Page 36
is a trademark and service mark of Emerson Electric Co. InSinkErator may make improvements and/or changes in the specifications at any time, in its sole discretion, without notice or obligation and further reserves the right to change or discontinue models. © 2008 InSinkErator, a division of Emerson
-
 1
1 -
 2
2 -
 3
3 -
 4
4 -
 5
5 -
 6
6 -
 7
7 -
8
-
9
-
10
-
11
-
12
-
13
-
14
-
15
-
16
-
17
-
18
-
19
-
20
-
21
-
22
-
23
-
24
-
25
-
26
-
27
-
28
-
29
-
30
-
31
-
32
-
33
-
34
-
35
-
36
 |
 |
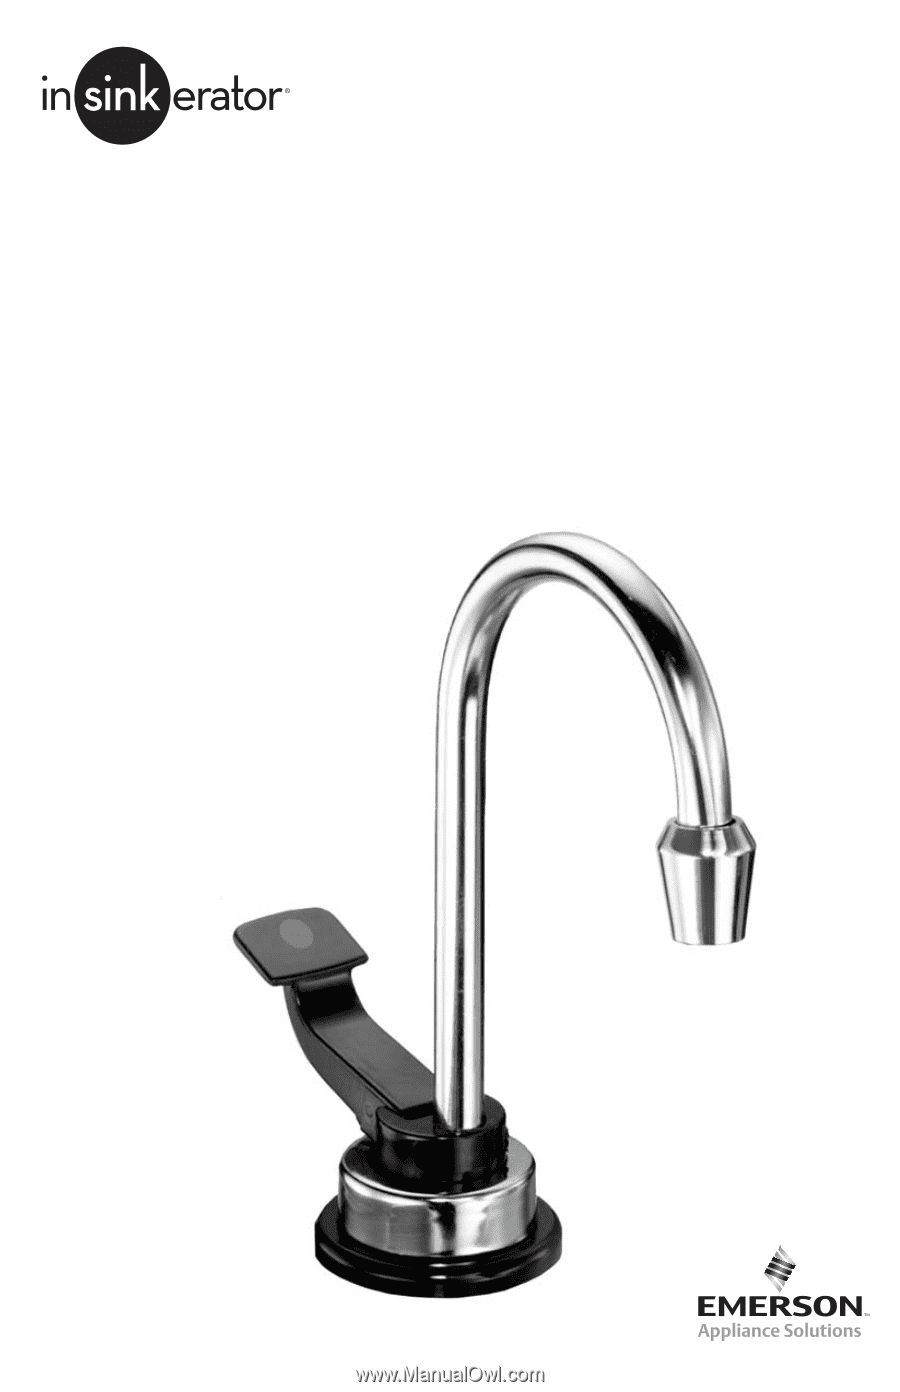
Instant Hot Water Dispenser
Owner’s Manual
Installation, Care & Use
Instalacion, cuidado & uso
Installation, soin et utilisation
Model Hot1