InSinkErator Model Hot1 Owners Manual - Page 7
Water Connection Options
 |
View all InSinkErator Model Hot1 manuals
Add to My Manuals
Save this manual to your list of manuals |
Page 7 highlights
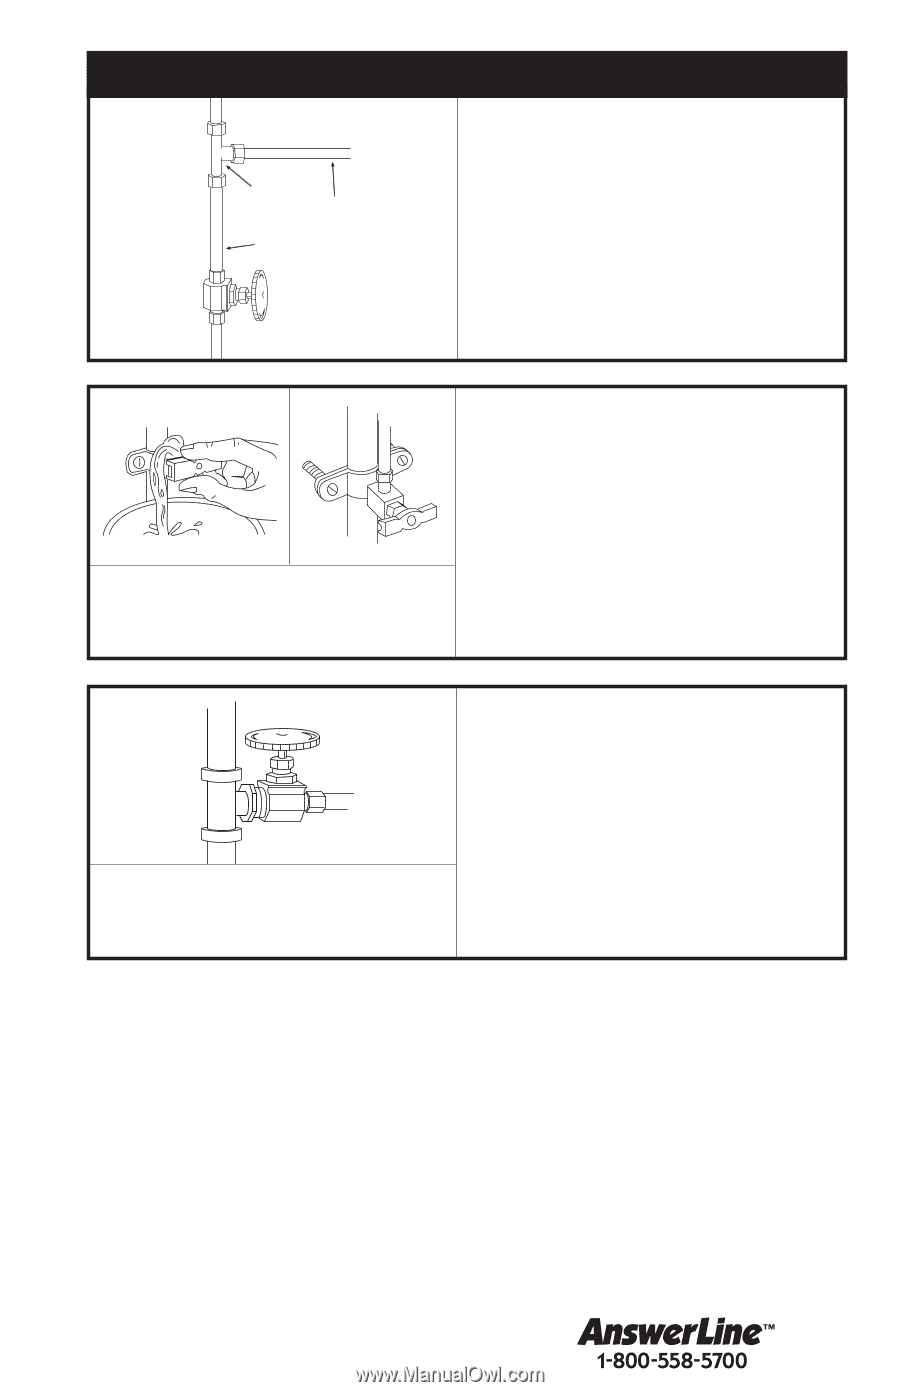
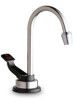
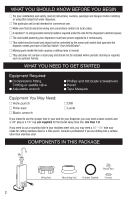
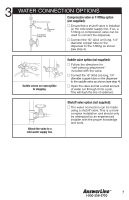
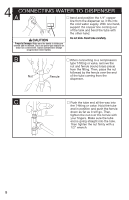
3 WATER CONNECTION OPTIONS T-fitting 1/4" Diameter Tube Cold Water Supply Line Compression valve or T-fitting option (not supplied): I Ensure that a shutoff valve is installed on the cold water supply line. If so, a T-fitting or compression valve can be used to connect the dispenser. I Connect the 16" (40.6 cm) long, 1/4" diameter copper tube on the dispenser to the T-fitting as shown (see step 4). Saddle valves are susceptible to clogging. Saddle valve option (not supplied): I Follow the directions for "self-piercing attachment" included with the valve. I Connect the 16" (40.6 cm) long, 1/4" diameter copper tube on the dispenser to the saddle valve as shown (see step 4). I Open the valve and let a small amount of water run through it into a pan. This will flush the line of sediment. Attach the valve to a cold water supply line. Shutoff valve option (not supplied): I The water connection can be made using a shutoff valve. This is a more complex installation and should only be attempted by an experienced installer with the proper knowledge and tools. 7
-
 1
1 -
 2
2 -
 3
3 -
 4
4 -
 5
5 -
 6
6 -
 7
7 -
 8
8 -
 9
9 -
 10
10 -
 11
11 -
 12
12 -
13
-
14
-
15
-
16
-
17
-
18
-
19
-
20
-
21
-
22
-
23
-
24
-
25
-
26
-
27
-
28
-
29
-
30
-
31
-
32
-
33
-
34
-
35
-
36
 |
 |