InSinkErator Model Hot1 Owners Manual - Page 6
Installing The Dispenser
 |
View all InSinkErator Model Hot1 manuals
Add to My Manuals
Save this manual to your list of manuals |
Page 6 highlights
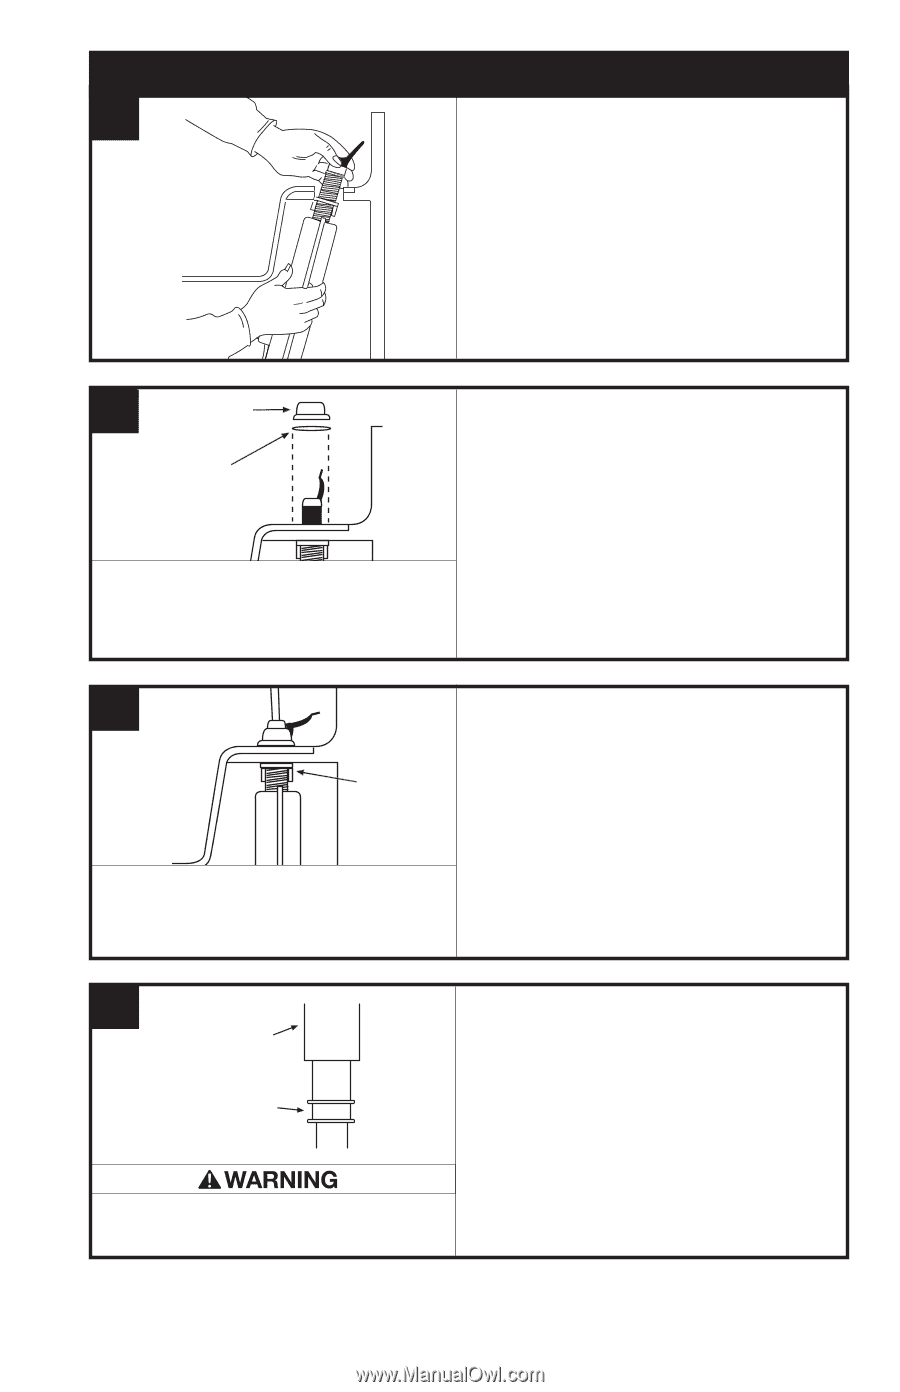
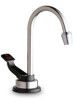
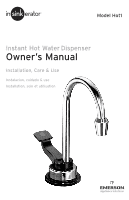
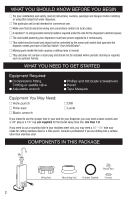
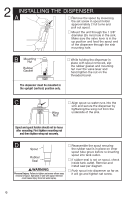
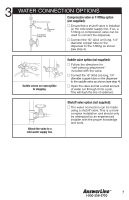
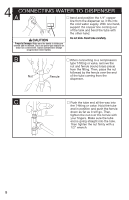
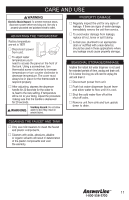
2 INSTALLING THE DISPENSER A I Remove the spout by loosening the set screw in spout holder approximately 2 full turns and pull out spout. I Mount the unit through the 1 3/8" diameter (35 mm) hole in the sink. Make sure the valve lever is in the up position and feed the spout end of the dispenser through the sink mounting hole. B Mounting Nut Rubber Gasket I While holding the dispenser in place with spout removed, slip the rubber gasket and mounting nut over the valve lever and hand tighten the nut on the threaded barrel. The dispenser must be mounted in the upright (vertical) position only. C I Align spout so water runs into the sink and secure the dispenser by tightening the wing nut from the Wing underside of the sink. Nut Spout and spout holder should not be loose after mounting. First tighten mounting nut and then tighten wing nut securely. D Spout Rubber Seal Personal Injury: Failure to tighten set screw allows easy removal of spout. Operation of unit with spout removed could cause injury from hot water spray. I Reassemble the spout ensuring the rubber seal is in place on inner spout tube grove before re-inserting spout into tank outlet. I If rubber seal is not on spout, check inside tank outlet. Remove and install seal per diagram. I Push spout into dispenser as far as it will go and tighten set screw. 6
-
 1
1 -
 2
2 -
 3
3 -
 4
4 -
 5
5 -
 6
6 -
 7
7 -
 8
8 -
 9
9 -
 10
10 -
 11
11 -
 12
12 -
13
-
14
-
15
-
16
-
17
-
18
-
19
-
20
-
21
-
22
-
23
-
24
-
25
-
26
-
27
-
28
-
29
-
30
-
31
-
32
-
33
-
34
-
35
-
36
 |
 |