Kenwood NX-320 Operation Manual
Kenwood NX-320 Manual
 |
View all Kenwood NX-320 manuals
Add to My Manuals
Save this manual to your list of manuals |
Kenwood NX-320 manual content summary:
- Kenwood NX-320 | Operation Manual - Page 1
NX-220 NX-320 NX-420 INSTRUCTION MANUAL MODE D'EMPLOI MANUAL DE INSTRUCCIONES B62-2470-10 (K) - Kenwood NX-320 | Operation Manual - Page 2
- Kenwood NX-320 | Operation Manual - Page 3
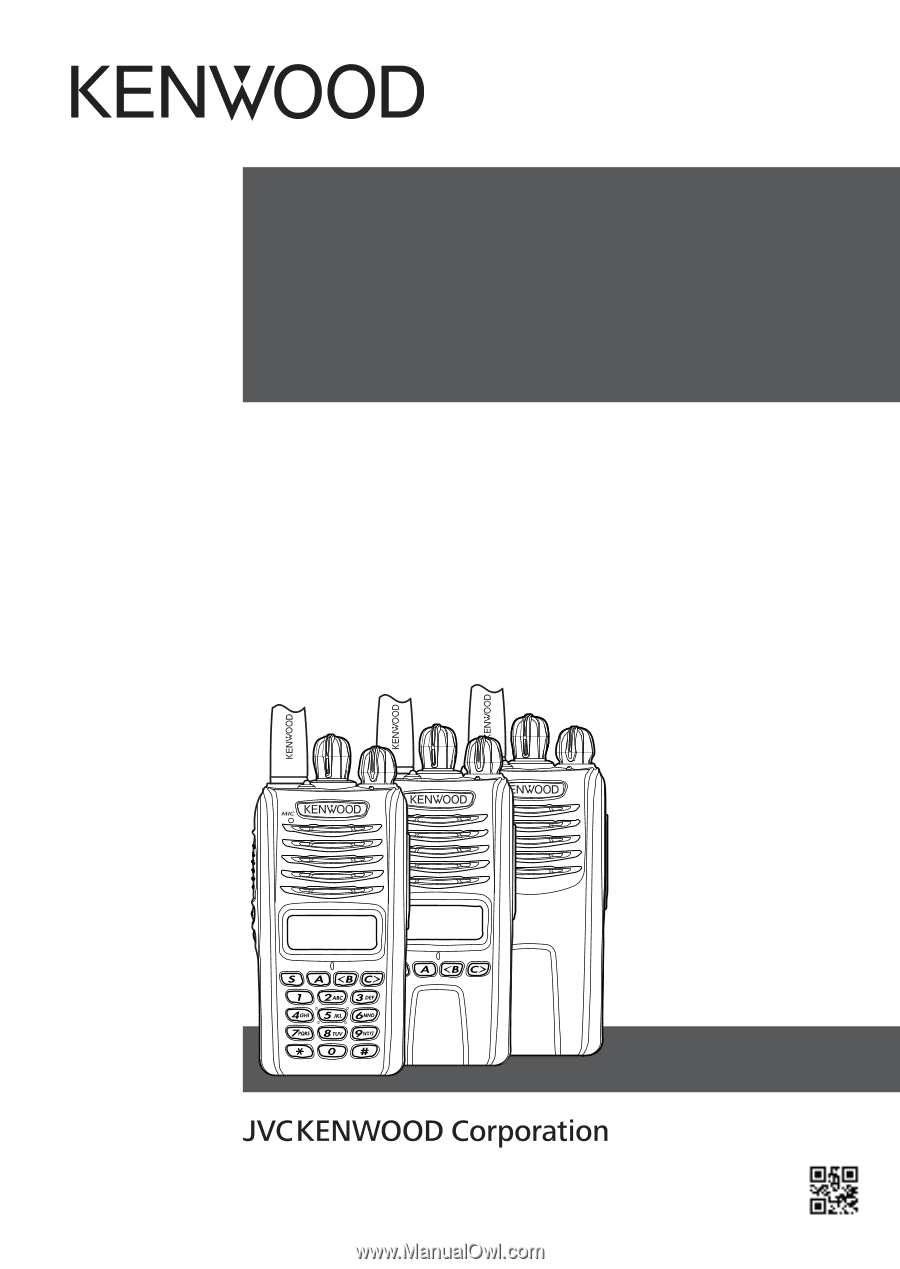
VHF DIGITAL TRANSCEIVER NX-220 UHF DIGITAL TRANSCEIVER NX-320 800MHz DIGITAL TRANSCEIVER NX-420 Instruction Manual The AMBE+2TM voice coding Technology embodied in this product is protected by intellectual property rights including patent rights, copyrights and trade secrets of Digital - Kenwood NX-320 | Operation Manual - Page 4
We are grateful you have chosen KENWOOD for your land mobile radio applications. This instruction manual covers only the basic operations of your NEXEDGE portable radio. Ask your dealer for information on any customized features they may have added to your radio. NOTICES TO THE USER ◆ Government law - Kenwood NX-320 | Operation Manual - Page 5
is illegal in some areas. For information on Li-ion battery recycling in your area, call (toll free) 1-800-8-BATTERY (1-800-822-8837). KENWOOD's involvement in this program is part of our commitment to preserve our environment and conserve our natural resources. ATTENTION: The RBRC Recycle seal - Kenwood NX-320 | Operation Manual - Page 6
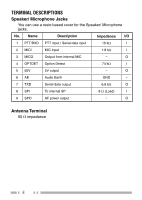
TERMINAL DESCRIPTIONS Speaker/ Microphone Jacks You can use a resin-based cover for the Speaker/ Microphone jacks. No. Name Description Impedance I/O 1 PTT/RXD PTT input / Serial data input 10 k I 2 MICI 3 MICO MIC input Output from internal MIC 1.8 k I − O 4 OPTDET Option Detect 5 - Kenwood NX-320 | Operation Manual - Page 7
may be applicable: FCC WARNING This equipment generates or uses radio frequency energy. Changes or modifications to this equipment may cause harmful interference unless the modifications are expressly approved in the instruction manual. The user could lose the authority to operate this equipment - Kenwood NX-320 | Operation Manual - Page 8
specified by KENWOOD. • If the accessories. service stations. • Near explosives or blasting sites. • In aircrafts. (Any use of the transceiver must follow the instructions and regulations provided by the airline crew.) • Where restrictions or warnings are posted regarding the use of radio - Kenwood NX-320 | Operation Manual - Page 9
, remove the battery pack from the transceiver, and contact your KENWOOD dealer. • Use of the transceiver while you are driving may to build up an electric charge (static electricity). When using an earphone accessory in such conditions, it is possible for the transceiver to send an electric - Kenwood NX-320 | Operation Manual - Page 10
Information concerning the battery pack: The battery pack includes flammable objects such as organic solvent. Mishandling may cause the battery to rupture producing flames or extreme heat, deteriorate, or cause other forms of damage to the battery. Please observe the following prohibitive matters. • - Kenwood NX-320 | Operation Manual - Page 11
• Do not charge the battery near fires or under direct sunlight! If the battery's protection circuit is damaged, the battery may charge at extreme current (or voltage) and an abnormal chemical reaction may occur. The battery may generate heat or smoke, rupture, or burst into flame. • Use only the - Kenwood NX-320 | Operation Manual - Page 12
eyes out with fresh water as soon as possible, without rubbing your eyes. Go to the hospital immediately. If left untreated, it may cause eye-problems. • Do not charge the battery for longer than the specified time! If the battery pack has not finished charging even after the regulated time - Kenwood NX-320 | Operation Manual - Page 13
EQUIPMENT Note: These unpacking instructions are for use by your KENWOOD dealer, an authorized KENWOOD service facility, or the factory. Carefully unpack the transceiver. If any items are missing or damaged, file a claim with the carrier immediately. SUPPLIED ACCESSORIES Antenna (NX-420 only 1 Belt - Kenwood NX-320 | Operation Manual - Page 14
/ REMOVING THE (OPTIONAL) BATTERY PACK 1 Match the guides of the battery pack with the grooves on the upper transceiver. Note: ◆ For battery pack charging procedures and useag, refer to the battery charger Instruction Manual. ◆ The battery pack is not charged at the factory; charge it before use. ◆ - Kenwood NX-320 | Operation Manual - Page 15
Note: ◆ If you do not plan to use the transceiver for a long period, remove the batteries from the battery case. ◆ This battery case has been designed for transmitting at a power of approximately 1 W (the low power setting on your transceiver). If you want to transmit a stronger signal (using the - Kenwood NX-320 | Operation Manual - Page 16
INSTALLING THE BELT CLIP Note: When first installing the belt clip, you must remove the battery pack from the rear of the transceiver. 1 Remove the 2 screws from the rear of the transceiver, then remove the small, plastic black covering that was held in place. 2 Insert the belt clip mount into the - Kenwood NX-320 | Operation Manual - Page 17
2 While holding the cap in place, push it towards the bottom of the transceiver until the tabs on the cap click into place. • To remove the cap, hold the top of the cap in place with your finger while inserting a 3 mm or smaller flat blade screwdriver under the bottom of the cap. Slowly slide the - Kenwood NX-320 | Operation Manual - Page 18
ORIENTATION There are 3 types of transceivers available: Type I: Equipped with a display and full keypad. Type II : Equipped with a display and 4-key keypad (S, A, ). Type III: Basic model. Type I Antenna Microphone Type II Speaker Antenna Microphone Battery pack - Kenwood NX-320 | Operation Manual - Page 19
Type III Antenna Microphone Battery pack Speaker Transmit/ Receive/ Battery low indicator If enabled by your dealer, lights red while transmitting, green while receiving a call (Conventional channels only), and orange when receiving an optional signaling call. Blinks red when the battery power is - Kenwood NX-320 | Operation Manual - Page 20
Side 2 key Press to activate its programmable function {page 10}. Types I and II: The default setting is [Backlight]. Type III: The default setting is [None] (no function). S, A, keys (Types I and II only) Press to activate their programmable functions {page 10}. S key: The default setting is - Kenwood NX-320 | Operation Manual - Page 21
DISPLAY (TYPES I AND II ONLY) Indicator Description Signal strength indicator {page 28}. Monitor or Squelch Off is activated. Blinks when an incoming call matches your Optional Signaling. Talk Around is activated. Scan is in progress. Blinks while scan is paused. A message is stored in memory. - Kenwood NX-320 | Operation Manual - Page 22
PROGRAMMABLE AUXILIARY FUNCTIONS The Selector, Auxiliary (orange), Side 1, Side 2, S, A, keys, as well as the Keypad, can be programmed with the functions listed below. Please contact your dealer for further details on these functions. • None • 2-tone 1, 10, 13 • Activity Detection • - Kenwood NX-320 | Operation Manual - Page 23
operation. 11 Available only for Analog Conventional and NXDN Conventional operation. 12 Available only for Analog Conventional and Analog Trunking operation. 13 Available only for NX-220/ NX-320. 11 - Kenwood NX-320 | Operation Manual - Page 24
BASIC OPERATIONS SWITCHING POWER ON/OFF Turn the Power switch/ Volume control clockwise to switch the transceiver ON. Turn the Power switch/ Volume control counterclockwise fully to switch the transceiver OFF. ■ Transceiver Password (Types I and II Only) If your transceiver is password protected, - Kenwood NX-320 | Operation Manual - Page 25
TRANSMITTING 1 Select the desired zone and channel/group ID. 2 Press the key programmed as [Monitor] or [Squelch Off] to check whether or not the channel is free. • If the channel is busy, wait until it becomes free. 3 Press the PTT switch and speak into the microphone. Release the PTT switch to - Kenwood NX-320 | Operation Manual - Page 26
RECEIVING Select the desired zone and channel. If signaling has been programmed on the selected channel, you will hear a call only if the received signal matches your transceiver settings. Note: Signaling allows your transceiver to code your calls. This will prevent you from listening to unwanted - Kenwood NX-320 | Operation Manual - Page 27
SCAN Scan monitors for signals on the transceiver channels. While scanning, the transceiver checks for a signal on each channel and only stops if a signal is present. To begin scanning, press the key programmed as [Scan]. • The indicator appears (types I and II only). • The LED blinks green (type - Kenwood NX-320 | Operation Manual - Page 28
SCAN REVERT The Scan Revert channel is the channel selected when you press the PTT switch to transmit during scan. Your dealer can program one of the following types of Scan Revert channels: • Selected: The last channel selected before scan. • Selected + Talkback: Same as "Selected", plus you can - Kenwood NX-320 | Operation Manual - Page 29
2-way Paging Function, and is a protocol owned by JVC KENWOOD Corporation. Note: This function is available only in analog operation. Press the key to select the station you want to call. • If Manual Dialing is enabled, you can directly enter the station ID (type I only). 4 Press - Kenwood NX-320 | Operation Manual - Page 30
to step 5) or [Selcall + Status] to enter Selcall mode (proceed to step 3). 3 Press the key to select the station you want to call. • If Manual Dialing is enabled, you can enter a station ID by using the DTMF keypad, or by using the Selector. When using the Selector, cycle through the - Kenwood NX-320 | Operation Manual - Page 31
stack memory of your transceiver. GPS REPORT To send your location data, you must first connect a GPS unit to the transceiver. GPS data can be manually transmitted by pressing the key programmed as [Send the GPS data]. If set up by your dealer, GPS data may be automatically transmitted at a preset - Kenwood NX-320 | Operation Manual - Page 32
switch for approximately 1 second to ensure a connection. • Confirm that there is a dial tone after you release the PTT switch. 3 Place the call, following the instructions for making a DTMF call, starting on page 22. 20 - Kenwood NX-320 | Operation Manual - Page 33
4 When the called party responds, press the PTT switch and speak into the microphone. Release the PTT switch to receive. • Only one person can speak at a time. 5 To end the call, press and hold the PTT switch, then press the # key or the key programmed as [Telephone Disconnect]. RECEIVING A - Kenwood NX-320 | Operation Manual - Page 34
ADVANCED OPERATIONS DTMF (DUAL TONE MULTI FREQUENCY) CALLS ■ Making a DTMF Call (Types I and II Only) Manual Dialing (Type I Only) 1 Press and hold the PTT switch. 2 Enter the desired digits using the DTMF keypad. • If you release the PTT switch, transmit mode - Kenwood NX-320 | Operation Manual - Page 35
■ Stun Code This function is used when a transceiver is stolen or lost. When the transceiver receives a call containing a stun code, the transceiver becomes disabled. The stun code is cancelled when the transceiver receives a call with a revive code. EMERGENCY CALLS If your transceiver has been - Kenwood NX-320 | Operation Manual - Page 36
Note: ◆ When Activity Detection has been turned off, and the transceiver power is then turned off and back on, Activity Detection is automatically enabled. ◆ When using this function, verify that it operates before taking the transceiver. ■ Activity Reset While Activity Detection is active, press - Kenwood NX-320 | Operation Manual - Page 37
] key again to turn the OST function OFF. ■ Radio Access Number (RAN) RAN is a signaling system designed for digital radio communications. When a channel is set up with a RAN a call containing matching 2 tones (available only for NX-220/ NX-320). DTMF Signaling: DTMF Signaling opens the squelch only - Kenwood NX-320 | Operation Manual - Page 38
■ VOX Gain Level (Types I and II Only) 1 Connect the headset to the transceiver. 2 Press the key programmed as [VOX]. • The current VOX Gain level appears on the display. 3 Press the key to increase or decrease the VOX Gain level. • The VOX Gain can be adjusted from levels 1 to 10. 4 While - Kenwood NX-320 | Operation Manual - Page 39
BACKGROUND OPERATIONS Your dealer can activate a variety of transceiver functions to perform without any additional operation on your part. TIME-OUT TIMER (TOT) The Time-out Timer prevents you from using a channel for an extended duration. If you continuously transmit for a preset time, the - Kenwood NX-320 | Operation Manual - Page 40
■ Battery Indicator (Type III Only) Press the key programmed as [Battery Indicator]. The LED lights for 2 seconds, displaying the battery power remaining, as described in the table below. When the battery power is very low, recharge or replace the battery pack. Lights Green Lights Orange Lights - Kenwood NX-320 | Operation Manual - Page 41
CONTROL CHANNEL HUNT On digital Trunking channels, the transceiver automatically searches for a control channel. • While searching for a control channel, the antenna icon will flash (types I and II only) and no signals can be received. PTT ID PTT ID is the transceiver unique ID code which is sent - Kenwood NX-320 | Operation Manual - Page 42
- Kenwood NX-320 | Operation Manual - Page 43
ÉMETTEUR-RÉCEPTEUR NUMÉRIQUE VHF NX-220 ÉMETTEUR-RÉCEPTEUR NUMÉRIQUE UHF NX-320 ÉMETTEUR-RÉCEPTEUR NUMÉRIQUE 800MHz NX-420 MODE D'EMPLOI La technologie de codage de la voix AMBE +2™ intégrée dans ce produit est protégée par des droits sur la propriété intellectuelle y - Kenwood NX-320 | Operation Manual - Page 44
MERCI Nous sommes heureux que vous ayez choisi KENWOOD pour vos applications de radio mobiles terrestres. Ce mode d'emploi ne reprend que le fonctionnement de base de votre radio portable NEXEDGE. Renseignez-vous auprès de votre revendeur pour de plus amples informations relatives aux fonctions - Kenwood NX-320 | Operation Manual - Page 45
DESCRIPTION DES BORNES Prises du microphone à haut-parleur Vous pouvez utiliser un cache à base de résine pour les prises du microphone à haut-parleur. N° Nom 1 PTT/RXD Description Entrée PTT / Entrée des données série Impédance E/S 10 k E 2 MICI Entrée MIC 1,8 k E 3 MICO Sortie de - Kenwood NX-320 | Operation Manual - Page 46
emetteurrecepteur et le bloc-piles. • N'utilisez pas d'options non specifiees par KENWOOD. • Si le chassis moule sous pression ou une autre piece de avion (toute utilisation de l'émetteur-récepteur doit se faire conformément aux instructions et règlements indiqués par l'équipage de l'avion), • Là où - Kenwood NX-320 | Operation Manual - Page 47
par l'émetteur-récepteur, mettez immédiatement l'émetteur-récepteur hors tension, retirez le bloc-piles de l'émetteur-récepteur et contactez votre revendeur KENWOOD. • Il est possible que l'utilisation de l'émetteur-récepteur pendant la conduite d'un véhicule soit contraire aux règles de circulation - Kenwood NX-320 | Operation Manual - Page 48
Informations concernant le bloc-piles : Le bloc-piles contient des produits inflammables comme par exemple un solvant organique. Une mauvaise manipulation de la pile peut la fissurer et entraîner des flammes ou une chaleur extrême, ou encore la détériorer et y provoquer d'autres formes de dégâts. - Kenwood NX-320 | Operation Manual - Page 49
• Ne chargez pas la pile proximité de feux ou sous les rayons direct du soleil! Si le circuit de protection de la pile est endommagé, le courant (ou la tension) de charge pourrait être anormalement élevé et une réaction chimique inadéquate risquerait de se produire. La pile risque de générer de la - Kenwood NX-320 | Operation Manual - Page 50
• N'inversez pas la charge ou la connexion de la pile! Le bloc-piles dispose de pôles positifs et négatifs. Si le bloc-piles ne se raccorde pas facilement à un chargeur ou un équipement utilisé, ne forcez pas; vérifiez la polarité du bloc-piles. Si la connexion du bloc-piles au chargeur est invers - Kenwood NX-320 | Operation Manual - Page 51
22 OPÉRATIONS EN ARRIÈRE-PLAN 27 DÉBALLAGE ET VÉRIFICATION DE L'ÉQUIPEMENT Remarque: Ces instructions de déballage s'adressent à votre revendeur KENWOOD, à un établissement de service agréé par KENWOOD ou à l'usine. Déballez soigneusement l'émetteur-récepteur. S'il manque un des éléments ou si un - Kenwood NX-320 | Operation Manual - Page 52
PRÉPARATION POSE/ DÉPOSE DU BLOC-PILES (EN OPTION) 1 Faites correspondre les guides du bloc-piles avec les rainures à l'arrière en haut de l'émetteur récepteur, puis appuyez fermement sur le bloc-piles pour le mettre en place. 2 - Kenwood NX-320 | Operation Manual - Page 53
Remarques: ◆ Si vous prévoyez de ne pas utiliser l'émetteur-récepteur pendant une longue période, enlevez les piles du boîtier piles. ◆ Ce boîtier piles a été conçu pour transmettre à une puissance d'environ 1 W (le réglage d'alimentation faible sur votre émetteur-récepteur). Si vous souhaitez - Kenwood NX-320 | Operation Manual - Page 54
INSTALLATION DU CROCHET DE CEINTURE Remarque: Lors de l'installation du crochet de ceinture pour la première fois, vous devez retirer le bloc-piles de l'arrière de l'émetteur-récepteur. 1 Retirez les 2 vis de l'arrière de l'émetteur-récepteur, puis, retirez le petit couvercle en plastique noir qui - Kenwood NX-320 | Operation Manual - Page 55
2 Tout en maintenant le cache en place, poussezle vers la base de l'émetteur-récepteur jusqu'à ce que les languettes sur le cache s'emboîtent. • Pour enlever le cache, maintenez le dessus du cache en place en vous aidant de votre doigt tout en insérant un tournevis à tête plate de 3 mm maximum sous - Kenwood NX-320 | Operation Manual - Page 56
ORIENTATION 3 types d'émetteurs-récepteurs sont disponibles : Type I : Équipé d'un afficheur et d'un clavier complet. Type II : Équipé d'un afficheur et d'un clavier 4 touches (S, A, ) . Type III : Modèle de base. Type I Antenne Microphone Type II Haut-parleur - Kenwood NX-320 | Operation Manual - Page 57
Type III Antenne Microphone Bloc-piles, Batterie Haut-parleur Indicateur de transmission/ réception/ batterie faible S'il est activé par votre revendeur, il s'allume en rouge pendant la transmission, en vert pendant la réception d'un appel (canaux classiques uniquement) et en orange lors de la ré - Kenwood NX-320 | Operation Manual - Page 58
Touche Latérale 2 Appuyez sur cette touche pour activer sa fonction programmable {page 10}. Types I et II : le réglage par défaut est [Rétroéclairage]. Type III : le réglage par défaut est [Aucune] (pas de fonction). Touches S, A, (Types I et II uniquement) Appuyez sur ces touches pour - Kenwood NX-320 | Operation Manual - Page 59
AFFICHEUR (TYPES I ET II UNIQUEMENT) Indicateur Description Indicateur de force(puissance) de signal {page 28}. La fonction Surveillance ou Silencieux désactivé est activée. Clignote lorsqu'un appel entrant correspond à votre signalisation en option. La fonction Talk Around est activée. Le - Kenwood NX-320 | Operation Manual - Page 60
FONCTIONS AUXILIAIRES PROGRAMMABLES Les touches Sélecteur, Auxiliaire (orange), Latérale 1, Latérale 2, S, A, et le Clavier peuvent être programmées avec les fonctions énumérées ci-dessous. Veuillez contacter votre revendeur pour de plus amples informations sur ces fonctions. • Aucune • 2 - Kenwood NX-320 | Operation Manual - Page 61
. 11 Disponible uniquement pour un fonctionnement analogique et NXDN conventionnel. 12 Disponible uniquement pour un fonctionnement trunking analogique et analogique conventionnel. 13 Disponible uniquement pour NX-220/ NX-320. F-11 - Kenwood NX-320 | Operation Manual - Page 62
FONCTIONNEMENT DE BASE MISE SOUS/ HORS TENSION Tournez le Commutateur d'alimentation/ Commande de volume dans le sens horaire pour mettre l'émetteur-récepteur sous tension. Tournez complètement le Commutateur d'alimentation/ Commande de volume dans le sens antihoraire pour mettre l'émetteur-ré - Kenwood NX-320 | Operation Manual - Page 63
TRANSMISSION 1 Sélectionnez la zone et le canal/ID de groupe souhaités. 2 Appuyez sur la touche programmée pour la fonction [Surveillance] ou [Silencieux désactivé] pour savoir si le canal est libre ou non. • Si le canal est occupé, attendez qu'il se libère. 3 Appuyez sur le commutateur PTT et - Kenwood NX-320 | Operation Manual - Page 64
RÉCEPTION Sélectionnez la zone et le canal souhaités. Si la signalisation a été programmée sur le canal sélectionné, vous n'entendrez un appel que si le signal reçu correspond aux réglages de votre émetteur-récepteur. Remarque : La signalisation permet à votre émetteur-récepteur de coder vos appels. - Kenwood NX-320 | Operation Manual - Page 65
BALAYAGE Le balayage surveille les signaux sur les canaux de l'émetteurrécepteur. Durant le balayage, l'émetteur-récepteur recherche un signal sur chaque canal et s'arrête uniquement si un signal est présent. Pour commencer le balayage, appuyez sur la touche programmée pour la fonction [Balayage]. • - Kenwood NX-320 | Operation Manual - Page 66
BALAYAGE INVERSE Le canal de balayage inverse est le canal sélectionné lorsque vous appuyez sur le commutateur PTT pour transmettre pendant le balayage. Votre revendeur peut programmer l'un des types de canaux de balayage inverse suivants : • Sélectionné : le dernier canal sélectionné avant le - Kenwood NX-320 | Operation Manual - Page 67
FleetSync : TÉLÉAVERTISSEUR BIDIRECTIONNEL ALPHANUMÉRIQUE FleetSync est un téléavertisseur bidirectionnel alphanumérique et ce protocole appartient à JVC KENWOOD Corporation. Remarque : Cette fonction est uniquement disponible pour un mode d'exploitation analogique. SELCALL (APPEL SÉLECTIF) Un - Kenwood NX-320 | Operation Manual - Page 68
MESSAGE D'ÉTAT (TYPES I ET II UNIQUEMENT) Vous pouvez envoyer et recevoir des messages d'état à 2 chiffres qui peuvent être décidés dans votre groupe de communication. Les messages peuvent contenir 16 caractères alphanumériques maximum. Plage des messages d'état de 10 à 99 (80 à 99 sont réservés - Kenwood NX-320 | Operation Manual - Page 69
■ Révision de Messages dans la Pile mémoire 1 Appuyez sur la touche programmée pour la fonction [Empilage] ou appuyez et maintenez la touche programmée pour la fonction [Selcall], [État] ou [Selcall + État] pour entrer en mode Empilage. • Le dernier message reçu s'affiche. 2 Appuyez sur la touche - Kenwood NX-320 | Operation Manual - Page 70
environ 1 seconde pour assurer une connexion. • Vérifiez qu'il y a une tonalité de numérotation après avoir relâcher le commutateur PTT. 3 Placez l'appel selon les instructions pour passer un appel DTMF, en démarrant à la page 22. F-20 - Kenwood NX-320 | Operation Manual - Page 71
4 Lorsque la partie appelée répond, appuyez sur le commutateur PTT et parlez dans le microphone. Relâchez le commutateur PTT pour recevoir. • Une seule personne peut parler à la fois. 5 Pour mettre fin à l'appel, appuyez et maintenez le commutateur PTT, ensuite, appuyez sur la touche # ou la touche - Kenwood NX-320 | Operation Manual - Page 72
OPÉRATIONS AVANCÉES APPELS DTMF (DOUBLE TONALITÉ MULTI-FRÉQUENCE) ■ Passer un appel DTMF (Types I et II uniquement) Composition manuelle (Type I uniquement) 1 Appuyez et maintenez enfoncé le commutateur PTT. 2 Entrez les chiffres souhaités à l'aide du clavier DTMF. • Si vous relâchez le commutateur - Kenwood NX-320 | Operation Manual - Page 73
■ Code de blocage émetteur-récepteur Cette fonction est utilisée en cas de vol ou de perte d'un émetteurrécepteur. Lorsque l'émetteur-récepteur reçoit un appel contenant un code de blocage, l'émetteur-récepteur se retrouve désactivé. Le code de blocage est annulé lorsque l'émetteur-récepteur reçoit - Kenwood NX-320 | Operation Manual - Page 74
Si vous mettez l'émetteur-récepteur hors tension puis de nouveau sous tension alors que la Détection d'activité est hors service, la Détection d'activité est mise automatiquement en service. ◆ Lors de l'utilisation de cette fonction, vérifiez qu'elle fonctionne avant de prendre l'émetteur-récepteur - Kenwood NX-320 | Operation Manual - Page 75
la fonction OST. ■ Numéro d'accès radio (RAN) RAN est un système de signalisation conçu pour les communications radio numériques. Lorsqu'un canal est configuré appel contenant 2 tonalités correspondantes (Disponible uniquement pour NX-220/ NX-320). Signalisation DTMF : la signalisation DTMF n'ouvre - Kenwood NX-320 | Operation Manual - Page 76
■ Niveau de gain VOX (Types I et II uniquement) 1 Connectez le casque téléphonique à l'émetteur-récepteur. 2 Appuyez sur la touche programmée pour la fonction [VOX]. • Le niveau de gain VOX actuel apparaît sur l'afficheur. 3 Appuyez sur la touche pour augmenter ou diminuer le niveau de gain - Kenwood NX-320 | Operation Manual - Page 77
OPÉRATIONS EN ARRIÈRE-PLAN Votre revendeur peut activer un certain nombre de fonctions que vous pouvez exécuter sans aucune autre manipulation de votre part. TEMPORISATEUR D'ARRÊT (TOT) L'objectif de la fonction temporisateur d'arrêt est d'éviter que vous utilisiez un canal pendant une période - Kenwood NX-320 | Operation Manual - Page 78
■ Indicateur de batterie (Type III uniquement) Appuyez sur la touche programmée pour la fonction [Indicateur de batterie]. Le voyant DEL s'allume pendant 2 secondes, affichant la puissance de batterie restante, comme décrit dans le tableau ci-dessous. Lorsque la puissance de batterie est très faible - Kenwood NX-320 | Operation Manual - Page 79
3 Parlez dans l'émetteur-récepteur pendant un appel normal. RECHERCHE DE CANAL DE COMMANDE Sur les canaux trunking numériques, l'émetteur-récepteur recherche automatiquement un canal de commande. • Pendant la recherche d'un canal de commande, l'icône d'antenne clignote (types I et II uniquement) et - Kenwood NX-320 | Operation Manual - Page 80
- Kenwood NX-320 | Operation Manual - Page 81
VHF DIGITAL TRANSCEIVER NX-220 TRANSCEPTOR DIGITAL UHF NX-320 TRANSCEPTOR DIGITAL 800MHz NX-420 MANUAL DE INSTRUCCIONES La tecnología de codificación de voz AMBE+2™ integrada en este producto está protegida por derechos de propiedad intelectual incluyendo los derechos de patente, - Kenwood NX-320 | Operation Manual - Page 82
que haya elegido KENWOOD para sus aplicaciones móviles terrestres. Este manual de instrucciones abarca únicamente las operaciones básicas de su radio portátil NEXEDGE. Solicite a su proveedor información sobre las funciones personalizadas que se puedan añadir a su radio. AVISOS AL USUARIO - Kenwood NX-320 | Operation Manual - Page 83
DESCRIPTION DES BORNES Prises du microphone à haut-parleur Vous pouvez utiliser un cache à base de résine pour les prises du microphone à haut-parleur. N° Nombre 1 PTT/RXD Descripción Entrada PTT / Entrada de datos serie Impedancia E/S 10 k E 2 MICI Entrada MIC 1,8 k E 3 MICO Salida - Kenwood NX-320 | Operation Manual - Page 84
lico interpuesto entre el transceptor y la batería. • No utilice opciones no indicadas por KENWOOD. • Si el chasis de fundición u otra pieza del transceptor resultara dañada, o de advertencia sobre el uso de aparatos de radio, como pudiera ser en centros hospitalarios, entre otros. • Cerca de - Kenwood NX-320 | Operation Manual - Page 85
detecta un olor anormal o humo procedente del transceptor, desconecte la alimentación, retire la batería del aparato y póngase en contacto con su distribuidor KENWOOD. • El uso del transceptor mientras conduce puede infringir las leyes de tráfico. Consulte y respete el reglamento de tráfico de su pa - Kenwood NX-320 | Operation Manual - Page 86
Información acerca de la batería: La batería contiene objetos inflamables, como disolvente orgánico. Su uso inapropiado puede hacer que la batería se rompa y se incendie o genere calor extremo, que se deteriore o se produzcan otros tipos de daños a la batería. Observe las siguientes prohibiciones. - Kenwood NX-320 | Operation Manual - Page 87
PELIGRO • ¡No cargue la batería cerca del fuego o bajo la luz directa del sol! Si el circuito protector de la batería resulta dañado, la batería podría cargarse con una corriente (o tensión) extrema y podría producirse una reacción química anormal. La batería podría generar calor o desprender humo, - Kenwood NX-320 | Operation Manual - Page 88
PELIGRO • ¡No cargue o conecte la batería de forma invertida! La batería tiene polos positivos y negativos. Si la batería no se conecta suavemente a un cargador o al equipo operativo, no la fuerce, compruebe la polaridad. Si la batería se conecta al cargador de forma invertida, se invertirá la carga - Kenwood NX-320 | Operation Manual - Page 89
de desembalaje son para su proveedor KENWOOD, un centro de reparaciones autorizado KENWOOD o la fábrica. Desembale el transceptor NX-420 1 Gancho para cinturón 1 Tapa de los jacks del micrófono/ altavoz 1 Soporte de traba del micrófono/ altavoz 1 Tapón (sólo en los Tipos I y II 1 Manual - Kenwood NX-320 | Operation Manual - Page 90
pestaña de liberación y luego separe la batería del transceptor. Notas: ◆ Para conocer los procedimientos de carga y uso de la batería, consulte el Manual de instrucciones del cargador de la batería. ◆ Puesto que la batería no viene cargada de fábrica, debe cargarla antes de utilizarla. ◆ Antes de - Kenwood NX-320 | Operation Manual - Page 91
Notas: ◆ Si no va a utilizar el transceptor durante un periodo prolongado de tiempo, retire las baterías del portabaterías. ◆ Este portabaterías ha sido diseñado para transmitir a una potencia de 1 W aproximadamente (ajuste de baja potencia del transceptor). Si desea transmitir una señal más intensa - Kenwood NX-320 | Operation Manual - Page 92
INSTALACIÓN DEL GANCHO PARA CINTURÓN Nota: Cuando instale el gancho para cinturón por primera vez, debe retirar la batería de la parte posterior del transceptor. 1 Retire los 2 tornillos de la parte posterior del transceptor y, a continuación, retire la pequeña tapa de plástico negra. 2 Inserte el - Kenwood NX-320 | Operation Manual - Page 93
2 Sujetando la tapa en posición, presiónela hacia la parte inferior del transceptor hasta que las pestañas de la tapa queden encajadas en su sitio. • Para retirar la tapa, sujete la parte superior de ésta con un dedo mientras inserta un destornillador de pala plana de 3 mm o menos por debajo de la - Kenwood NX-320 | Operation Manual - Page 94
ORIENTACIÓN Hay 3 tipos de transceptores disponibles: Tipo I: Equipado con pantalla y teclado completo. Tipo II : Equipado con pantalla y teclado de 4 teclas (S, A, ). Tipo III: Modelo básico. Tipo I Antena Micrófono Tipo II Altavoz Antena Micrófono Batería Altavoz - Kenwood NX-320 | Operation Manual - Page 95
Tipo III Antena Micrófono Batería Altavoz Indicador de transmisión/recepción/batería baja Si el proveedor lo ha activado, se ilumina de color rojo al transmitir, verde al recibir una llamada (en canales convencionales únicamente) y naranja al recibir una llamada de señalización opcional. Parpadea - Kenwood NX-320 | Operation Manual - Page 96
Tecla lateral 2 Púlsela para activar su función programable {página 10}. Tipos I y II: El valor predeterminado es [Luz de fondo]. Tipo III: El valor predeterminado es [Ninguno] (sin función). Teclas S, A, (sólo en los Tipos I y II) Púlsela para activar sus funciones programables {página 10}. - Kenwood NX-320 | Operation Manual - Page 97
PANTALLA (SÓLO EN LOS TIPOS I Y II) Indicador Descripción Indicador de potencia de señal {página 28}. Monitor o desactivar silenciamiento esta activado. Parpadea cuando una llamada entrante coincide con la señalización opcional de su aparato. La función Circunvalación está activada. Se está - Kenwood NX-320 | Operation Manual - Page 98
FUNCIONES AUXILIARES PROGRAMABLES Las teclas Selector, Auxiliar (naranja), Lateral 1, Lateral 2, S, A, y el Teclado pueden programarse con las funciones que se señalan a continuación. Consulte a su proveedor para obtener más información acerca de estas funciones. • Ninguno • 2 tonos 1, 10, - Kenwood NX-320 | Operation Manual - Page 99
. 11 Sólo disponible para operaciones convencionales analógicas y convencionales NXDN. 12 Sólo disponible para operaciones convencionales analógicas y trunking analógicas. 13 Sólo disponible para NX-220/ NX-320. E-11 - Kenwood NX-320 | Operation Manual - Page 100
OPERACIONES BÁSICAS ENCENDIDO Y APAGADO Gire el interruptor de Encendido/ control de Volumen hacia la derecha para encender el transceptor. Gire el interruptor de Encendido/ control de Volumen completamente hacia la izquierda para apagar el transceptor. ■ Contraseña del transceptor (sólo en los - Kenwood NX-320 | Operation Manual - Page 101
TRANSMISIÓN 1 Seleccione la zona y el canal/ID grupo deseados. 2 Pulse la tecla programada con la función [Monitor] o [Desactivar silenciamiento] para comprobar si el canal está libre. • Si el canal está ocupado, espere hasta que quede libre. 3 Presione el conmutador PTT y hable al micrófono. Suelte - Kenwood NX-320 | Operation Manual - Page 102
RECEPCIÓN Seleccione la zona y el canal deseados. Si se ha programado la función de señalización en el canal seleccionado, sólo oirá las llamadas en las que la señal recibida coincida con la configuración del transceptor. Nota: La señalización permite al transceptor codificar las llamadas. Esto le - Kenwood NX-320 | Operation Manual - Page 103
EXPLORACIÓN Exploración permite escuchar señales en los canales del transceptor. Durante la exploración, el transceptor busca una señal en cada canal y sólo se detiene si hay una señal presente. Para iniciar la exploración, pulse la tecla programada con la función [Exploración]. • Aparece el - Kenwood NX-320 | Operation Manual - Page 104
REVERSIÓN DE EXPLORACIÓN El canal de reversión de exploración es el canal que se selecciona cuando presiona el conmutador PTT para transmitir durante una exploración. El proveedor puede programar uno de los siguientes tipos de canal de reversión de exploración: • Seleccionado: El último canal - Kenwood NX-320 | Operation Manual - Page 105
2 vías y a su vez es un protocolo patentado por JVC KENWOOD Corporation. Nota: Esta función sólo está disponible en modo de funcionamiento seleccionar el ID de la emisora a la que desea llamar. • Si la Marcación manual está activada, puede introducir el ID de emisora (sólo en el Tipo I). 4 Presione - Kenwood NX-320 | Operation Manual - Page 106
al modo de selcall (vaya al paso 3). 3 Pulse la tecla para seleccionar el ID de la emisora a la que desea llamar. • Si la marcación manual está activada, puede introducir un ID de emisora a través del teclado DTMF o utilizando el Selector. Si utiliza el Selector, gírelo para seleccionar un - Kenwood NX-320 | Operation Manual - Page 107
■ Revisión de los mensajes guardados en la memoria de pila 1 Pulse la tecla programada con la función [Pila], o pulse prolongadamente la tecla programada con la función [Selcall], [Estado] o [Selcall + Estado] para pasar al modo de pila. • Aparece el último mensaje recibido. 2 Pulse la tecla - Kenwood NX-320 | Operation Manual - Page 108
LLAMADAS TRUNKING (ANALÓGICAS) REALIZACIÓN DE UNA LLAMADA DE DISTRIBUCIÓN 1 Seleccione la zona y el ID de grupo deseados mediante el selector y las teclas Zona o CH/GID. 2 Presione prolongadamente el conmutador PTT. 3 Si suena el tono "PTT proceda", es posible establecer comunicación; empiece a - Kenwood NX-320 | Operation Manual - Page 109
• Sólo puede hablar una persona a la vez. 5 Para finalizar la llamada, presione prolongadamente el conmutador PTT y luego pulse la tecla # o la tecla programada con la función [Desconectar teléfono]. RECEPCIÓN DE UNA LLAMADA TELEFÓNICA 1 Cuando se recibe una llamada telefónica, el transceptor pasa - Kenwood NX-320 | Operation Manual - Page 110
OPERACIONES AVANZADAS LLAMADAS DTMF (MULTIFRECUENCIA DE DOBLE TONO) ■ Realización de una llamada DTMF (sólo en los Tipos I y II) Marcación manual (sólo en el Tipo I) 1 Presione prolongadamente el conmutador PTT. 2 Introduzca los dígitos deseados utilizando el teclado DTMF. • Si suelta el conmutador - Kenwood NX-320 | Operation Manual - Page 111
■ Código de bloqueo del transceptor Esta función se utiliza cuando se sufre la pérdida o el robo de un transceptor. Cuando el transceptor recibe una llamada que contiene un código de bloqueo, el transceptor se desactiva. El código de bloqueo del transceptor se anula cuando el transceptor recibe una - Kenwood NX-320 | Operation Manual - Page 112
Notas: ◆ Si se ha desactivado el detector de actividad y posteriormente se apaga y se vuelve a encender el transceptor, el detector de actividad se activará automáticamente. ◆ Cuando vaya a utilizar esta función, compruebe que funciona antes de utilizar el transceptor. ■ Reinicio de actividad Con el - Kenwood NX-320 | Operation Manual - Page 113
■ Número de acceso radio (RAN) RAN es un sistema de señalización diseñado silenciamiento sólo se abre cuando el transceptor recibe una llamada con 2 tonos coincidentes (Sólo disponible para NX-220/ NX-320). Señalización DTMF : Con señalización DTMF el silenciamiento sólo se abre cuando el transceptor - Kenwood NX-320 | Operation Manual - Page 114
■ Nivel de ganancia VOX (sólo en los Tipos I y II) 1 Conecte el micrófono-auricular al transceptor. 2 Pulse la tecla programada con la función [VOX]. • El nivel de ganancia VOX actual aparece en la pantalla. 3 Pulse las teclas para incrementar o disminuir el nivel de ganancia VOX. • Los - Kenwood NX-320 | Operation Manual - Page 115
OPERACIONES DE FONDO Su proveedor puede activar una serie de funciones del transceptor que no requieran intervención posterior por parte del usuario. TEMPORIZADOR DE TIEMPO LÍMITE (TOT) El temporizador de tiempo límite impide que pueda utilizar un canal durante demasiado tiempo. Si transmite - Kenwood NX-320 | Operation Manual - Page 116
■ Indicador de batería (sólo en los Tipo III) Pulse la tecla programada con la función [Indicador de batería]. El piloto LED se ilumina durante 2 segundos señalando el nivel de potencia de la batería, según se describe en la tabla siguiente. Cuando el nivel de potencia de la batería es muy bajo, - Kenwood NX-320 | Operation Manual - Page 117
3 Hable al transceptor igual que en una llamada normal. BÚSQUEDA DE CANALES DE CONTROL En los canales de trunking digital, el transceptor busca automáticamente un canal de control. • Mientras se busca un canal de control, el icono de la antena parpadea (sólo en los Tipos I y II) y no se pueden - Kenwood NX-320 | Operation Manual - Page 118
- Kenwood NX-320 | Operation Manual - Page 119
- Kenwood NX-320 | Operation Manual - Page 120
© 2015
-
 1
1 -
 2
2 -
 3
3 -
 4
4 -
 5
5 -
 6
6 -
 7
7 -
8
-
9
-
10
-
11
-
12
-
13
-
14
-
15
-
16
-
17
-
18
-
19
-
20
-
21
-
22
-
23
-
24
-
25
-
26
-
27
-
28
-
29
-
30
-
31
-
32
-
33
-
34
-
35
-
36
-
37
-
38
-
39
-
40
-
41
-
42
-
43
-
44
-
45
-
46
-
47
-
48
-
49
-
50
-
51
-
52
-
53
-
54
-
55
-
56
-
57
-
58
-
59
-
60
-
61
-
62
-
63
-
64
-
65
-
66
-
67
-
68
-
69
-
70
-
71
-
72
-
73
-
74
-
75
-
76
-
77
-
78
-
79
-
80
-
81
-
82
-
83
-
84
-
85
-
86
-
87
-
88
-
89
-
90
-
91
-
92
-
93
-
94
-
95
-
96
-
97
-
98
-
99
-
100
-
101
-
102
-
103
-
104
-
105
-
106
-
107
-
108
-
109
-
110
-
111
-
112
-
113
-
114
-
115
-
116
-
117
-
118
-
119
-
120
 |
 |
INSTRUCTION MANUAL
MODE D’EMPLOI
MANUAL DE INSTRUCCIONES
NX-220
NX-320
NX-420
B62-2470-10 (K)