Kodak DP1050 User Manual
Kodak DP1050 - Digital Projector XGA DLP Manual
 |
View all Kodak DP1050 manuals
Add to My Manuals
Save this manual to your list of manuals |
Kodak DP1050 manual content summary:
- Kodak DP1050 | User Manual - Page 1
5 3. Connecting a computer to the KODAK DP1050 ULTRA 6 4. Connecting a video source to the KODAK DP1050 ULTRA 10 5. Connecting a TV-source to the KODAK DP1050 ULTRA 12 6. Using the KODAK DP1050 ULTRA 14 7. Using the menus 19 8. Maintenance 34 9. What do I do if (Trouble shooting 35 1 Page 1 - Kodak DP1050 | User Manual - Page 2
connected simultaneously for high impact multimedia presentation. Thanks to the unique KODAK Graphical User Interface, the KODAK DP1050 ULTRA offers true plug and play operation from remote control, which by the way also can control your computer. 1.1 Color coding for ease of use All connectors - Kodak DP1050 | User Manual - Page 3
Please take a few minutes to make sure that your KODAK DP1050 ULTRA contains all the necessary parts: 1.2.1 Computer accessories for external /accessories x Dual soft bag x Power cable, 4m/12 ft. x Remote control including batteries (type AAA/LR03) 1.2.4 Optional cables and accessories x EVC cable - Kodak DP1050 | User Manual - Page 4
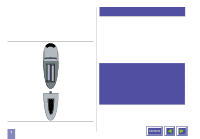
cable Audio cable PS/2 mouse for PC RS232 mouse for PC Mac adapter Stereo jack cable ADB mouse for Macintosh 4 Figure 1: Product and accessories Interactive Remote Control Cable organizerbag Contents - Kodak DP1050 | User Manual - Page 5
the unit. WARNING! Tampering with or opening the KODAK DP1050 ULTRA can be dangerous. Leave maintenance to authorized KODAK service personnel. Please contact your local dealer with any service or maintenance questions you may have. Figure 2: Inserting batteries in remote control 5 Contents - Kodak DP1050 | User Manual - Page 6
audio connection and to the PC or MAC adapter box. 7. Turn on the KODAK DP1050 ULTRA and then the computer. The computer image should now be projected from the KODAK DP1050 ULTRA and the remote control should now work as a regular mouse. If the computer's image is not displayed simultaneously - Kodak DP1050 | User Manual - Page 7
Connecting to a laptop, notebook Back panel of computer Connecting to an Apple PowerBook Back panel of computer PC adapter MAC adapter EVC cable EVC cable Figure 3: Connecting to a laptop, notebook 7 Figure 4: Connecting to an Apple PowerBook Contents - Kodak DP1050 | User Manual - Page 8
Connecting to a desktop PC with standard RGB Back panel of computer Connecting to an Apple Macintosh desktop computer Back panel of computer PC adapter PC monitor EVC cable Figure 5: Connecting to a desktop PC with standard RGB 8 MAC adapter PC monitor EVC cable Figure 6: Connecting to an Apple - Kodak DP1050 | User Manual - Page 9
Connecting the mouse cable and stereo jack (PC) Back panel of computer Connecting the mouse cable and stereo jack (MAC) Back panel of computer Stereo jack cable PS/2 mouse for PC RS232 mouse for PC Stereo jack cable ADB mouse for Macintosh PC adapter PC monitor EVC cable Figure 7: Connecting the - Kodak DP1050 | User Manual - Page 10
4. Connecting a video source to the KODAK DP1050 ULTRA The procedure for connecting a video source to the KODAK DP1050 ULTRA is the same for S-video and Composite video SECAM, PAL N and PAL M modes are manually selected by pressing "Green Button". If the right format is not found first time, press - Kodak DP1050 | User Manual - Page 11
you need an amplifier. Connect the amplifier to the audio out on the KODAK DP1050 ULTRA. When external speakers are connected, these can be turned on or off from the KODAK DP1050 ULTRA. To control the internal speakers, see section on Adjust audio settings, section 7.3.3. Figure 10: Using external - Kodak DP1050 | User Manual - Page 12
channel in a different program. . The same is true for the KODAK DP1050 ULTRA TVtuner. When connected to an antenna you assign the different channels to the programs in the Television Setup Menu. Then you use the Up and Down arrows in the menu, remote control or the channel up/down button on the - Kodak DP1050 | User Manual - Page 13
channel for the cable, and then you use the remote control for the decoder to switch between channels. If you do not have a decoder you simply set your TV up just like you would with an antenna. This is also the same with the KODAK DP1050 ULTRA. You must scroll the channel name in the - Kodak DP1050 | User Manual - Page 14
KODAK DP1050 ULTRA 6.1 Different program modes for the KODAK DP1050 ULTRA KODAK DP1050 ULTRA has different modes of operation: x Stand-by mode x Normal mode x Quick mode x Menu mode x Pointer mode x Blank mode 14 Stand-by mode In stand-by mode the projector on the remote control to navigate in - Kodak DP1050 | User Manual - Page 15
located beside the lens, as this will prevent the communication between the remote control and the KODAK DP1050 ULTRA. To ensure smooth operation, the combined distance from the remote control to the screen and back to the projector should not exceed 10 meters (33 ft). If the distance via the - Kodak DP1050 | User Manual - Page 16
zap keys can be programmed to do the same function e.g. volume up/down. See section 7.2.5 for further explanations of the zap menu. Figure 13: The remote mouse communicates with the KODAK DP1050 ULTRA projector via the projection screen 16 Contents - Kodak DP1050 | User Manual - Page 17
access to the most important functions of the KODAK DP1050 ULTRA. It is very handy to use when the remote control has low batteries, or you simply have forgotten to bring it with you. The key functions are as follows: Source The KODAK DP1050 ULTRA has direct keys for four sources: Functionality - Kodak DP1050 | User Manual - Page 18
up the projector with optimal settings for the connected source. If you want to do manual adjustments you can do this by using the menus (see section 7). Note! You can not access the screen menu system without the remote control. 6.4 Adjusting the height and angle of the KODAK DP1050 ULTRA You can - Kodak DP1050 | User Manual - Page 19
6.5 Adjusting Focus / Zoom To adjust focus, turn the outer part of the lens (1). To adjust zoom, turn the inner part of the lens (2). 7. Using the menus 7.1 The menu system PC TV 1 2 Main menu. Main Menu Menu with TV tuner option installed. 19 Contents - Kodak DP1050 | User Manual - Page 20
the text area will give a short description of the icon. Stand by This function sets the projector in stand-by mode Auto set-up Auto set-up will do automatic set-up of the projector: x Horizontal and vertical position x Sampling clock x Phase x Chooses between available video formats and NTSC/PAL - Kodak DP1050 | User Manual - Page 21
Source Control panel You can connect four different sources to the KODAK DP1050 ULTRA; one computer source, two video sources and one TV tuner (optional). You select the source you want to use by clicking on the icon representing the source. Use the pressuresensing pad on the remote mouse to move - Kodak DP1050 | User Manual - Page 22
x Mouse system x Quick key assignment x ZAP keys assignment x Lamp hours 22 7.2.1 Picture orientation Picture orientation The picture orientation menu is used when the projector is standing on a table projecting a picture on a screen. Mirror Mirror is used when the projector is projecting the - Kodak DP1050 | User Manual - Page 23
projecting image from the front. Rotate and mirror Rotate and mirror is used when the projector is ceiling mounted and projects the picture from the back of the screen. 7.2.2 Mouse will be active until another system is chosen. When shipped the KODAK DP1050 ULTRA is set up to PS/2. 23 Contents - Kodak DP1050 | User Manual - Page 24
7.2.3 Language This menu allows you to choose between six different menu languages: English, French, German, Italian, Spanish and Norwegian. Click in the box next to the language you want to use. Click on the OK button. The window will disappear, and the selected language will be used in the main - Kodak DP1050 | User Manual - Page 25
the quick menu you can assign functionality for the quick key on the remote control. When clicking on the quick key you will be able to switch right or left or you may use one of the two zap keys on the remote control. To accept the adjustment, and terminate the quick menues click on the left mouse - Kodak DP1050 | User Manual - Page 26
is used to assign functions to the zap keys on the remote control. The menu consists of two columns of buttons where the left column assigns the functions to the Zap 1 key and the right column assigns the functions to the Zap 2 key. 26 Volume (+/-) Controls the sound of active source. TV channel - Kodak DP1050 | User Manual - Page 27
7.2.6 Television programs This menu is only displayed if the TV tuner is installed and TV tuner is selected as source. The television program menu is then activated by pressing the "television program" icon The TV setup menu is divided in two parts: x Automatic TV station x Program Automatic TV - Kodak DP1050 | User Manual - Page 28
. The highlighting will disappear, and the TV icon will turn green to indicate that the channel has been assigned to a program. To search for channels manually, use the arrow keys at the bottom right. The channel may be assigned to a program by just selecting an unused program choice. When deleting - Kodak DP1050 | User Manual - Page 29
time In this window you can see the accumulated time that the lamp have been used. You also use this window to reset the accumulated lamp time when you have changed lamp. Control panel menu In the control panel you have access to menus for adjusting picture and audio settings. The icons "Picture - Kodak DP1050 | User Manual - Page 30
7.3.1 Picture control Select the picture control menu for adjusting brightness, saturation and tint. When PC is selected as source, only brightness and contrast will be available. When PC is selected as source and auto contrast is marked, only brightness will be available. 30 Contents - Kodak DP1050 | User Manual - Page 31
When PAL/SECAM video is selected brightness, contrast and saturation will be available. 31 All options will be available for NTSC video. Select OK to save your changes and exit, or select Cancel to exit without saving your changes. Selecting Default restores factory settings. Contents - Kodak DP1050 | User Manual - Page 32
save your changes and exit, or select Cancel to exit without saving your changes. 32 Audio control Select this function when you have connected an audio signal to the 'Audio in' on the KODAK DP1050 ULTRA connectors (or through the EVC cable). Use the four sliders to adjust volume, bass, treble and - Kodak DP1050 | User Manual - Page 33
will be set by the automatic set-up function. Manual sync adjustments should typically not be required. Color tone settings The color manager is designed to give you maximum performance from your KODAK DP1050 ULTRA projector, independent of ambient light conditions. In the color manager - Kodak DP1050 | User Manual - Page 34
Product information Click on the product information icon in order to get information about the product and company. 8. Maintenance All maintenance should be done by KODAK authorized service personnel. Contact your KODAK dealer for maintenance. Select Exit to leave the menu. 34 Contents - Kodak DP1050 | User Manual - Page 35
and remedies: 1. The KODAK DP1050 ULTRA is left in Standby mode. If the product is in standby mode, there will be a red light next to the stand-by button. Press the stand-by button or the Menu key on the remote cotrol. 2. The lamp does not function. Check the light on the control panel. If the - Kodak DP1050 | User Manual - Page 36
IR receiver at the front of the KODAK DP1050 ULTRA. 2. Make sure the remote is pointed towards the screen. 3. Make sure there is no more than 10m/33ft in distance to the projector. 4. Batteries might be low. Change batteries in the remote control. 5. Electromagnetic or optic noise may influence the - Kodak DP1050 | User Manual - Page 37
coding for ease of use 2 • 1.2 Accessories 3 • 1.2.1 Computer accessories for external PC/MAC .....3 • 1.2.2 Video accessories 3 • 1.2.3 Other cables/accessories 3 • 1.2.4 Optional cables and accessories 3 • 1.3 Insert batteries in the remote control 5 Contents - Kodak DP1050 | User Manual - Page 38
4. CONNECTING A VIDEO SOURCE TO THE KODAK DP1050 ULTRA 10 • 4.1 Using external speakers 11 Contents - Kodak DP1050 | User Manual - Page 39
6. USING THE KODAK DP1050 ULTRA 14 • 6.1 Different program modes for the KODAK DP1050 ULTRA 14 • 6.2 KODAK Remote control 15 • 6.3 Using the touch panel on the KODAK DP1050 ULTRA 17 • 6.4 Adjusting the height and angle of the KODAK DP1050 ULTRA 18 • 6.5 Adjusting Focus / Zoom 19 Contents - Kodak DP1050 | User Manual - Page 40
• 7.2.5 Zap menu 26 • 7.2.6 Television programs 27 • 7.2.7 Show accumulated lamp time 29 • 7.3 Control Panel Menu 29 • 7.3.1 Picture control 30 • 7.3.2 Picture positioning 32 • 7.3.3 Audio control 32 • 7.3.4 Synchronization Adjustments 33 • 7.3.5 Color manager 33 • 7.4 Product information
-
 1
1 -
 2
2 -
 3
3 -
 4
4 -
 5
5 -
 6
6 -
 7
7 -
8
-
9
-
10
-
11
-
12
-
13
-
14
-
15
-
16
-
17
-
18
-
19
-
20
-
21
-
22
-
23
-
24
-
25
-
26
-
27
-
28
-
29
-
30
-
31
-
32
-
33
-
34
-
35
-
36
-
37
-
38
-
39
-
40
 |
 |

Page 1
1
Before you start
.........................................................................................
2
Important information
...............................................................................
5
Connecting a computer to the KODAK DP1050 ULTRA
........................
6
Connecting a video source to the KODAK DP1050 ULTRA
................
10
Connecting a TV-source to the KODAK DP1050 ULTRA
....................
12
Using the KODAK DP1050 ULTRA
........................................................
14
Using the menus
.....................................................................................
19
Maintenance
............................................................................................
34
What do I do if (Trouble shooting)
.........................................................
35
1.
2.
3.
4.
5.
6.
7.
8.
9.
CONTENTS