Kodak DP1050 User Manual - Page 10
Connecting a video source to the KODAK DP1050 ULTRA - manual
 |
View all Kodak DP1050 manuals
Add to My Manuals
Save this manual to your list of manuals |
Page 10 highlights
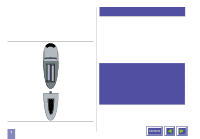
4. Connecting a video source to the KODAK DP1050 ULTRA The procedure for connecting a video source to the KODAK DP1050 ULTRA is the same for S-video and Composite video SECAM, PAL N and PAL M modes are manually selected by pressing "Green Button". If the right format is not found first time, press again. The video format is stored separately for each connector. 1. Make sure that the video source and the KODAK DP1050 ULTRA are switched off. 2. Connect the video cable from the Video out connector of the video source to the correct video connector on the KODAK DP1050 ULTRA plug panel. 3. Connect the audio cable from the Audio out connectors of the video source to the Audio in connectors on the KODAK DP1050 ULTRA. Connect the red plug to the red connector, and the other plug to the white connector. Red is the right stereo channel. 10 4. When all the connections are done and verified, switch on the video source and the KODAK DP1050 ULTRA. 5. The KODAK DP1050 ULTRA will now automatically display the pictures from the video source. If not, see the section 'What do I do if'. Figure 9: Connecting to video sources Contents
-
 1
1 -
2
-
3
-
4
-
 5
5 -
 6
6 -
 7
7 -
 8
8 -
 9
9 -
 10
10 -
 11
11 -
 12
12 -
 13
13 -
 14
14 -
 15
15 -
16
-
17
-
18
-
19
-
20
-
21
-
22
-
23
-
24
-
25
-
26
-
27
-
28
-
29
-
30
-
31
-
32
-
33
-
34
-
35
-
36
-
37
-
38
-
39
-
40
 |
 |
