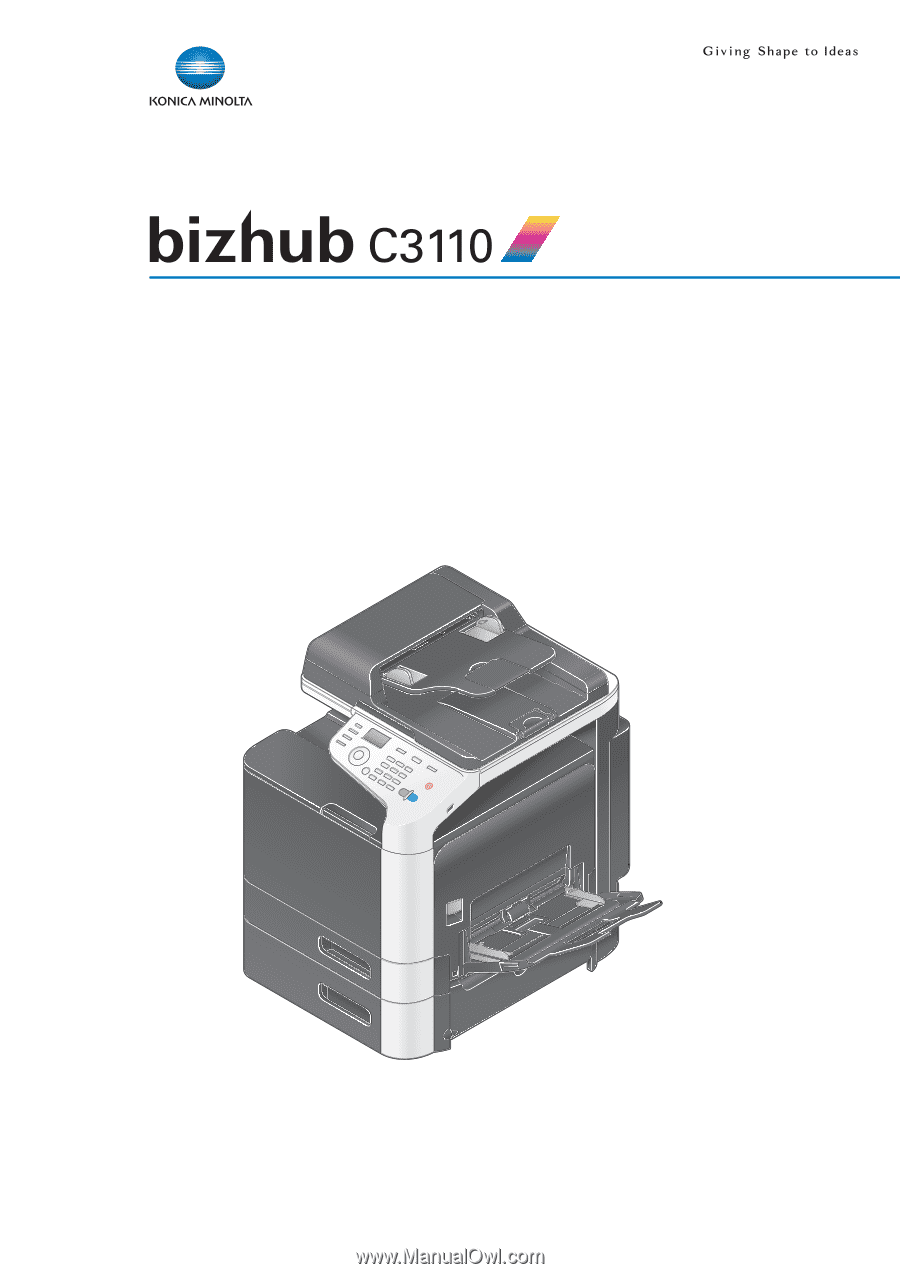
Konica Minolta bizhub C3110 bizhub C3110 Print Functions User Guide
Konica Minolta bizhub C3110 Manual
 |
View all Konica Minolta bizhub C3110 manuals
Add to My Manuals
Save this manual to your list of manuals |
Konica Minolta bizhub C3110 manual content summary:
- Konica Minolta bizhub C3110 | bizhub C3110 Print Functions User Guide - Page 1
User's Guide: Print Functions - Konica Minolta bizhub C3110 | bizhub C3110 Print Functions User Guide - Page 2
systems supported by the printer driver 2-10 Changing the installation settings (Windows 7/8/8.1/Server 2008 R2/Server 2012/ Server 2012 R2) ...2-11 Installation procedure ...2-12 Initializing the printer driver ...2-14 Configuring the optional environment of this machine 2-14 Change the default - Konica Minolta bizhub C3110 | bizhub C3110 Print Functions User Guide - Page 3
2-46 Operations on this machine (Printing only specific data 2-46 Printer driver setting items ...2-47 [Properties] window of the printer driver 2-47 How to display the [Properties] window 2-47 Tabs provided by Windows ...2-49 Available operations in the [Configure] tab 2-50 Available operations - Konica Minolta bizhub C3110 | bizhub C3110 Print Functions User Guide - Page 4
systems supported by the printer driver 3-8 Installing the printer driver ...3-9 Configuring USB connection settings (Mac OS X 10.5 or later 3-9 Configuring USB connection settings (Mac OS X 10.4 3-10 Configuring USB connection settings (Mac OS X 10.3 3-10 Initializing the printer driver ...3-11 - Konica Minolta bizhub C3110 | bizhub C3110 Print Functions User Guide - Page 5
for the original ([Color Settings 3-20 Saving the toner consumption ([Toner Save 3-21 Increasing the legibility of small or faint text ([Edge Strength 3-21 Using a color profile ...3-22 Registering a color profile on this machine 3-22 Adding a color profile to the printer driver 3-22 Printing - Konica Minolta bizhub C3110 | bizhub C3110 Print Functions User Guide - Page 6
4.2 Printing directly from a USB memory device 4-4 Printing from a USB memory device 4-4 Supported USB memory devices ...4-4 Printing procedure ...4-4 5 Index [Print Functions] Contents-5 - Konica Minolta bizhub C3110 | bizhub C3110 Print Functions User Guide - Page 7
1 Printer Functions - Konica Minolta bizhub C3110 | bizhub C3110 Print Functions User Guide - Page 8
functions of this machine from other application software. When you install the printer driver on your computer, you can use a variety of this machine's printing functions. Furthermore, the printer driver supports a wide range of connection methods and provides flexibility in various environments - Konica Minolta bizhub C3110 | bizhub C3110 Print Functions User Guide - Page 9
X (10.3.x, 10.4.x, 10.5.x, 10.6.x, 10.7.x, 10.8.x, 10.9.x) PowerPC, Intel Processor Memory capacity as recommended for your operating system CD-ROM drive dReference For details on how to use the Linux printer driver, refer to Chapter 5 "Printing in the Linux Environment" in [User's Guide: Applied - Konica Minolta bizhub C3110 | bizhub C3110 Print Functions User Guide - Page 10
printer cables are connected to each port on this machine. 1 2 No. Port Description 1 Ethernet (LAN) Port Use the LAN cable to connect this machine to the network. This ma- (1000Base-T/100Base- chine supports (LPD/LPR, IPP) protocols and Web services are support- ed. 2 USB port Use a USB - Konica Minolta bizhub C3110 | bizhub C3110 Print Functions User Guide - Page 11
2 Printing in the Windows Environment - Konica Minolta bizhub C3110 | bizhub C3110 Print Functions User Guide - Page 12
Windows Environment 2.1 Preparation for printing (network connection) 2.1.1 Overview Before using this machine as a printer, you need to install the printer driver set. (Usually, you can use the default settings default settings.) When using the Secure Print (IPPS) % Set network settings Print - Konica Minolta bizhub C3110 | bizhub C3110 Print Functions User Guide - Page 13
been configured. For details on how to configure settings, refer to Chapter 1 "Using Web Connection" in [User's Guide: Applied Functions]. 2.1.3 Easy installation of the printer driver Preparing the printer driver Preparing the printer driver CD-ROM % For the CD-ROM, contact the administrator - Konica Minolta bizhub C3110 | bizhub C3110 Print Functions User Guide - Page 14
-ROM. CD-ROM Driver & Utilities CD-ROM User's Guide CD-ROM Description Contains Windows printer driver (PCL/PS/XPS), Mac OS printer driver, Linux printer driver, and TWAIN driver. Also contains the download page of the utility software. Contains user's guides. Checking the printer driver type The - Konica Minolta bizhub C3110 | bizhub C3110 Print Functions User Guide - Page 15
and the supported operating systems. Printer driver PCL driver PS driver XPS driver Supported operating systems Windows XP Home Edition (Service Pack 3 or later) Windows XP Professional (Service Pack 3 or later) Windows Server 2003, Standard Edition (Service Pack 2 or later) Windows Server 2003 - Konica Minolta bizhub C3110 | bizhub C3110 Print Functions User Guide - Page 16
printer driver folder on the CD-ROM, double-click [Set- up.exe], then go to Step 3. % If the [User Account Control] window appears, click [Continue] or [Yes]. 2 Click [Printer/FAX , select [Specify the Printer/MFP Except for the Above. (IP Address, Host Name...)], then manually specify the IP address - Konica Minolta bizhub C3110 | bizhub C3110 Print Functions User Guide - Page 17
The installation process of the printer driver is then completed. Settings [Review] [Rename Printer] [Property] [Print Setting] [Print Test page] Description printer driver, configure the default settings of the printer driver. For details, refer to page 2-7. 2.1.4 Initializing the printer driver - Konica Minolta bizhub C3110 | bizhub C3110 Print Functions User Guide - Page 18
, manually set this information in [Device Option]. Select the item to change from the list, and set a value in [Setting]. 3 Click [OK]. Change the default print settings If necessary, you can change the default print settings of the printer driver. 1 Display the [Printing Preferences] window of - Konica Minolta bizhub C3110 | bizhub C3110 Print Functions User Guide - Page 19
with this machine: The printer driver is included on the Driver & Utilities CD-ROM. CD-ROM Driver & Utilities CD-ROM User's Guide CD-ROM Description Contains Windows printer driver (PCL/PS/XPS), Mac OS printer driver, Linux printer driver, and TWAIN driver. Also contains the download page of the - Konica Minolta bizhub C3110 | bizhub C3110 Print Functions User Guide - Page 20
the printer driver The following lists the printer drivers included on the CD-ROMs supplied with this machine and the supported operating systems. Printer driver PCL driver PS driver Supported operating systems Windows XP Home Edition (Service Pack 3 or later) Windows XP Professional (Service Pack - Konica Minolta bizhub C3110 | bizhub C3110 Print Functions User Guide - Page 21
) 2 Printer driver XPS driver Supported operating systems Windows Vista Business (Service Pack 2 or later)* Windows Vista Enterprise (Service Pack 2 or later)* Windows Vista Home Basic (Service Pack 2 or later)* Windows Vista Home Premium (Service Pack 2 or later)* Windows Vista Ultimate (Service - Konica Minolta bizhub C3110 | bizhub C3110 Print Functions User Guide - Page 22
to Step 3. % If the installer does not start, open the printer driver folder on the CD-ROM, double-click [Set- up.exe], then go to Step 4. % If the [User Account Control] window appears, click [Continue] or [Yes]. 3 Click [Printer/FAX]. 4 Read the license agreement, then click [AGREE]. 5 Check the - Konica Minolta bizhub C3110 | bizhub C3110 Print Functions User Guide - Page 23
10 If necessary, change the printer name or print a test page, then click [Finish]. The installation process of the printer driver is then completed. Settings [Review] [Rename Printer] [Property] [Print Setting installing the printer driver, configure the default settings of the printer driver. For - Konica Minolta bizhub C3110 | bizhub C3110 Print Functions User Guide - Page 24
If you are using Windows XP/Server 2003, set the option manually using [Device Option]. Select the item to change from the list, and set a value in [Setting]. 3 Click [OK]. Change the default print settings If necessary, you can change the default print settings of the printer driver. 1 Display the - Konica Minolta bizhub C3110 | bizhub C3110 Print Functions User Guide - Page 25
] dialog box varies depending on the application software. 3 Specify the print range and the number of copies to print. 4 Click [Properties] (or [Preferences]) to change the print settings of the printer driver, if necessary. % The print settings you have changed here return to the default values - Konica Minolta bizhub C3110 | bizhub C3110 Print Functions User Guide - Page 26
registered. Use names that can easily be identified. Assign an icon to the favorite settings, if necessary. Select this check box to share the favorite settings with other users. Enter a comment to the favorite setting, if necessary. The comment is displayed when you place the mouse cursor over the - Konica Minolta bizhub C3110 | bizhub C3110 Print Functions User Guide - Page 27
2.3 How to print 2 Customizing the setting window You can gather setting items from difference tabs and place them in [My Tab]. Registering frequently used setting items in [My Tab] allows you to change settings in one tab, without switching among multiple tabs. This section describes how to edit - Konica Minolta bizhub C3110 | bizhub C3110 Print Functions User Guide - Page 28
paper sizes selected in [Original Size] and [Paper Size]. Tips This function is enabled when [Zoom] is set to [Auto]. Enlarging or reducing by the desired zoom ratio ([Zoom]) You can print the original image after it has been enlarged or reduced by the desired zoom ratio. The zoom ratio can be - Konica Minolta bizhub C3110 | bizhub C3110 Print Functions User Guide - Page 29
For details on how to load paper into the Manual Feed Tray or Tray 1, refer to Chapter 6 "Loading Paper" in [User's Guide: Introduction]. When you are using the PCL driver, you can pre-register a custom size in the [Settings] tab. For details in the [Settings] tab, refer to page 2-50. Specifying the - Konica Minolta bizhub C3110 | bizhub C3110 Print Functions User Guide - Page 30
Manual Feed] or [Tray 1]. 2 Execute printing. % For information on how to load postcards, refer to Chapter 6 "Loading Paper" in [User's Guide: Introduction]. 2.4.2 Printing multiple sets , reducing the amount of waste paper generated. For details, refer to page 2-40. [Print Functions] 2-20 - Konica Minolta bizhub C3110 | bizhub C3110 Print Functions User Guide - Page 31
2.4 Useful printing functions 2 Printing on a set basis ([Collate]) When the [Collate] check box on the [Basic] tab is selected, copies are output separately in a set-by-set manner, for example, "Pages 1, 2, 3, 4, and 5", "Pages 1, 2, 3, 4, and 5", and then "Pages 1, 2, 3, 4, and 5". Tips This - Konica Minolta bizhub C3110 | bizhub C3110 Print Functions User Guide - Page 32
Useful printing functions 2 Settings [Layout Order] [Border] Description Select the page layout order. Select this check box to draw border Blank Pages] check box. Tips - For some originals, blank pages are also printed. - This function is only available for the Windows printer driver (PCL/XPS). - Konica Minolta bizhub C3110 | bizhub C3110 Print Functions User Guide - Page 33
the [Basic] tab, select the [Manually Print on 2nd Side] check box. Tips To print data by selecting [Manually Print on 2nd Side], use the back side of paper that has already been printed on using this machine. The printing result with this setting is excluded from assurance. 2.4.4 Adjusting the - Konica Minolta bizhub C3110 | bizhub C3110 Print Functions User Guide - Page 34
on both sides, specify the size of the margin on the back side. When the [Same value for front and back sides] check box is selected, a margin of the same size is created on both the front and back sides. Tips This function is only available for the Windows printer driver. [Print Functions] 2-24 - Konica Minolta bizhub C3110 | bizhub C3110 Print Functions User Guide - Page 35
a poster-sized image ([Combination]) Enlarge an original image and divide it , when you select [2 e 2], one page of the original image is enlarged, divided, and printed on four sheets. If necessary, for the PCL driver. Rotating the image 180 degrees ([Rotate 180]) Print an image upside down. This - Konica Minolta bizhub C3110 | bizhub C3110 Print Functions User Guide - Page 36
2-sided printing, you can also fine-tune the print position of an image on the back side. This function is available when a fine adjustment is . 1 In the [Layout] tab, select the [Image Shift] check box. 2 Click [Image Shift Settings...]. 3 Adjust the upward/downward and rightward/leftward shift - Konica Minolta bizhub C3110 | bizhub C3110 Print Functions User Guide - Page 37
/Composition] tab, select the [Watermark] check box. In addition, select the watermark you want to print. Tips This function is only available for the Windows printer driver. Registering or editing a watermark This machine has several factory-set watermarks. However, you can register new watermarks - Konica Minolta bizhub C3110 | bizhub C3110 Print Functions User Guide - Page 38
the slide bar. • [Center]: Click this button to reset the watermark position to the center. • [Angle]: color of the watermark. Select this check box to print the watermark in a translucent tone. When this check box is cleared, the printed watermark obscures the background. Select this check box - Konica Minolta bizhub C3110 | bizhub C3110 Print Functions User Guide - Page 39
Change the method to compose an overlay image, if necessary. Select the range of pages to compose an overlay image on. Tips - This function is only available for the Windows printer driver. - When the PS driver is used, you need to download a target overlay image to this machine in advance. [Print - Konica Minolta bizhub C3110 | bizhub C3110 Print Functions User Guide - Page 40
box, then print data to be registered as an overlay image to create an overlay file on the computer. 1 Create an original to be registered in an overlay image printing. Tips This function is only available for the Windows printer driver (PCL/XPS). 2.4.6 Deterring unauthorized copying Printing a - Konica Minolta bizhub C3110 | bizhub C3110 Print Functions User Guide - Page 41
Windows printer driver (PCL). Configuring the print settings for Copy Protect When printing a copy protect pattern on sheets, you can set sheet that is different from text sheets (colored paper or thick paper) as a front the [Cover Mode] tab, select the [Front Cover] or [Back Cover] check box. % If - Konica Minolta bizhub C3110 | bizhub C3110 Print Functions User Guide - Page 42
[Separator Page] check box, then specify the position to insert a separator page. % In [Separator Page Tray], select a paper tray to load sheets to be used as separator pages. 2.4.8 Specifying the color and image quality Selecting printing colors ([Select Color]) In [Select Color] of the [Quality - Konica Minolta bizhub C3110 | bizhub C3110 Print Functions User Guide - Page 43
tab, select the printing resolution. Tips This function is available only for the PCL/PS driver. Fine-tuning the image quality according to the original ([Quality Adjustment]) You can fine-tune the color image quality according to the original. For example, you can increase the vividness or reduce - Konica Minolta bizhub C3110 | bizhub C3110 Print Functions User Guide - Page 44
available for the Windows printer driver. Selecting the optimum color representation for the original ([Color Settings]) You can select the optimum settings for an original such as photos or presentation materials to print it at the optimum image quality level. In [Color Settings] of the [Quality - Konica Minolta bizhub C3110 | bizhub C3110 Print Functions User Guide - Page 45
or not the quality or printing speed is preferred when the image data contained in the original is compressed. Tips - This function is only available for the Windows printer driver (PCL). - This function can be specified when [Auto Color] is selected in [Select Color]. [Print Functions] 2-35 - Konica Minolta bizhub C3110 | bizhub C3110 Print Functions User Guide - Page 46
functions 2 Saving the toner consumption ([Toner Save]) Selecting the [Toner Save] check box in the [Quality] tab adjusts the printing density in order to reduce the amount of toner consumed. Sharpening the border between texts ([Edge Strength]) Sharpen the edges of images such as text in - Konica Minolta bizhub C3110 | bizhub C3110 Print Functions User Guide - Page 47
to replace the TrueType font. 3 Click [OK]. Tips - If characters are garbled in an environment where the PCL driver is used, we recommend that you select [Bitmap] in [Download Font Format] and clear the [Use Printer Fonts] check box. - This function is available only for the Windows printer driver - Konica Minolta bizhub C3110 | bizhub C3110 Print Functions User Guide - Page 48
tab, check the [Excel Job Control] box. Tips This function is only available for the Windows printer driver. However, this function may not be available depending on a specific environment or application software. Composing and printing an image correctly in PowerPoint The process executed when an - Konica Minolta bizhub C3110 | bizhub C3110 Print Functions User Guide - Page 49
size printing. In the [Other] tab, select the [Thin Line Support] check box. Tips - This is effective for thin lines such as table borders created in Excel, but not for thin lines used in illustrations. - This function is only available for the Windows printer driver (PCL). [Print Functions] 2-39 - Konica Minolta bizhub C3110 | bizhub C3110 Print Functions User Guide - Page 50
Operations on this machine". Operations on this machine 1 On the main screen (Copy mode), press the + or , key to select [USB/HDD], then press the key. 2 Select [Documents to Print], then press the Select key. 3 Select a user name, then press the Select key. 4 Select a job name, then press the Select - Konica Minolta bizhub C3110 | bizhub C3110 Print Functions User Guide - Page 51
when an optional Hard Disk is installed. How to print from the computer 1 In [Job Retention] of the [Basic] tab, select [Secured Job]. 2 Enter the password, then click [OK]. 3 Execute printing. Print data is saved on the hard disk of this machine. Continue to "Operations on this machine". [Print - Konica Minolta bizhub C3110 | bizhub C3110 Print Functions User Guide - Page 52
you need to enter the password specified in the printer driver. 1 On the main screen (Copy mode), press the + or user name, then press the Select key. 4 Select a job name, then press the Select key. % To delete the selected job, select its job name, then press the Stop/Reset key. 5 Enter the password - Konica Minolta bizhub C3110 | bizhub C3110 Print Functions User Guide - Page 53
(user name and password) to this machine to execute printing. This requirement limits the users who box of [Acquire Settings...] is cleared and [User Authentication]/[Account Track] of [Device Option] is set to [None] in the [Configure] tab of the [Properties] windows of the printer driver - Konica Minolta bizhub C3110 | bizhub C3110 Print Functions User Guide - Page 54
the list, then change the relevant setting in [Setting]. 3 Click [OK]. How to print from the computer 1 In the [Basic] tab, click [Authentication/Account Track...] 2 When user authentication is enabled, select [Recipient User], then enter the user name and password. % If access to this machine by - Konica Minolta bizhub C3110 | bizhub C3110 Print Functions User Guide - Page 55
and Authentication Unit are installed while IC card authentication is employed. dReference User Authentication / Account User's Guide: Applied Functions]. To enable the ID & Print function, select [Security] - [ID & Print Settings] - [ID & Print] in the administrator mode of Web Connection, then set - Konica Minolta bizhub C3110 | bizhub C3110 Print Functions User Guide - Page 56
screen. 2 Place the IC card on the Authentication Unit. 3 On the main screen (Copy mode), press the + or , key to select [USB User], then press the Select key. 6 Select a job name, then press the Start key to start printing. % To delete the selected job, select its job name, then press the Stop/Reset - Konica Minolta bizhub C3110 | bizhub C3110 Print Functions User Guide - Page 57
2.6 Printer driver setting items 2 2.6 Printer driver setting items 2.6.1 [Properties] window of the printer driver How to display the [Properties] window The printer driver has two windows for configuring settings: the [Properties] window and the [Printing Preferences] window. This section - Konica Minolta bizhub C3110 | bizhub C3110 Print Functions User Guide - Page 58
Printer driver setting items 2 % In Windows Vista/Server 2008, click the Start menu, and select [Control Panel] - [Hardware and Sound] - [Printers]. When [Control Panel] is displayed in Classic View, double-click [Printers]. % In Windows XP/Server 2003, click the Start menu, then select [Printers - Konica Minolta bizhub C3110 | bizhub C3110 Print Functions User Guide - Page 59
2.6 Printer driver setting items 2 2 Open the printer properties. % In Windows 7/8/8.1/Server 2008 R2/Server 2012/Server 2012 R2, right-click the icon of the installed printer, and from [Printer properties], click the displayed printer name. % In Windows XP/Vista/Server 2003/Server 2008, right- - Konica Minolta bizhub C3110 | bizhub C3110 Print Functions User Guide - Page 60
that you have selected printer driver functions that cannot be used together. Select this check box when using the paper added in [Server Properties] in the printer window. Select this check box to enable the [Verify] button in the [User Authentication/Account Track] dialog box. This function is - Konica Minolta bizhub C3110 | bizhub C3110 Print Functions User Guide - Page 61
select [Server Properties]. 2.6.4 [Printing Preferences] window of the printer driver How to display the [Printing Preferences] window The printer driver has two windows for configuring settings: the [Properties] window and the [Printing Preferences] window. This section describes the [Printing - Konica Minolta bizhub C3110 | bizhub C3110 Print Functions User Guide - Page 62
2.6 Printer driver setting items 2 % In Windows 7/Server 2008 R2, open the Start menu, then click [Devices and Printers]. If [Devices and Printers] is not displayed, select [Control Panel] - [Hardware and Sound], and click [View devices and printers]. % In Windows Vista/Server 2008, click the - Konica Minolta bizhub C3110 | bizhub C3110 Print Functions User Guide - Page 63
right-click the icon of the installed printer, and click [Printing Preferences...]. The [Printing preferences] window of the printer appears. Tips The print settings changed here are registered as default values. When you want to temporarily change settings to print from application software, click - Konica Minolta bizhub C3110 | bizhub C3110 Print Functions User Guide - Page 64
versed mode. Select whether or not to allow the application to print data directly without using the printer driver. Tips [Advanced Printing Features:] is displayed when the [Enable advanced printing features] check box is selected in the [Advanced] tab of the [Properties] window. 2.6.6 Available - Konica Minolta bizhub C3110 | bizhub C3110 Print Functions User Guide - Page 65
and Hold] [Secured Job] [Proof then Print] [ID & Print] [User Settings...] [Authentication/Account Track...] [Copies] Description Specify the orientation of the original created in application software. If the setting in the printer driver differs from the one specified in the application software - Konica Minolta bizhub C3110 | bizhub C3110 Print Functions User Guide - Page 66
2.6 Printer driver setting items 2 Settings [Collate] [Manually Print on 2nd Side] Description When printing multiple sets of copies, select this check box to output sets of copies one by one. When this check box is cleared, the first page of the original is printed on as many sheets as the - Konica Minolta bizhub C3110 | bizhub C3110 Print Functions User Guide - Page 67
to draw border lines. Select the binding position. Select this check box to provide a margin on printed sheets. Click [Binding Margin Settings...] to specify the size of the margin in detail. • [Shift Mode]: Select how the images are shifted for creating the margin. • [Front Side]: Specify the size - Konica Minolta bizhub C3110 | bizhub C3110 Print Functions User Guide - Page 68
can be specified vary depending on your printer driver. Settings [Select Color] Description Select colors for printing. • [Auto Color]: The color mode is automatically selected according to the original color. • [Gray Scale]: The original is printed in black and white regardless of wheth- er or - Konica Minolta bizhub C3110 | bizhub C3110 Print Functions User Guide - Page 69
. - You can change the [Excel Job Control] setting only when the printer driver setting dialog box is displayed on the [Printers] ([Devices and Printers] in Windows 7/8/8.1/Server 2008 R2/Server 2012/Server 2012 R2 and [Printers and Faxes] in Windows XP/Server 2003) window. [Print Functions] 2-59 - Konica Minolta bizhub C3110 | bizhub C3110 Print Functions User Guide - Page 70
. 1 Start the deletion program. % From the Start menu, click [All Programs] (or [Programs]) - [KONICA MINOLTA] - model name of this machine - [Uninstall Printer Driver]. % In Windows 8.1, click [ ] in the Start window, then click [Control Panel] - [Programs] - [Uninstall a program]. Double-click the - Konica Minolta bizhub C3110 | bizhub C3110 Print Functions User Guide - Page 71
3 Printing in the Mac OS Environment - Konica Minolta bizhub C3110 | bizhub C3110 Print Functions User Guide - Page 72
driver on your computer and add the printer to your computer. This section describes preparations required to carry out printing on this machine by Bonjour (Rendezvous) connection that is supported in Mac OS X 10.3 or later. Tips - The Bonjour technology enables you to configure the network settings - Konica Minolta bizhub C3110 | bizhub C3110 Print Functions User Guide - Page 73
CD-ROM User's Guide CD-ROM Description Contains Windows printer driver (PCL/PS/XPS), Mac OS printer driver, Linux printer driver, and TWAIN driver. Also contains the download page of the utility software. Contains user's guides. Checking the operating systems supported by the printer driver The - Konica Minolta bizhub C3110 | bizhub C3110 Print Functions User Guide - Page 74
the [Print & Fax] icon. % In Mac OS X 10.7/10.8, click the [Print & Scan] icon. In Mac OS X 10.9, click the [Printers & Scanners] icon. 3 Click [+] located on the lower left of the screen. % In Mac OS X 10.4/10.5/10.6, go to Step 4. % In Mac OS X 10.7/10.8/10.9, if a target printer name is found in - Konica Minolta bizhub C3110 | bizhub C3110 Print Functions User Guide - Page 75
is displayed in another window. % In Mac OS X 10.5, select [Select a driver to use...] in [Print Using:], then click the driver of the desired printer from the list. % In Mac OS X 10.4, select [KONICA MINOLTA] in [Print Using:], and then click the driver of the desired printer from the list. 7 Click - Konica Minolta bizhub C3110 | bizhub C3110 Print Functions User Guide - Page 76
(Bonjour connection) 3 5 Manually select the printer driver. % In [Printer Model:], select [KONICA MINOLTA], then click the driver of the desired printer from the model list. 6 Click [Add]. The addition process of the printer is then completed. Then, proceed to the [Installable Options] window to - Konica Minolta bizhub C3110 | bizhub C3110 Print Functions User Guide - Page 77
3.1 Preparation for printing (Bonjour connection) 3 Changing the default print settings In the [Page Setup] window of the printer driver, you can change the default settings for paper and zoom ratio. 1 Display the [Page Setup] window of the printer driver. % For information on how to display the [ - Konica Minolta bizhub C3110 | bizhub C3110 Print Functions User Guide - Page 78
CD-ROM User's Guide CD-ROM Description Contains Windows printer driver (PCL/PS/XPS), Mac OS printer driver, Linux printer driver, and TWAIN driver. Also contains the download page of the utility software. Contains user's guides. Checking the operating systems supported by the printer driver The - Konica Minolta bizhub C3110 | bizhub C3110 Print Functions User Guide - Page 79
the [Print & Fax] icon. % In Mac OS X 10.7/10.8, click the [Print & Scan] icon. In Mac OS X 10.9, click the [Printers & Scanners] icon. 4 Click [+] located on the lower left of the screen. % In Mac OS X 10.4/10.5/10.6, go to Step 4. % In Mac OS X 10.7/10.8/10.9, if a target printer name is found in - Konica Minolta bizhub C3110 | bizhub C3110 Print Functions User Guide - Page 80
7 Click [Add]. The addition process of the printer is then completed. Then, proceed to the [Installable Options] window to configure the optional environment for this machine. For details, refer to page 3-6. Configuring USB connection settings (Mac OS X 10.4) 1 Connect a USB cable to the USB port - Konica Minolta bizhub C3110 | bizhub C3110 Print Functions User Guide - Page 81
the printer driver so that it contains information such as the options installed on this machine. 1 From the Apple menu, open [System Preferences...], then click the [Print & Fax] icon. % In Mac OS X 10.7/10.8, click the [Print & Scan] icon. In Mac OS X 10.9, click the [Printers & Scanners] icon - Konica Minolta bizhub C3110 | bizhub C3110 Print Functions User Guide - Page 82
3.2 Preparation for printing (USB connection) 3 Change the default print settings In the [Page Setup] window of the printer driver, you can change the default settings for paper and zoom ratio. 1 Display the [Page Setup] window of the printer driver. % For information on how to display the [Page - Konica Minolta bizhub C3110 | bizhub C3110 Print Functions User Guide - Page 83
being executed appears in the Message Window. If you press the * key during printing, the [PRINTER MODE] screen appears, and you can view the status of the currently executed print job. If you press the [PRINTER MODE] key while the Stop/Reset screen is displayed, a confirmation screen appears - Konica Minolta bizhub C3110 | bizhub C3110 Print Functions User Guide - Page 84
from the presets, even if the combination is complicated as it contains settings on multiple menus. 1 Display the [Print] window of the printer driver. % For information on how to display the [Print] window, refer to page 3-29. 2 Change the print settings, and select [Save As...] or [Current Print - Konica Minolta bizhub C3110 | bizhub C3110 Print Functions User Guide - Page 85
the [File] menu, click [Page Setup] (or [Paper Setup]). % In Mac OS X 10.5 or later, you can configure the same setting in [Paper Size:] in the [Print] window. 2 Open the window for registering a custom size. % In Mac OS X 10.4 or later, select [Manage Custom Sizes...] from the Paper Size list. % In - Konica Minolta bizhub C3110 | bizhub C3110 Print Functions User Guide - Page 86
printed on sheets of the next nearest size. Select [Printer Features] - [Basic], then select the [Nearest Size and Scale] check box. 3.4.2 Printing multiple sets of copies Specifying the number of copies ([Copies:]) In [Copies:] of the [Print] window, specify the number of copies you want to print - Konica Minolta bizhub C3110 | bizhub C3110 Print Functions User Guide - Page 87
3.4 Useful printing functions 3 Printing on a set basis ([Collate]) When the [Collate] check box is selected on the [Basic] menu of [Printer Features], copies are output separately in a set-by-set manner, for example, "Pages 1, 2, 3, 4, and 5", "Pages 1, 2, 3, 4, and 5", and then "Pages 1, 2, 3, - Konica Minolta bizhub C3110 | bizhub C3110 Print Functions User Guide - Page 88
Side]) Select [Printer Features] - [Basic], then select the [Manually Print on 2nd Side] check box. Tips To print data by selecting [Manually Print on 2nd Side], use the back side of paper that has already been printed on using this machine. The printing result with this setting is excluded from - Konica Minolta bizhub C3110 | bizhub C3110 Print Functions User Guide - Page 89
printed in [Cover Page Type:]. To print billing information, enter the information to be printed in [Billing Info:]. 3.4.6 Specifying the color and image quality Printing with gray scale ([Color as Grayscale]) In [Color Options], select the [Color as Grayscale] check box. [Print Functions] 3-19 - Konica Minolta bizhub C3110 | bizhub C3110 Print Functions User Guide - Page 90
presentation materials to print it at the optimum image quality level. In [Color Settings:] of [Color Options], select the optimum color setting mode for the original. If necessary, you can specify the color representation method for each object (image, text, or graphics) in an original in detail - Konica Minolta bizhub C3110 | bizhub C3110 Print Functions User Guide - Page 91
for printing on an image, text, or graphics category basis. Settings [Image] [Text] [Graphics] [Simulation] Description Configure a color setting for each image, text, or graphics category. • [RGB Source:]: Specify the color space of the input RGB for the printer. • [RGB Intent:]: Specify the - Konica Minolta bizhub C3110 | bizhub C3110 Print Functions User Guide - Page 92
disk of this machine. % Set the color profile name to the format "file name = ASCII (up to eight characters) + extension ASCII (up to three characters)". 5 Click [Download Profile]. 6 Click [OK]. 7 Click [Exit]. Adding a color profile to the printer driver Add the color profiles saved on the hard - Konica Minolta bizhub C3110 | bizhub C3110 Print Functions User Guide - Page 93
profile to be added to the printer driver. 4 Select the color profile to be added, then click [Add]. 5 Click [OK]. The color profile is added to Driver Profile List. After this, you can specify the color profile added here on the [Advanced Color Options] window to carry out printing. For details - Konica Minolta bizhub C3110 | bizhub C3110 Print Functions User Guide - Page 94
In [Job Retention:] of the [Security] window, select [Proof then Print]. 2 Specify Operations on this machine 1 On the main screen (Copy mode), press the + or , key to select [USB/ [Documents to Print], then press the Select key. 3 Select a user name, then press the Select key. 4 Select a job name - Konica Minolta bizhub C3110 | bizhub C3110 Print Functions User Guide - Page 95
you need to enter the password specified in the printer driver. 1 On the main screen (Copy mode), press the + or user name, then press the Select key. 4 Select a job name, then press the Select key. % To delete the selected job, select its job name, then press the Stop/Reset key. 5 Enter the password - Konica Minolta bizhub C3110 | bizhub C3110 Print Functions User Guide - Page 96
using the printer driver even though the User Authentication/Account Track setting is configured on this machine. If [Print] in [Job Retention:] is selected to execute a print job while the [User Authentication]/[Account Track] check box is cleared in the [Security] window of the printer driver, the - Konica Minolta bizhub C3110 | bizhub C3110 Print Functions User Guide - Page 97
To enable the ID & Print function, select [Security] - [ID & Print Settings] - [ID & Print] in the administrator mode of Web Connection, then set ID & Print to [Enable]. For details, refer to Chapter 1 "Using Web Connection" in [User's Guide: Applied Functions]. How to print from the computer 1 In - Konica Minolta bizhub C3110 | bizhub C3110 Print Functions User Guide - Page 98
screen. 2 Place the IC card on the Authentication Unit. 3 On the main screen (Copy mode), press the + or , key to select [USB User], then press the Select key. 6 Select a job name, then press the Start key to start printing. % To delete the selected job, select its job name, then press the Stop/Reset - Konica Minolta bizhub C3110 | bizhub C3110 Print Functions User Guide - Page 99
or reduce the original image. The setting range differs depending on the Mac OS X version. Tips In Mac OS X 10.5 or later, you can also specify [Paper Size:] and [Orientation:] in the [Print] window. 3.6.2 [Print] window of the printer driver How to display the [Print] window 1 Open data of the - Konica Minolta bizhub C3110 | bizhub C3110 Print Functions User Guide - Page 100
3.6 Printer driver setting items 3 2 Check that the desired printer is selected in [Printer:]. Items common to each window This section describes the settings and buttons common to the [Print] window. Settings [Copies:] [Collated] [Pages:] [Paper Size:] [Orientation:] [Cancel] [Print] - Konica Minolta bizhub C3110 | bizhub C3110 Print Functions User Guide - Page 101
.8/10.9. 3.6.6 Available operations in [ColorSync] In [ColorSync], you can specify the color conversion method or Quartz filter. Settings [Color Conversion:] [Quartz Filter:] Description Select the color conversion method. • [Standard]: Performs color conversion using the computer. • [In Printer - Konica Minolta bizhub C3110 | bizhub C3110 Print Functions User Guide - Page 102
3.6 Printer driver setting items 3 3.6.7 Available operations in [Color Matching] In [Color Matching], you can specify the color conversion method or a color profile. Settings [ColorSync] / [In Printer] [Profile:] Description Select the color conversion method. • [ColorSync]: Performs color - Konica Minolta bizhub C3110 | bizhub C3110 Print Functions User Guide - Page 103
3.6 Printer driver setting items 3 3.6.11 Available operations in [Color Options] In [Color Options], you can configure settings for the image quality of the original. You can specify colors and image processing. Settings [Color Settings:] [Brightness:] [Color as Grayscale] [Toner Save] [Edge - Konica Minolta bizhub C3110 | bizhub C3110 Print Functions User Guide - Page 104
Printer driver setting items 3 3.6.13 Available operations in [Printer Features] Configure the basic print settings on the [Basic] menu. Settings [Collate] [Nearest Size and Scale] [Manually Print on 2nd Side] [Paper Type:] [Resolution:] Description When printing multiple sets OS X 10.4 or later - Konica Minolta bizhub C3110 | bizhub C3110 Print Functions User Guide - Page 105
printer driver is necessary, uninstall the driver using the following procedure. 1 From the Apple menu, open [System Preferences...], then click the [Print & Fax] icon. % In Mac OS X 10.7/10.8, click the [Print & Scan] icon. In Mac OS X 10.9, click the [Printers & Scanners] icon. % In Mac OS X 10 - Konica Minolta bizhub C3110 | bizhub C3110 Print Functions User Guide - Page 106
4 Printing without Using the Printer Driver - Konica Minolta bizhub C3110 | bizhub C3110 Print Functions User Guide - Page 107
settings are configured. To download Direct Print, select [PageScope Utilities] on the menu of the Driver & Utilities CD-ROM and display the download page of the utility software. For details, refer to the Direct Print manual. - Mobile (for iPhone/iPad/Android) directly sends files to the printer - Konica Minolta bizhub C3110 | bizhub C3110 Print Functions User Guide - Page 108
] - [User Settings] - [Printer Settings] - [OOXML Print Set] - You can specify the method to determine the paper size when directly printing TIFF, JPEG, or PDF files. To configure settings: [UTILITY] - [User Settings] - [Printer Settings] - [PAPER MENU] - [TIFF Paper Setting] (default: [Priority - Konica Minolta bizhub C3110 | bizhub C3110 Print Functions User Guide - Page 109
settings: [UTILITY] - [Admin Settings] - [System Settings] - [Folder Settings] - [ExtMemFuncSettings] - [Print Document] (default: [ON]). Supported other USB devices (such as a hard disk unit or USB switching hub). - When this machine. 2 On the main screen (Copy mode), press the + or , key to - Konica Minolta bizhub C3110 | bizhub C3110 Print Functions User Guide - Page 110
. 6 If necessary, change the setting of the paper size, duplex printing, number of copies, or collate function. Settings [PAPER SIZE] [DUPLEX] [COPIES the Start key. % To print in color, press the Start (Color) key. To print in black and white, press the Start (B&W) key. Printing starts. [Print - Konica Minolta bizhub C3110 | bizhub C3110 Print Functions User Guide - Page 111
5 Index - Konica Minolta bizhub C3110 | bizhub C3110 Print Functions User Guide - Page 112
(Bonjour connection 3-4 Install (Network connection 2-3 Install (USB connection 2-9, 3-9 PCL driver 2-4 PS driver 2-4 Settings 2-47, 3-29 Uninstall 2-60, 3-35 XPS driver 2-4 Printer Features 3-34 Printer function How to print 2-15, 3-13 Overview 1-2 System requirements 1-3 Printing - Konica Minolta bizhub C3110 | bizhub C3110 Print Functions User Guide - Page 113
3-31 Secured Job 2-41, 3-25 Security 3-33 Select Color 2-32 Separator Page 2-32 Settings 2-50 Skip Blank Pages 2-22 Stamp 2-58 Store Job 2-42 Supply Levels 3-34 T Toner Save 2-36, 3-21 U USB cable 1-4 USB memory 4-4 User Authentication 2-43, 3-26 W Watermark 2-27 Z Zoom 2-18 [Print - Konica Minolta bizhub C3110 | bizhub C3110 Print Functions User Guide - Page 114
http://konicaminolta.com A6DT-9222-00A © 2014 2014. 2
-
 1
1 -
 2
2 -
 3
3 -
 4
4 -
 5
5 -
 6
6 -
 7
7 -
8
-
9
-
10
-
11
-
12
-
13
-
14
-
15
-
16
-
17
-
18
-
19
-
20
-
21
-
22
-
23
-
24
-
25
-
26
-
27
-
28
-
29
-
30
-
31
-
32
-
33
-
34
-
35
-
36
-
37
-
38
-
39
-
40
-
41
-
42
-
43
-
44
-
45
-
46
-
47
-
48
-
49
-
50
-
51
-
52
-
53
-
54
-
55
-
56
-
57
-
58
-
59
-
60
-
61
-
62
-
63
-
64
-
65
-
66
-
67
-
68
-
69
-
70
-
71
-
72
-
73
-
74
-
75
-
76
-
77
-
78
-
79
-
80
-
81
-
82
-
83
-
84
-
85
-
86
-
87
-
88
-
89
-
90
-
91
-
92
-
93
-
94
-
95
-
96
-
97
-
98
-
99
-
100
-
101
-
102
-
103
-
104
-
105
-
106
-
107
-
108
-
109
-
110
-
111
-
112
-
113
-
114
 |
 |
User's Guide: Print Functions