Kyocera KM-C3232E DF-710/MT-710/BF-710/PH-5A Operation Guide Rev-1 - Page 17
Mailbox Mode, Preparation for Usage, Configuring Mailbox Output <from Computer> - printer driver
 |
View all Kyocera KM-C3232E manuals
Add to My Manuals
Save this manual to your list of manuals |
Page 17 highlights
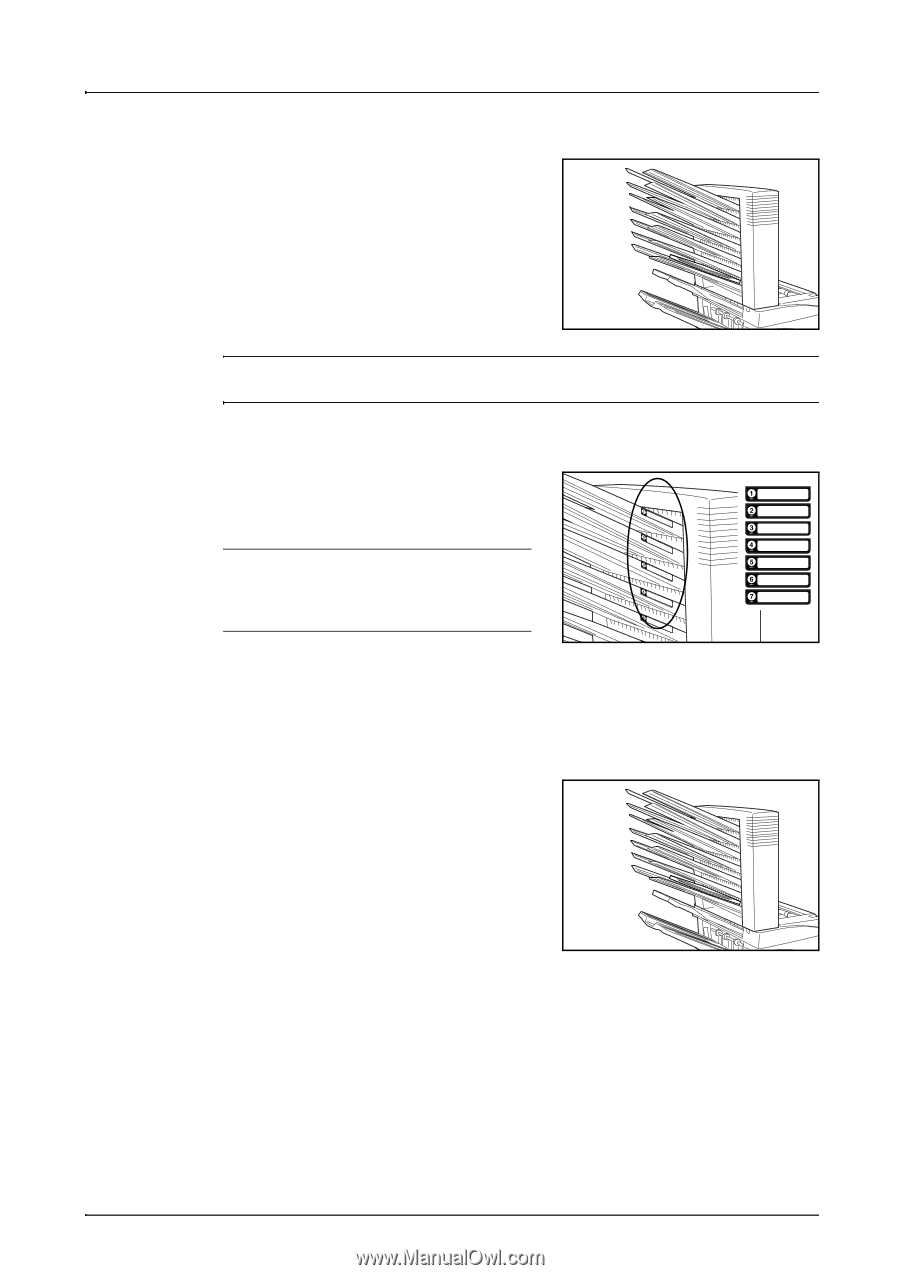
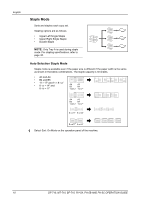
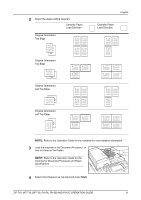
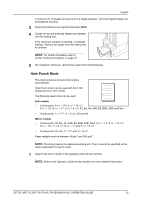
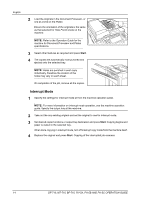
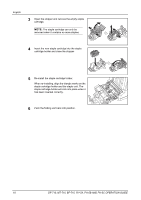
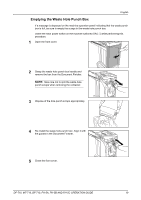
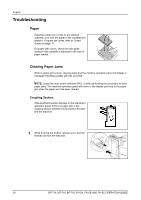
Mailbox Mode Paper printed at the machine can be output to the optional mailbox. This feature is useful when sharing the printer among multiple computers to output paper to specific trays for each user. The following paper sizes can be used: A3, B4, A4, A4R, B5, B5R, A5R, Folio, 11 × 17", 8 1/2 × 14", 8 1/2 × 13 1/2", 8 1/2 × 13", 11 × 8 1/2", 8 1/2 × 11", 5 1/2 × 8 1/2", 8K, 16K and 16KR English NOTE: The maximum number of copies that can be stored in each tray will differ depending on the size of copy paper being used. For further information refer to page 37. Preparation for Usage Write the name of the user of each tray on the labels provided and attach the labels to the side of each tray. NOTE: Attach the labels in the location indicated on the illustration. The bins to which labels should be applied are 1, 2, 3, 4, 5, 6, 7 as counted from the top down. Configuring Mailbox Output 1 Use the printer driver on your computer to select a mailbox tray (mailbox) between 1 and 7. 2 Select the paper size, page(s) to be printed and number of prints required. 3 Print the job. Prints will be ejected onto the selected tray (mailbox). 4 On completion of the job, remove all prints from the tray (mailbox). Configuring Mailbox Output To use the machine to select the tray required, refer to the Operation Guide for the machine. On the full color machine, the output tray can be specified with the copy and fax functions. On the monochrome machine, the output tray can be specified with the copy, fax, and printer functions. DF-710, MT-710, BF-710, PH-5A, PH-5B AND PH-5C OPERATION GUIDE 15
-
 1
1 -
2
-
3
-
4
-
5
-
6
-
7
-
8
-
9
-
10
-
11
-
 12
12 -
 13
13 -
 14
14 -
 15
15 -
 16
16 -
 17
17 -
 18
18 -
 19
19 -
 20
20 -
 21
21 -
 22
22 -
23
-
24
-
25
-
26
-
27
-
28
-
29
-
30
-
31
-
32
-
33
-
34
-
35
-
36
-
37
-
38
-
39
-
40
-
41
-
42
-
43
-
44
-
45
-
46
-
47
-
48
-
49
-
50
-
51
-
52
-
53
-
54
-
55
-
56
-
57
-
58
-
59
-
60
-
61
-
62
-
63
-
64
-
65
-
66
-
67
-
68
-
69
-
70
-
71
-
72
-
73
-
74
-
75
-
76
-
77
-
78
-
79
-
80
-
81
-
82
-
83
-
84
-
85
-
86
-
87
-
88
-
89
-
90
-
91
-
92
-
93
-
94
-
95
-
96
-
97
-
98
-
99
-
100
-
101
-
102
-
103
-
104
-
105
-
106
-
107
-
108
-
109
-
110
-
111
-
112
-
113
-
114
-
115
-
116
-
117
-
118
-
119
-
120
-
121
-
122
-
123
-
124
-
125
-
126
-
127
-
128
-
129
-
130
-
131
-
132
-
133
-
134
-
135
-
136
-
137
-
138
-
139
-
140
-
141
-
142
-
143
-
144
-
145
-
146
-
147
-
148
-
149
-
150
-
151
-
152
-
153
-
154
-
155
-
156
-
157
-
158
-
159
-
160
-
161
-
162
-
163
-
164
-
165
-
166
-
167
-
168
-
169
-
170
-
171
-
172
-
173
-
174
-
175
-
176
-
177
-
178
-
179
-
180
-
181
-
182
-
183
-
184
-
185
-
186
-
187
-
188
-
189
-
190
-
191
-
192
-
193
-
194
-
195
-
196
-
197
-
198
-
199
-
200
-
201
-
202
-
203
-
204
-
205
-
206
-
207
-
208
-
209
-
210
-
211
-
212
-
213
-
214
-
215
-
216
-
217
-
218
-
219
-
220
-
221
-
222
-
223
-
224
 |
 |