Kyocera TASKalfa 3501i Kyocera NET ADMIN Operation Guide for Ver 3.1 - Page 6
Creating a Backup of Earlier Versions, Installing the New Version 3.x - user manual
 |
View all Kyocera TASKalfa 3501i manuals
Add to My Manuals
Save this manual to your list of manuals |
Page 6 highlights
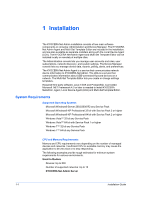
Installation 1-3 console). After discovery, KYOCERA Net Admin 3.x lists each device as managed and linked to a specified network. Select the Show Unmanaged Devices check box in the Status filter list to display both the managed and unmanaged devices. Clear the check box to show only the managed devices. Creating a Backup of Earlier Versions Before upgrading from versions 1.03, 1.04, 1.5 or 2.0, you must create a backup file. The following steps apply to version 2.0. 1 In the navigation area, select Database. 2 Select the Immediate option. 3 Click Submit. 4 After the backup file is created, open "C:\KNetAdminBackup" folder and locate the backup zip file. An example of the file name format is "backup zip". 5 Copy the backup file into another folder on the computer. If the upgrade is from version 1.03, 1.04, or 1.5, save a copy of the following files. You can restore them manually in the new version. Log files Firmware files Map view background images Installing the New Version 3.x After creating backup files from the older version, you can install KYOCERA Net Admin 3.x. 1 Use the Windows Uninstall or change a program to remove KYOCERA Net Admin from the computer. 2 Install KYOCERA Net Admin 3.x or use a computer with KYOCERA Net Admin 3.x already installed. Restoring a Database in Version 3.x After KYOCERA Net Admin 3.x is installed, you can restore a database backup. This uses a backup file (.ZIP) in the default backup location C:\KNetAdminBackup, or in another user-specified backup location. 1 Open the Administration console. 2 Click Preferences > Database restore. 3 Select from the list the backup file created from the previous version. If the file is not in the list, click the Upload Backup File icon and browse to find the list. 4 Click the Start Restore Process icon, and then click OK. Installation Guide
-
 1
1 -
 2
2 -
 3
3 -
 4
4 -
 5
5 -
 6
6 -
 7
7 -
 8
8 -
 9
9 -
 10
10 -
 11
11 -
 12
12 -
13
-
14
-
15
 |
 |
